Tips to get started with dip pens
There’s an appeal to drawing with dip pens but are you scratching your head wondering where to start?
If you’ve been searching for answers on how to get into drawing using dip pens or how to choose the right supplies for your projects, I was in that same spot.
A quick search on the internet only leads to more confusion. There are so many options for nibs, holders, inks, and papers – and what if the wrong combination doesn’t work?
In this article, you’ll learn what I wish I had known at the beginning so that you can get a smooth start.
Disclosure: Some of the links on this page are affiliate links. I earn a small commission when you use those links at no cost to you. You can read more about the Affiliate Disclosure on the Terms page.
What is a dip pen?
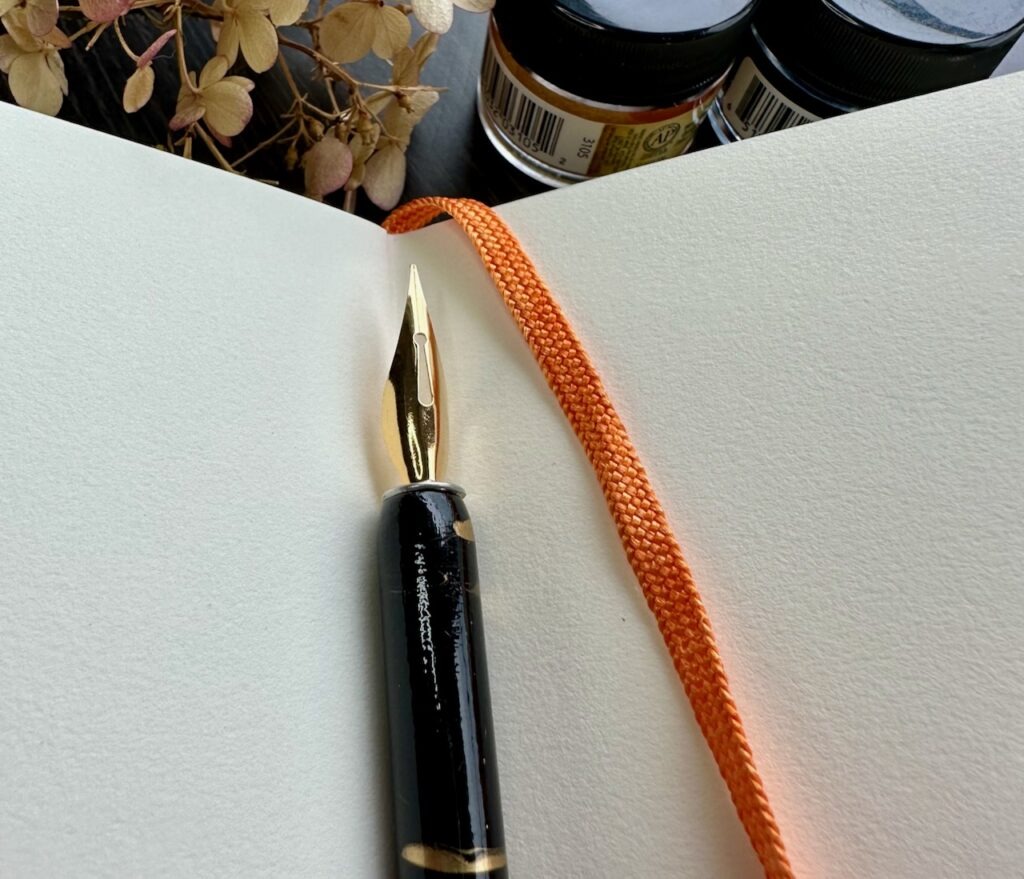
By definition, a dip pen is a pen that you dip in ink. It has two parts, a nib, and a pen holder – also called a handle.
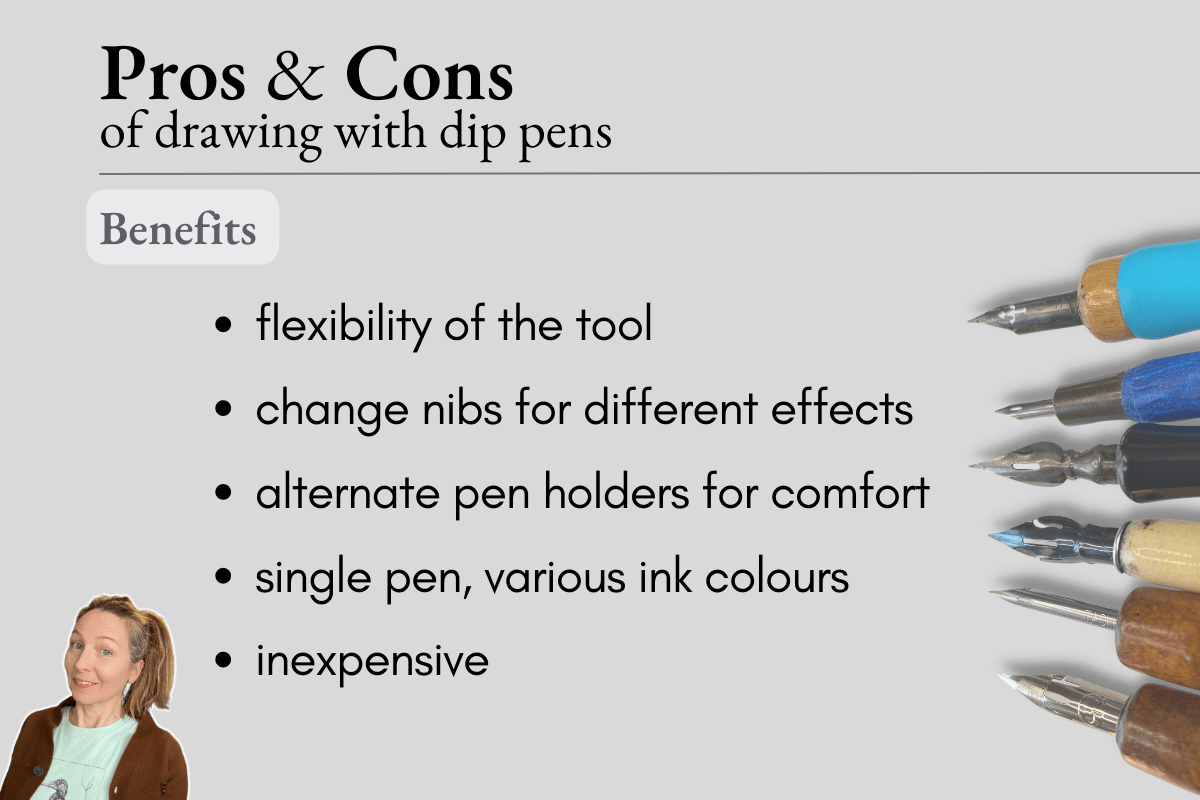
Pros and cons of using dip pens
The primary benefit of using a dip pen is the flexibility of the tool. For example, you can vary the line weight of your stroke, and the thickness of the line, without having to switch pens. Other benefits are:
- You can change the nib for different effects to suit your drawing approach
- You can alternate pen holders for higher comfort
- You can use a single pen and vary just the ink to experiment with colour or to combine with mixed media (watercolor, gouache, pencils); and
- Dip pens are comparatively inexpensive – a low commitment if you’re unhappy with your initial choices
The downside:
- There are more parts to deal with
- They require care and maintenance to stay in good working order; and
- A flat stable surface for best performance – as such, they are less travel-friendly
- It can take longer to complete a piece because of the constant dipping and cleaning/wiping during the ink application
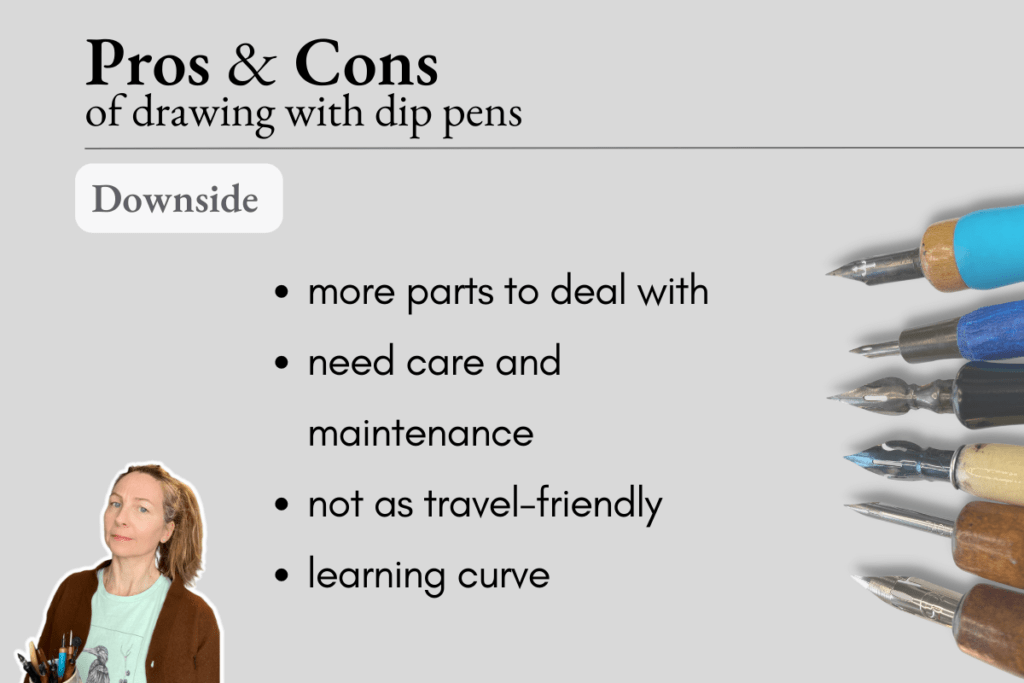
Lastly, the biggest drawback is probably the intimidation factor as using dip pens has a reputation for having somewhat of a learning curve.
However, once you’re familiarized and have the basic supplies, dip pens last a long time and are super satisfying to make marks with.
Want more recommendations for inking supplies? Visit the Tool page to see what I use.
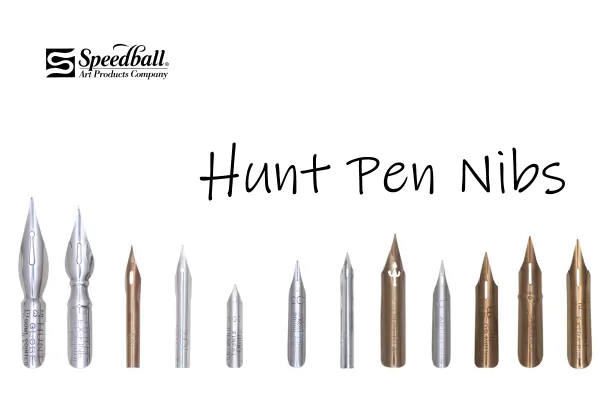
Types of nibs
When I first searched online, getting started with supplies was daunting because of the vast array of options.
I made a trip to my local art supply store to get a better idea. Although choices seemed overwhelming at first, a lot of the pen sets were actually for calligraphy writing.
You can narrow down your selection by choosing nibs or pen sets labeled for drawing, sketching, mapping, or illustration.

Some nibs are multi-purpose for both writing and drawing.
If it’s not specified on the packaging, you can identify the nibs visually. The ones you want taper into a sharp point at the end.

The next hurdle was when I read the nib-type descriptions. There were terms like “flexibility” and “elasticity” for “line width” variations. Plus there are “Manga” and “Western” type nibs.
These distinctions matter to a degree. It becomes more noticeable with growing experience. At the start, it’s trickier to discern subtle differences or know what we prefer.
However, some nibs are easier to start with than others and it depends on your style:
- Are you the type of artist who uses many scribbly strokes? Or do you generally ink in a controlled, methodical manner?
- Do you apply a heavy load of pressure on your instruments while drawing or glide delicately across the surface?
Some nib types will respond well to your approach and others will work against you.
Best nibs for your approach
From my experience, the approach matters more in your selection of nibs than the subject of your projects.
Whether you’re into inking comics, manga, technical urban renderings, or flowy botanical line patterns how you draw is more important than what you draw.
Each brand, type, and size or shape of nib performs differently. Therefore, a good option as a starting point is to get a pen set sampling kit.
Because of what I did not yet understand about my preferences towards elasticity and flexibility, initially, I bought a pen set labeled “Manga-specific”. I realized eventually that these nibs were not particularly versatile.
Manga nibs are not all created equal, and when lacking the discernment to spot the differences, are not ideal as a beginner-friendly kit.
Then I found Speedball’s sketching kit that comes with two pen holders and six nibs. This was a useful first choice for me and what I recommend as a starting point.

As you progress you may decide, as I did, to expand your kit and experiment with additional nibs.
A quick guide on flexibility and elasticity:
Flexibility refers to how much a nib will bend under pressure. Nibs can range from extremely stiff (not flexible) to quite soft (flexible). Too much flexibility can be challenging to control, feel erratic, sloppy, or prone to wear out prematurely (bend and be ruined).
In turn, an overly stiff nib can limit the range of stroke techniques used for creating textures and effects, and as well be susceptible to breaking under pressure.
Elasticity refers to how quickly a nib springs back into its original shape after pressure is applied.
A new inker may find an elastic nib too unpredictable to produce even marks with.
Advanced inkers will appreciate moderate to extremely elastic nibs because of how responsive they are to the slightest change in pressure. Super-flexible nibs can either feel erratic or precise.
Most of the “drawing” nibs will hold a reasonably consistent line. The quality of line variation, meaning the transitions of thin-to-thick and vice versa depends on these combined factors:
- The size and shape of the nib (example: pointed, bowl, spoon)
- The ratio of flex and elasticity (soft – stiff)
- How much pressure is applied
- The angle (degree) at which it is held
- User experience level (beginner – expert)
Over time I’ve accumulated a collection through trial and error. Here are so far my six favourite nibs:
For precise rendering and long flowing lines:
For general illustration:
I enjoy the 512 Bowl nib, which is comparable to another industry favourite the 361 Steno also known as the “Blue Pumpkin”.
The Blue Pumpkin grows along with you. Mine has proven to increase in performance at the same rate that my skills have improved.

Through further investigation of Manga nibs, I did become partial to the soft Maru for fine details, and occasionally Tachikawa’s G-nib for when I need to draw a bunch of dynamic action lines.

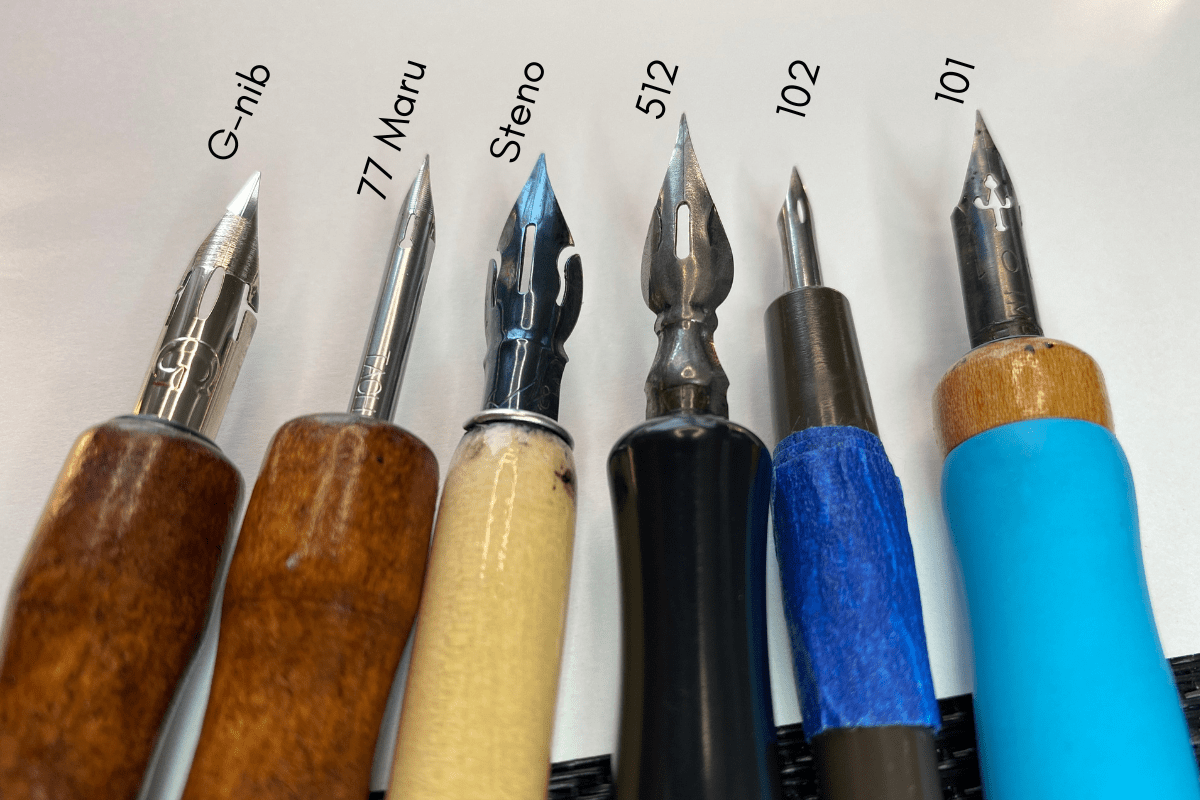
Nib rating table
| Nib name | Brand | Flexibility | Elasticity | Best for | Holder type |
| 101 Imperial | Speedball Hunt | Soft | High | Finesse, hatching details | Classic or universal |
| 102 Crow quill | Speedball Hunt | Soft | Medium-high | Precision, long flowy fine lines | Cylindrical holder |
| 512 Bowl | Speedball Hunt | Stiff | Medium | General use, outlines | Classic or universal |
| 361 Steno | Brause blue pumpkin | Medium | Medium-high | General use, textures | Classic or universal |
| 77 soft maru | Tachikawa | Soft | Medium | Curves, fine details | Cylindrical holder |
| Gnib | Tachikawa | Medium-stiff | Medium-low | Straight lines, dynamic lines, sketching | Classic or universal |
Many have reached out after watching my YouTube video (below) on this topic to recommend their favourite dip pen nibs. Some of these included brands such as Nikko, Zebra Titanium, Principal, and the highly rated Gillott nibs that I have yet to experiment with. I mention these brands as “vouched for” by other experienced inkers, in case you come across any of these mentioned and wish to try them for yourself.
Also, I was told by subscribers that Speedball nibs can be difficult to obtain from locations outside of North America.
Pen holders
There are straight and oblique holders.
For drawing, a straight holder is commonly preferred to begin with. They work for both right and left-handed artists.
Straight holders come in different shapes, diameters, and materials across brands. Some are wider in grip or offer a rubber section for added comfort.
If you were to own only a single holder, I recommend one that has either a universal mount with the four prongs or a classic mount with two hole sizes that fit most of the standard Japanese and Western nibs plus the small cylindrical shaped Maru and quill nibs.
My favorite nib holder is Tachikawa’s model 40.

Note that you will end up needing two or several holders regardless.
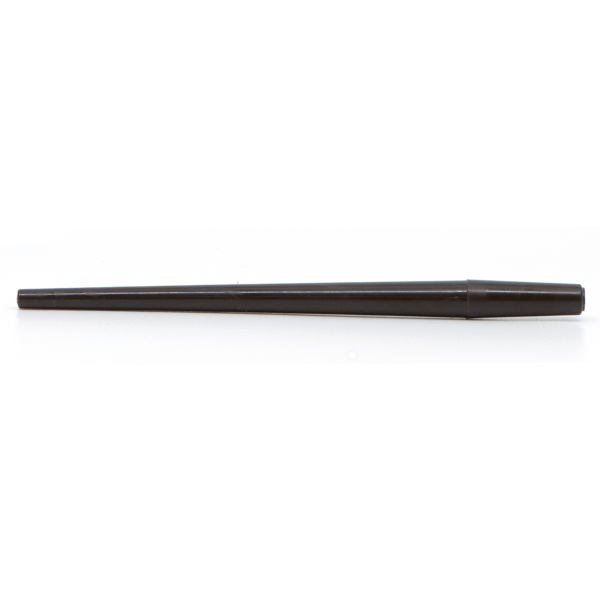
The Hunt 108, 107 hawk quill, and 102 crow quill cylindrical-shaped nibs typically function exclusively with Speedball’s crow quill holder. I have come across other holders (Tachikawa, Zebra Comic, Nikko N-17, Kuelox) intended for the cylindrical Maru and mapping nibs that sometimes also work with the hawk quill.
Speedball’s plastic crow quill holder is quite slender in diameter and shorter than a typical-size holder. For this reason, some artists will wrap sports tape, strips of leather, or other materials to improve the grip on this particular holder.
As a member of Speedball’s Professional Artist Network, I did reach out directly to Speedball’s marketing director inquiring about designing a classic holder for the crow quills and they are considering the idea favorably in the future.
Ink
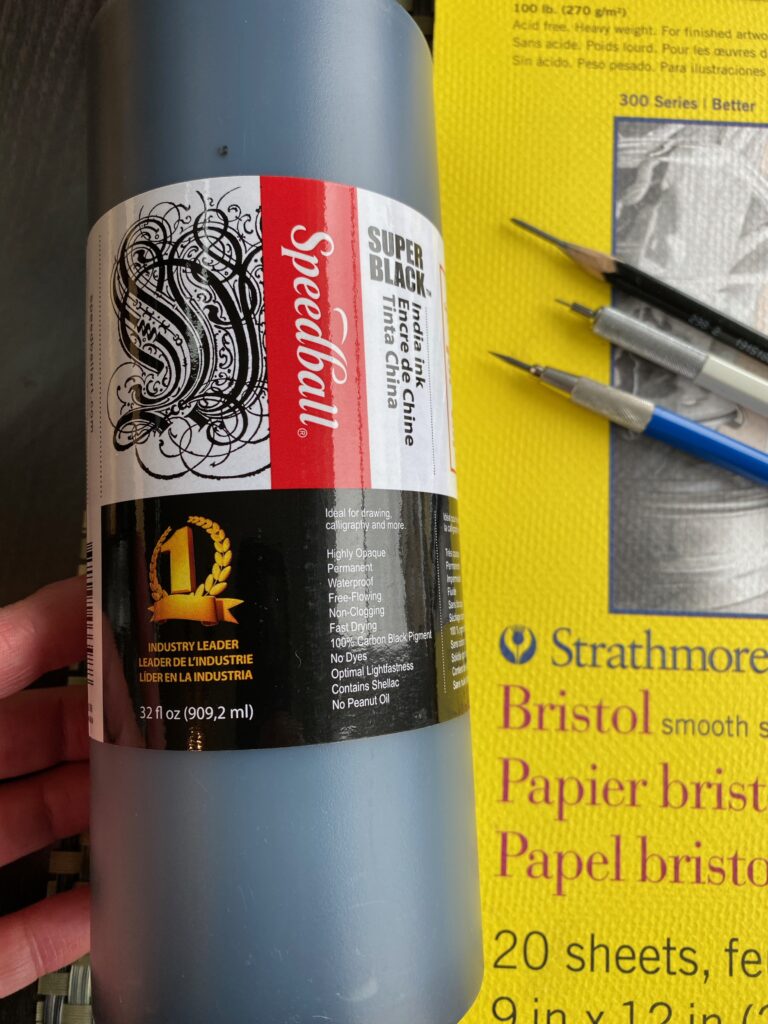
Pigment-based inks are best for dip pen drawing such as Speedball’s super black India ink which is a pigment-carbon mix. Most brands that are labeled as India ink or drawing ink will work well for dip pens.

What about acrylic inks?
The key thing to remember is that there are two kinds of inks:
- Pigment-based ink
- Dye-based ink
The pigment-based ink sits (or glides) on the surface.
Dye-based inks are absorbed into the paper. They act more like a stain.
Acrylic ink is a pigment-based ink. India ink is mixed with carbon which contains a substance (varnish or shellac) that gives it more permanency, and a lightfast archival quality.
Both India and acrylic inks are waterproof and can be mixed with other mediums.
India ink will act more like a watercolor when mixed with other mediums. Acrylic is more like paint. Be mindful that different brands vary in their formula (how quick drying, viscosity, opacity) and that paper plays a major role in the outcomes.
Paper
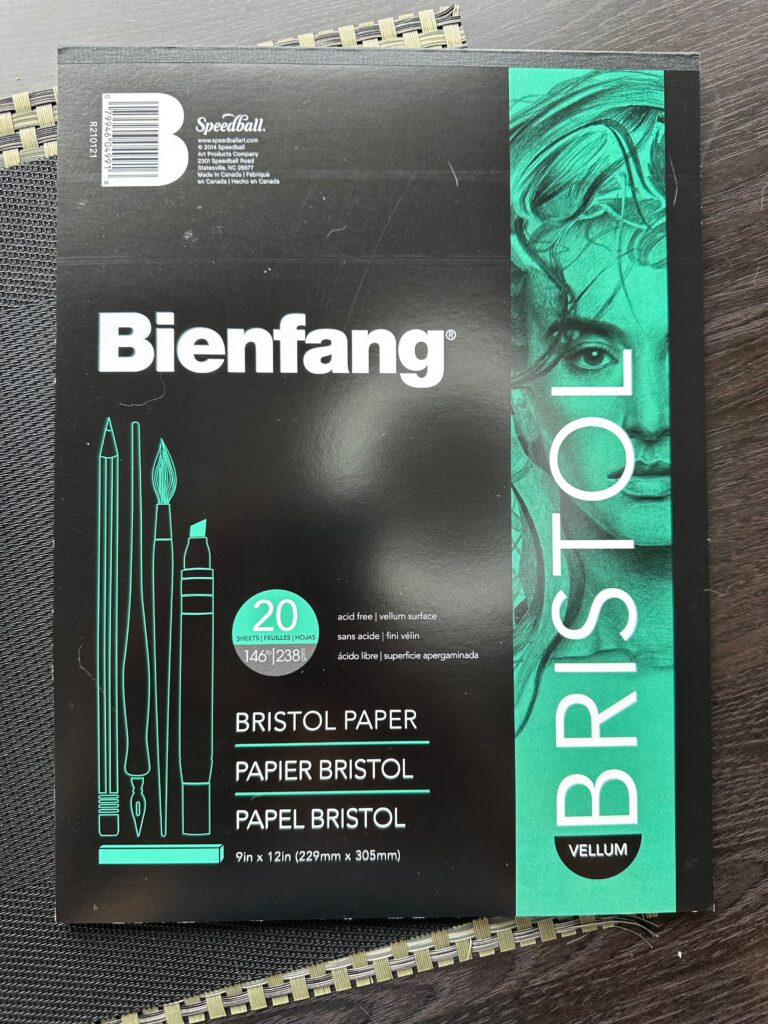
Paper is important. Bristol paper is ideal because it has a heavier weight which is more resistant to potential bleeding and scarring from nib action.
Bristol comes in two surfaces, smooth and vellum finish.

Smooth is best for precision drawing and advanced inkers.
Depending on your approach to drawing (scribbly or orderly) you may prefer a vellum surface that has more tooth. The subtle surface texture provides resistance for the nib, which makes it easier to control marks compared to a slick surface like the Bristol smooth.
Keep in mind that paper has limitations and anticipate compromises when choosing one finish over another. Also, some paper brands labeled for “pen and ink” perform well with fine liners and technical pens but fail with dip pens.
If your project is mixed medium – like combining ink with crayon, graphite, paint, washes, and markers, then my second choice from Bristol is a hot press paper.
I love my Moleskine Art Collection sketchbook for doing subject studies. Its hot press paper responds well to dip pens and brush inking mixed with other illustration mediums with minimal show-through.

Curious about paper for sketching? Visit the FAQ page to see the full list of supplies I use.
Important nib preparation
New nibs out of the package are covered in a protective oil or waxy coating. This is for storage and shipping and requires prepping before use.
Skipping this step means it will take longer for your nib to work properly and be frustrating.
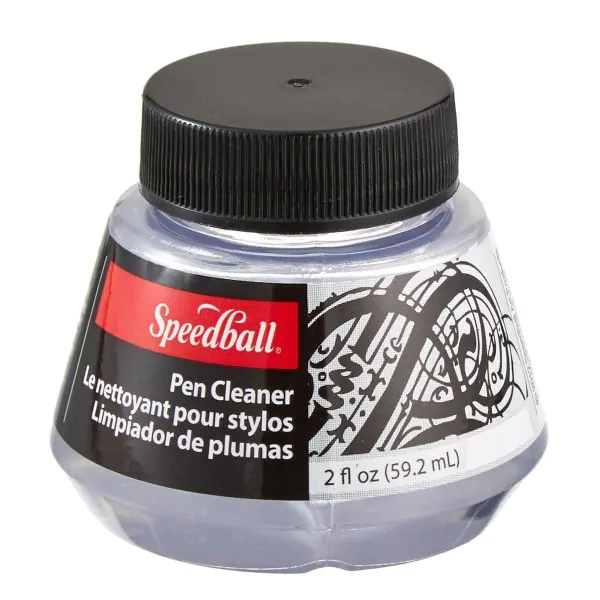
It only takes a few minutes. Submerge the nib in boiled water with a mild cleaning agent such as a squirt of mild soap for approximately ten minutes then wipe it dry. Even better if you have a proper pen cleaner, such as Speedball’s agent.
To be certain there is no lingering protective residue, I wipe the nib with isopropyl alcohol then wipe it again to ensure no moisture rests on the nib.

You may have heard of other methods to remove the protective coating, such as using saliva, toothpaste, or running the nib under a flame.
These methods are outdated. Dip pens have been around since ancient Egypt. My guess on this is that the protective coating formulas were once more tenacious than today’s.
Once that coating is removed with soap and water, and your nib is completely dry, gently insert it into its holder.
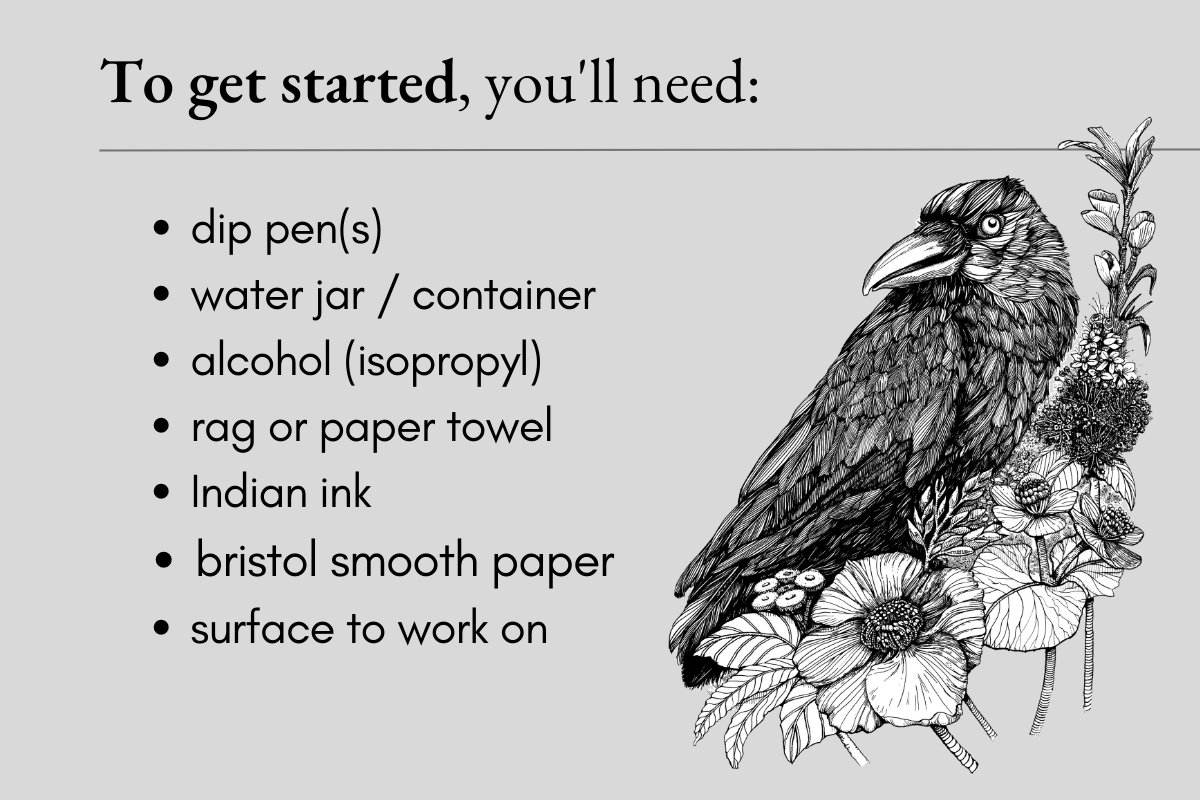
But before diving into your first project, it’s a good idea to conduct tests.
First, gather your supplies: A water jar, alcohol, a clean rag or paper towel, an ink bottle, a spare piece of Bristol paper, and a flat clutter-free, well-lit, surface to work on.
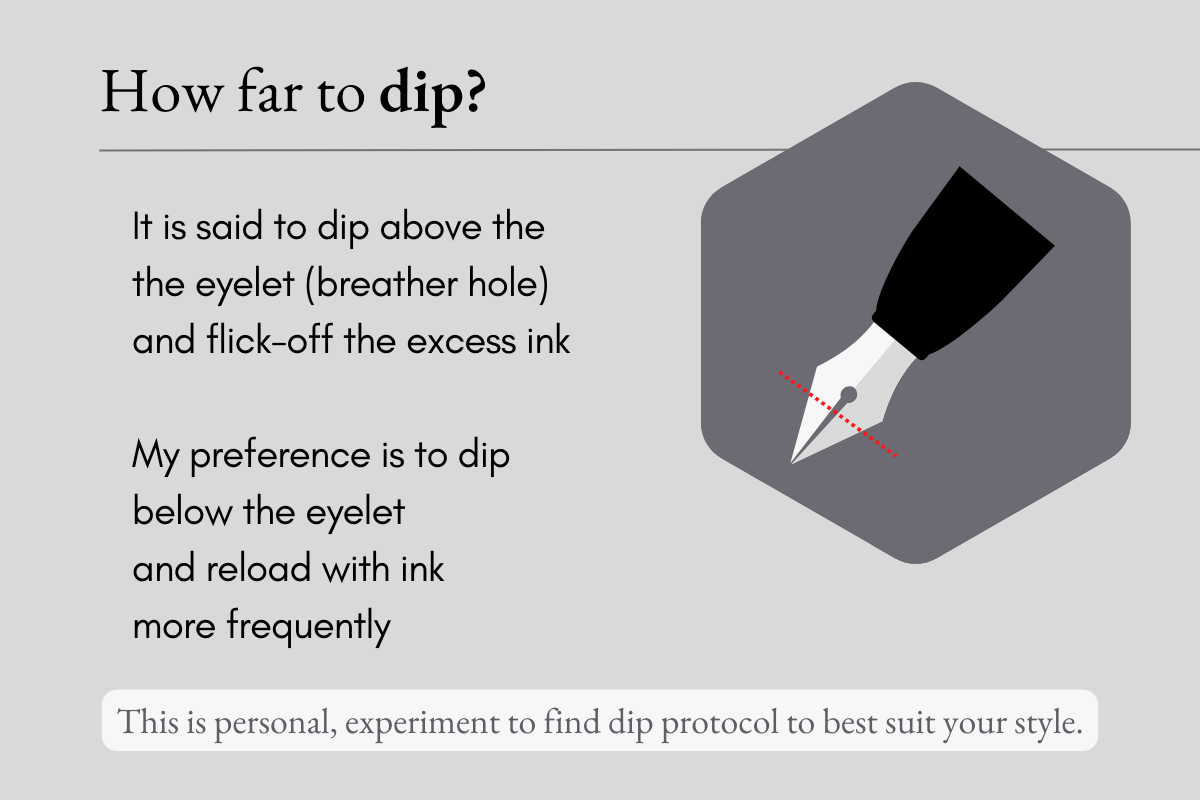
How far to dip in the ink
It is said to dip just past the eyelet vent (breather hole) followed by a vigorous shake to remove excess ink. I prefer to dip it less deeply and more frequently to avoid mishaps. Dip it just below or halfway up the eyelet.
Many veteran comic inkers use an eye dropper to fill the nib’s shank and tines with ink. Whichever dipping tactic works best for your drawing approach is the right one. It comes down to personal preference.
Warmup test
Spend a good 20-30 minutes making marks on a spare piece of Bristol paper.
Lines, hatches, curves, dots, scribbles. Additionally, to get a feel for your nib’s effects in motion experiment with pulling the line towards you and then pushing it away from you while varying the angle, applied pressure, and speed.
Depending on the nib, the inking surface, and your drawing approach you will need to re-dip to load with ink each 4 to 8 strokes.
A good quality drawing ink is typically rightly viscous and quick drying. India ink is ideal for illustration yet can be problematic for accumulating and drying on the nib while in use.
I keep an old jam jar of clean water next to a refillable 2oz ink bottle along with a paper towel.
To keep the nib well functioning, I periodically swirl-rinse it in water, wipe it, and then reload it with ink, rather than continuously dipping in the ink.
Nib maintenance
To get the results you want with your dip pens, part of the process of using nibs is being attentive with regular maintenance.
There are nibs made of (or coated in) gold or titanium to help prevent corrosion. The majority are made of metal, typically stainless steel, some even come in bronze, chrome, or other color finishes.
Either way, these can rust, or as mentioned, caked with ink.
After each session, I remove the nib from the pen holder, clean it with Speedball pen cleaning agent or mild soap, sometimes also using a soft-bristle brush, wipe it with alcohol, and then a final rust-preventing wipe.
An ultrasonic jewelry cleaner is a nice alternative especially if you have several nibs to clean at once.

Storage
I insert each dry nib back in its handle and keep the pens pointing upwards in a container (use ceramic or glass) away from snag and fall hazards.
For individual nibs, I keep them in a re-sealable plastic baggy along with a sachet of silica gel or beads inside.
Signs of a damaged nib
You’ll know that a nib is worn out if it:
- Becomes overly flexible (sloppy)
- Leaks ink
- Is visibly misshapen
- Is encrusted with rust
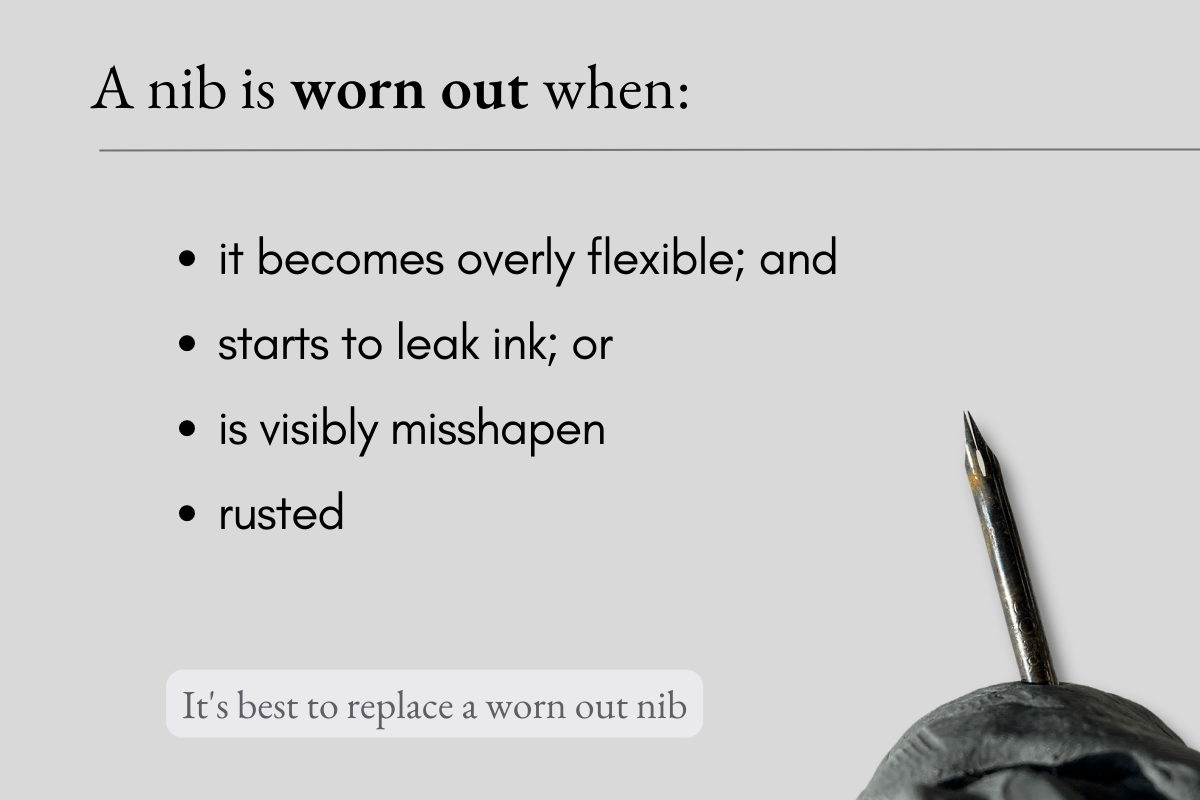
To prevent damaging your artwork, it’s best just to replace a worn-out nib.
I hope that sharing my learnings in this guide will help make your start with dip pens a smooth experience.
Let me know in the comments because I’d love to read them!
Resources
🎬 Watch the trailer for my dip pen course
Visit the FAQ page for additional resources and answers to the most commonly asked questions.
Purchasing for a friend? Read my pen and ink gift guide.
Flaxart made this handy guide for buying inks.


Since I just dived into the pen and ink hobby world, this info is extremely precious and helpful !! Thank you so much Chloe !! 😊🙏
I’m so happy that you are finding this Blog helpful Isabelle. Thanks for checking it out, and all the best with your pen and ink projects!
Thank you so much for this in depth overview! I found this on Pinterest and just wanted to ask an ink unrelated question: what is the song that’s playing underneath – I really like it but can’t find it from the short lyrics that I catch. Thank you so much!
Thank you for checking out the Blog! Glad you’re enjoying the ink art. As for Pinterest, I subscribe to a Artlist for all my music so that it’s licensed for my content. I don’t know the song that is playing in the particular pin that you caught your attention. But if you’re interested in Royalty-free music for your content – You can check them out with a 1-month free trial using my affiliate link: https://artlist.io/artlist-70446/?artlist_aid=longstrideillustration_2876&utm_source=affiliate_p&utm_medium=longstrideillustration_2876&utm_campaign=longstrideillustration_2876
Will Sumi ink work well? I have a number of bottles of different brands. Ive used it and I like the color but the lines seem scratchy, like the inl spreads a little, i was thinking it could be the paper which is Canson pen and ink. It seems the ink also goes through the paper and marks the next sheet somewhat. Im wondering if it would work fine with different paper.
Thanks for your question. Sumi ink, to my knowledge, performs best with a brush on a ‘watercolour’ paper such as a cold press. Using the sumi ink for Calligraphy, you could also use a hot press paper, which also works okay for dip pens. For drawing, that Canson pen and ink paper is intended for fine liners and technical pens but performs poorly with dip pens (regardless of the ink type), the weave can’t handle a nib or liquid ink. For drawing with a brush or a dip pen, it’s best to use a pigment-based India ink because of the viscosity – it’s not too runny (like acrylic ink) and no seep-through (like dye-based inks). You could test your Sumi ink on a Bristol vellum or a high quality hot press but for precise line work you’ll see best results using India ink on a Bristol paper.