How often do you think “I wish I could draw like that?” or “I wish my art looked more like this”?
In this step-by-step guide, we will analyze masterworks to help you figure out what to practice to get the results you want with your pen and ink projects.
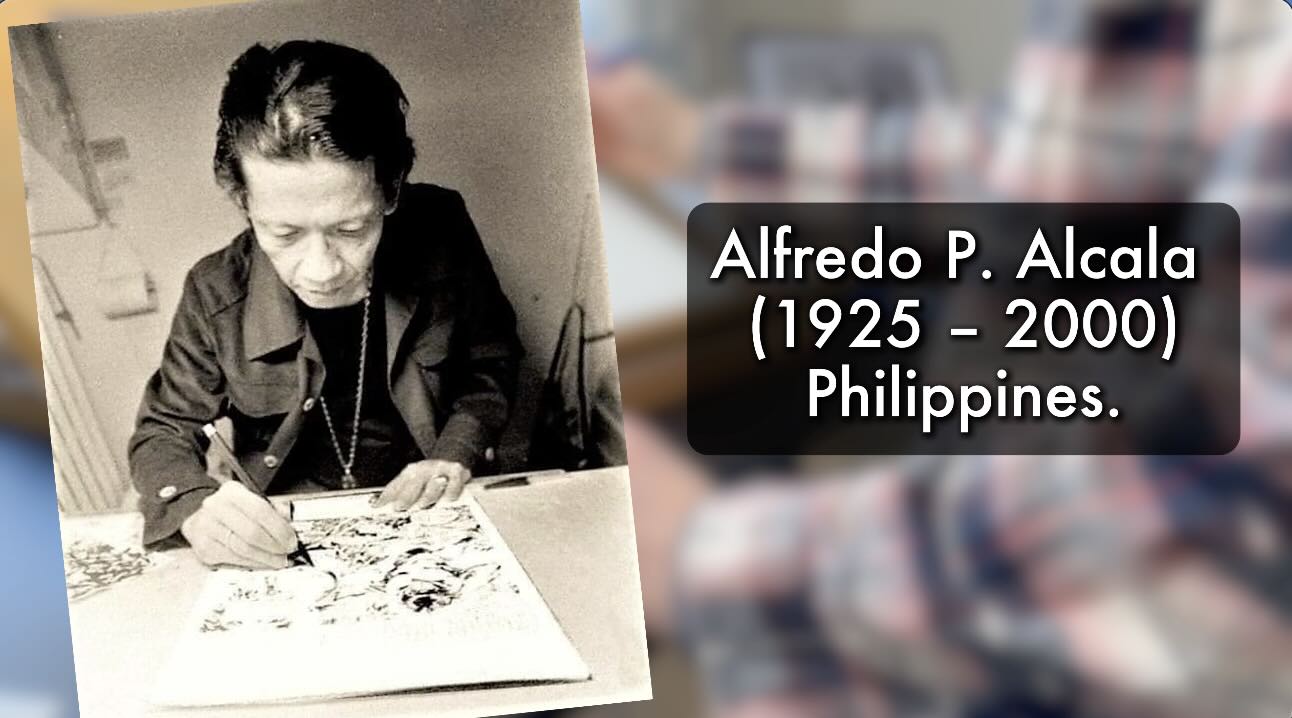
To demonstrate the process, we examine the art of master Alfredo Alcala.
// DISCLOSURE: I earn a small commission when you use my affiliate links to make a purchase. Please read the Terms for more information.
Where to Start?
The easiest way to do a Master Study is to pick artists whose work inspires you.
Meaning that you someday aspire to make art that feels similar to what they’re doing.
The reason I say this is the easiest is because the primary objective of doing a Master Study is to develop observation skills.
“Learning to draw is nothing more than the ability to translate what you have seen to paper.” – Alfredo Alcala
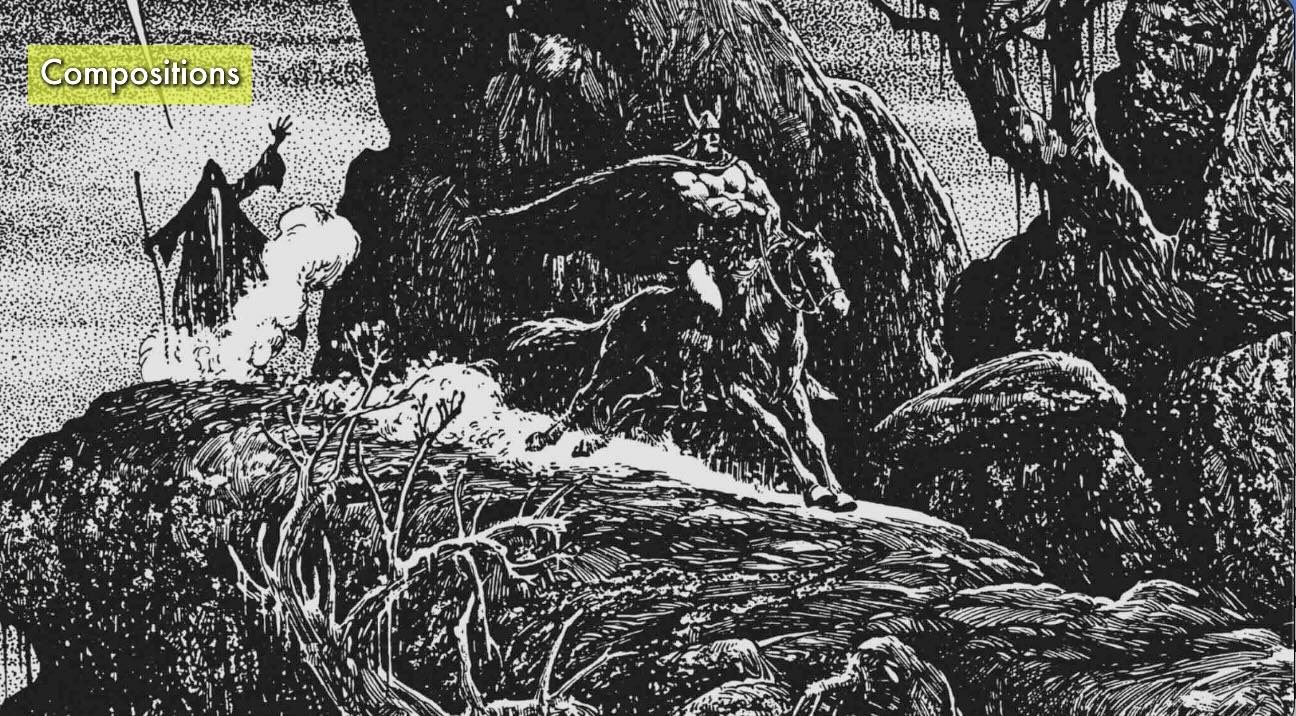
The key to being able to draw anything anytime is through observation.
An artist you admire means you’re familiar with their work.
Knowing what stands out about their style, technique, or methods helps you be more intentional with your practice.
Another way of doing master studies is to select artists whose work you’re not familiar with.
This is more challenging because it’s less obvious how to make the study relevant to your needs.
For an overview of the entire framework, read How to Do Master Studies.
For this article, we’ll focus on the analysis process of the framework and what to do with it, starting with the selection of the master and subject.
I. Selection of the Subject
I chose to study master Alfredo Alcala because he was suggested, and I was unfamiliar with his work.
To select a subject (to study from his works), my first step is to search online and at the public library for the best-quality images.
I typically don’t purchase resources like books until I’m certain that I’ll use them extensively.
A great resource for free downloads of comic book art is the Heritage Auctions website.
The Kindle edition of the Secret Teachings of a Comic Book Master: The Art of Alfredo Alcala is good value. The images are of decent quality for studies and include commentary from Alcala himself, so I went ahead and added this book to my collection.
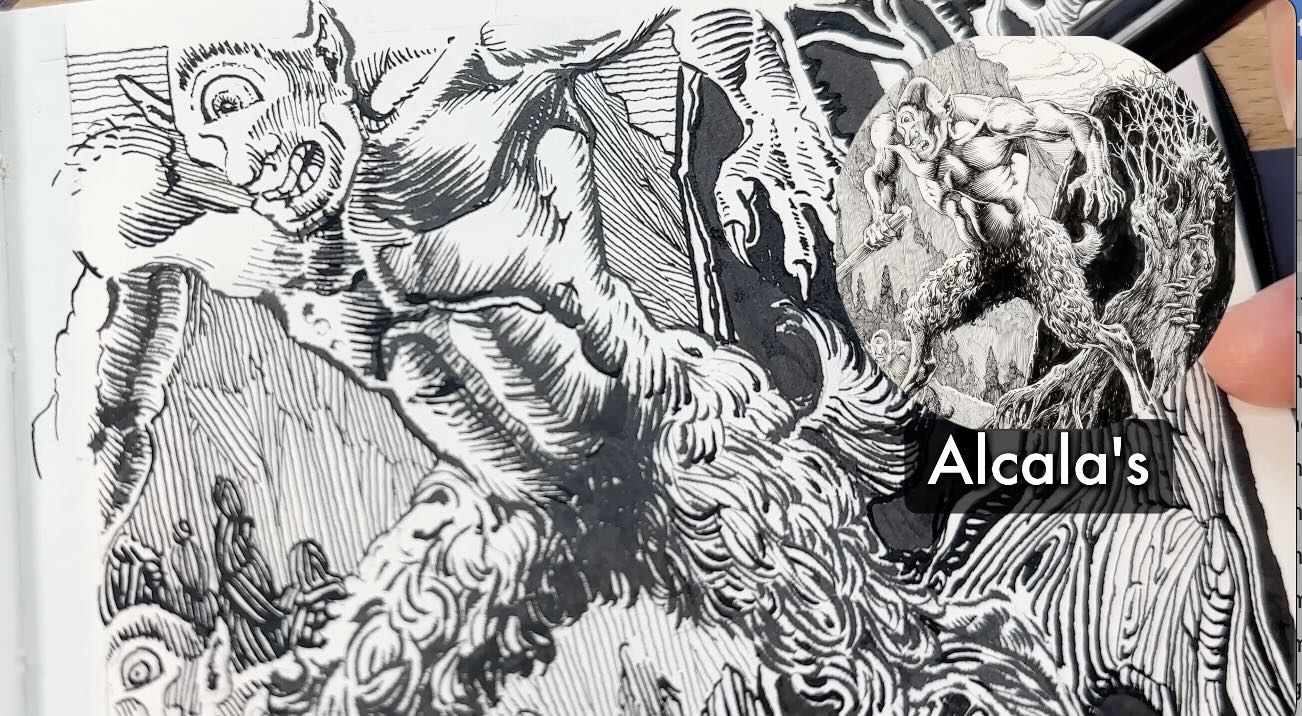
The second step is to review which images will work as subjects for your studies.
Look for pieces that best showcase the breadth of the master’s genius.
Even better if you can also match these to your learning goals!
This is where the questions in the Observation Guidelines come in handy to guide your selection.
II. Observation Guidelines
There are three categories that I find most help guide observations about how the master made decisions.
These categories in order of priority are:
- Lighting and Shading
- Composition
- Rendering Techniques
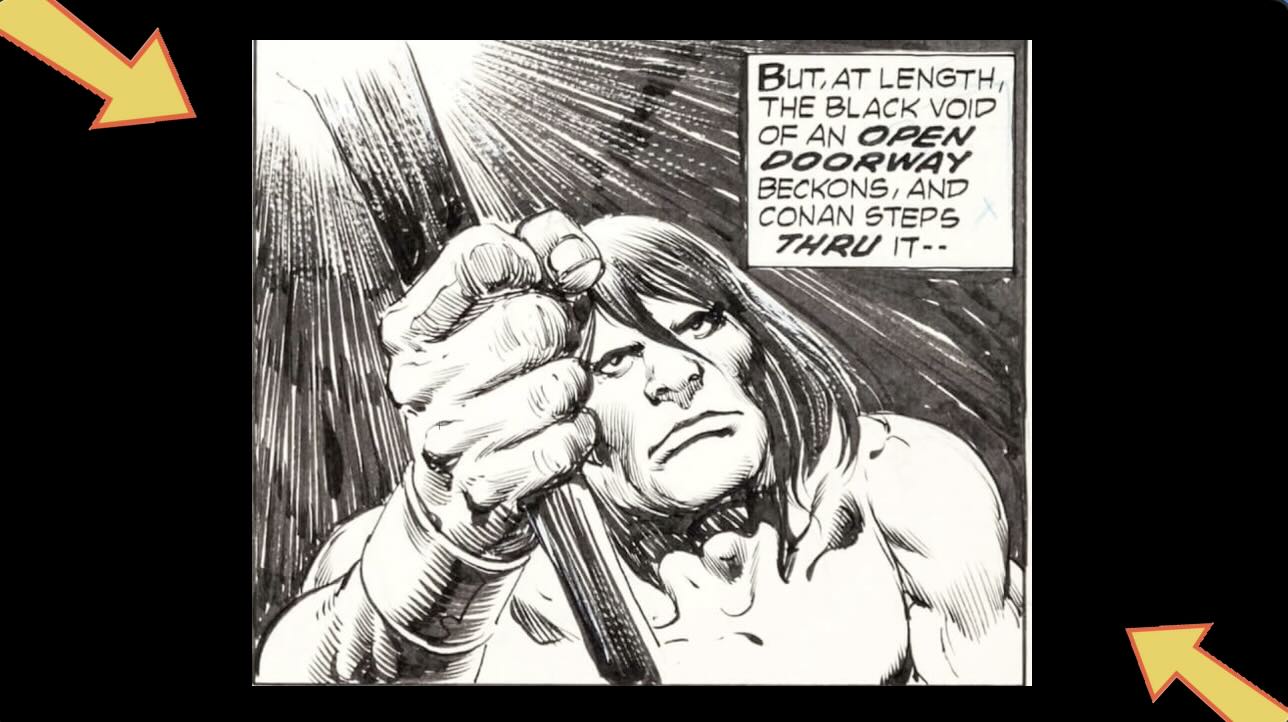
Lighting and Shading
The first and most important is to establish the source of light.
You find the source of light by identifying the highlights and darks (shading) on the picture plane; look for the high-contrast areas.
It would be the same process if you were drawing from a live object, the light informs everything else.
Is there more than one source of light?
Sometimes there’s an apparent backlight or a significant reflection.
To confirm whether there is a second source of light, look for the cast shadows (the darks).
If the cast shadows are mostly in a logical place, then there is only one intended light source.
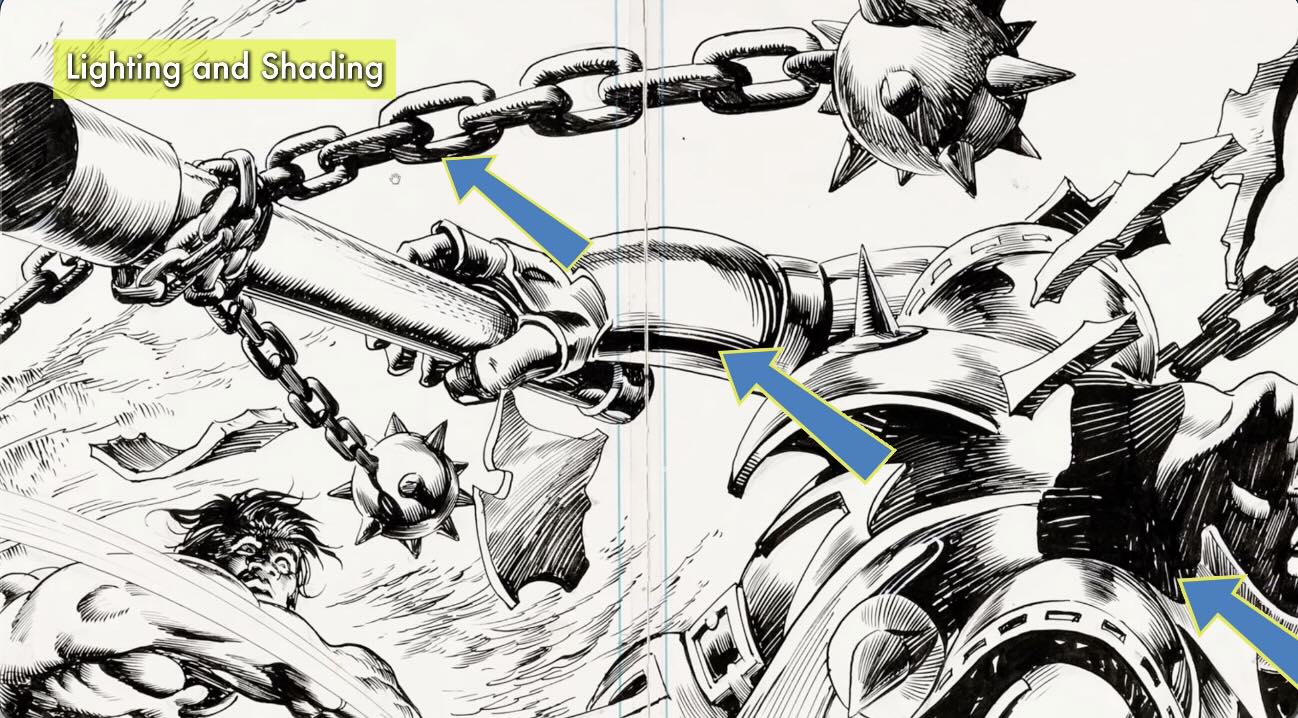
I say intended light source because master Alcala stretches the rules a little.
In the image below, the cast shadows are under the shield. So logically the light would approximately shine from the opposite direction of the shaded area.
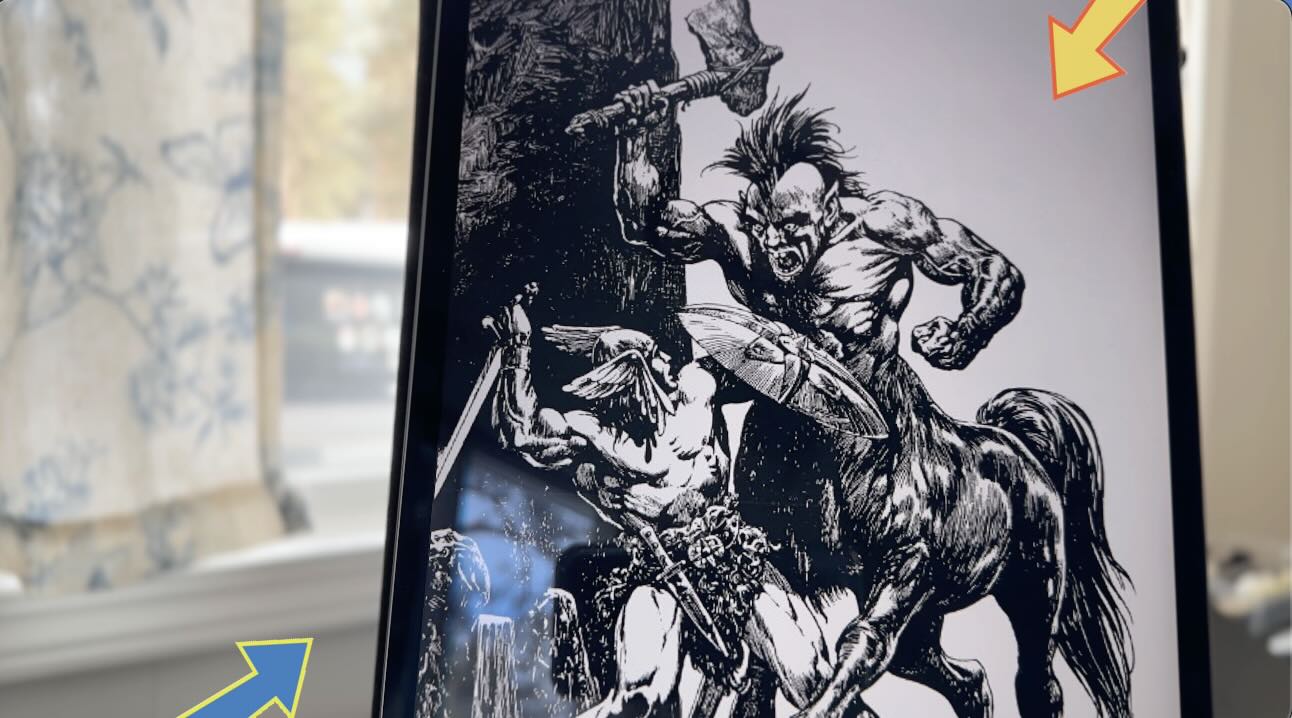
If the light shines from the top right-hand corner, the creature’s raised arm and weapon would cast a shadow resulting in more gradual mid-tones on the elements beneath it.
Also, the creature is practically on top of the hero. Yet our hero remains in direct light.
Maybe there is a secondary source of light reflected (bounce light) from an object below?
Any clues?
The highlights in the back of the hero, the spark of his sword, and the creature’s arm where it overlaps the boulder are not quite at the right angle for either direct or bounce light.
These lighting choices are slightly unrealistic yet do not distract the viewer. Rather, these clues (the highlighted areas) enhance the composition by bringing your attention to the action between the hero and the creature.
Let’s talk about the master’s compositions.
Composition
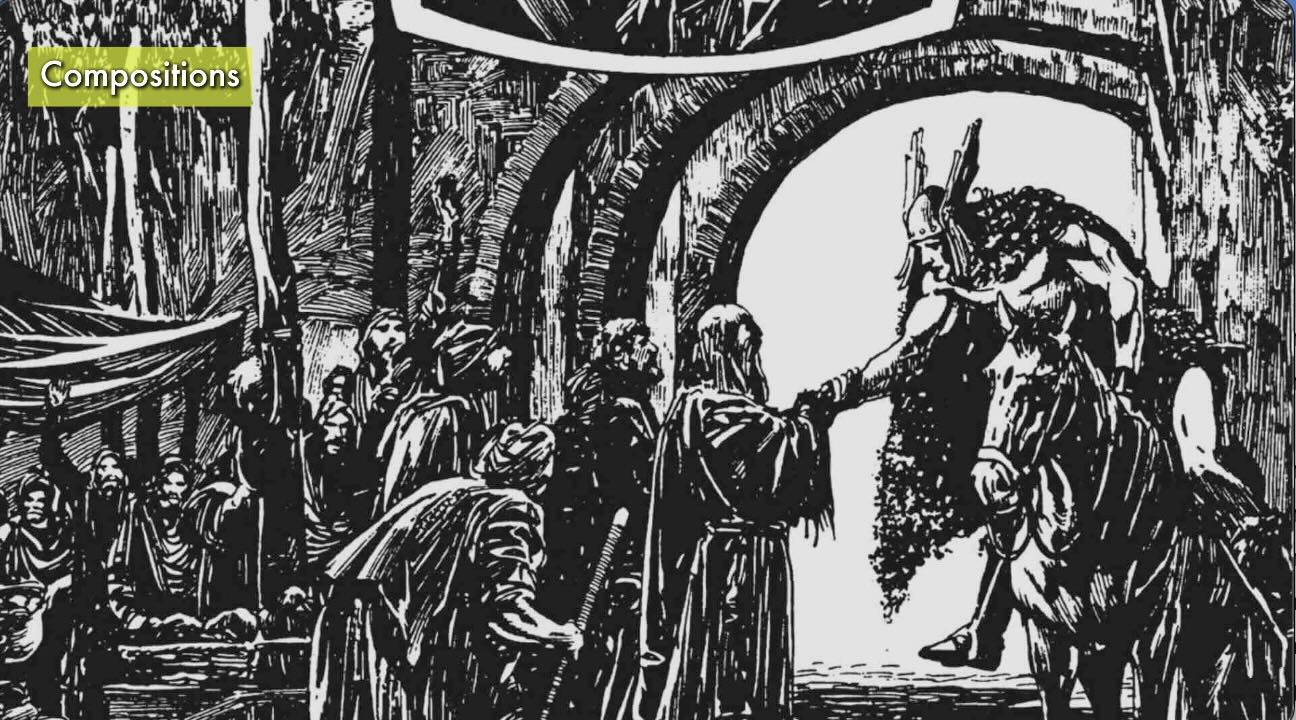
Examine how the composition is structured and how space is divided on the picture plane.
Where is the horizon line?
From what perspective is the viewer looking at the scene? From above, below, at eye level?
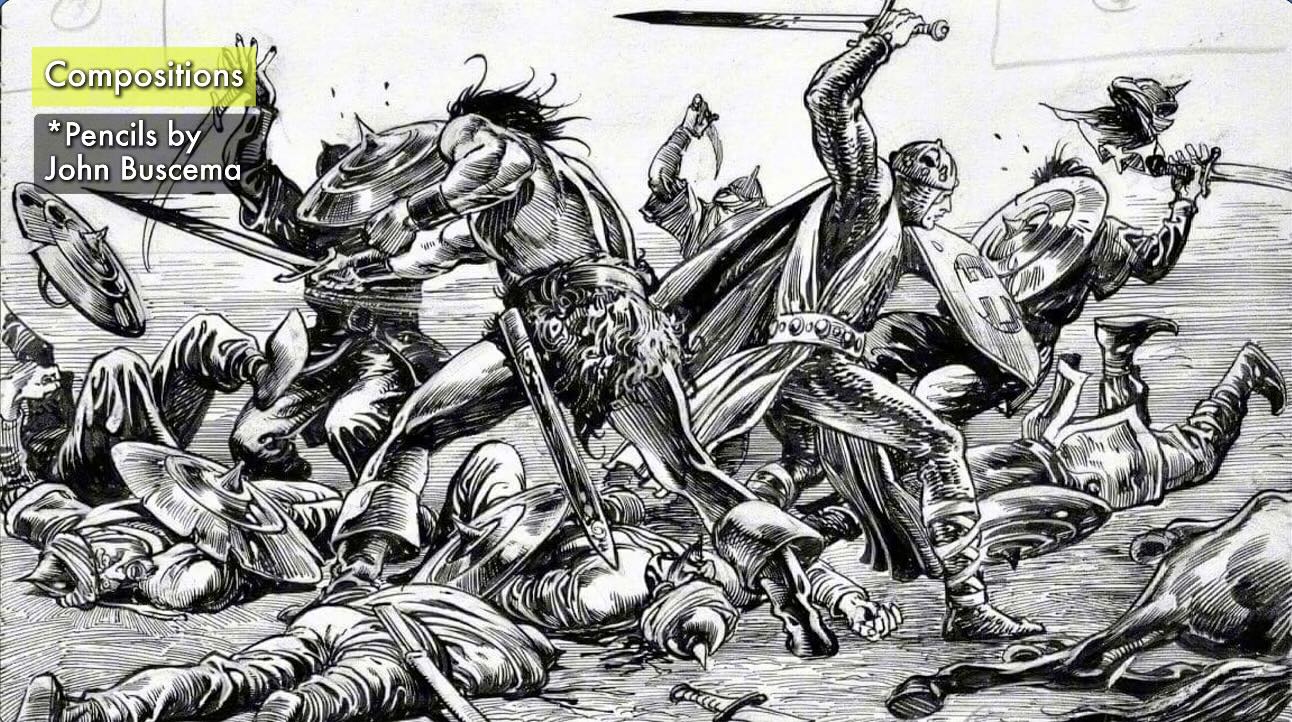
In the image above, it looks like the viewer is slightly below eye level, on the battlefield.
How is the main subject framed in the picture plane?
Is this accomplished mostly with values or with elements?
Master Alcala tends to structure his compositions with elements and divides the space with contrasting values to frame the focal point.
He says for comic book panels, he uses an O, X, T, or N structure. Those structural patterns can also be applied to each individual scene.
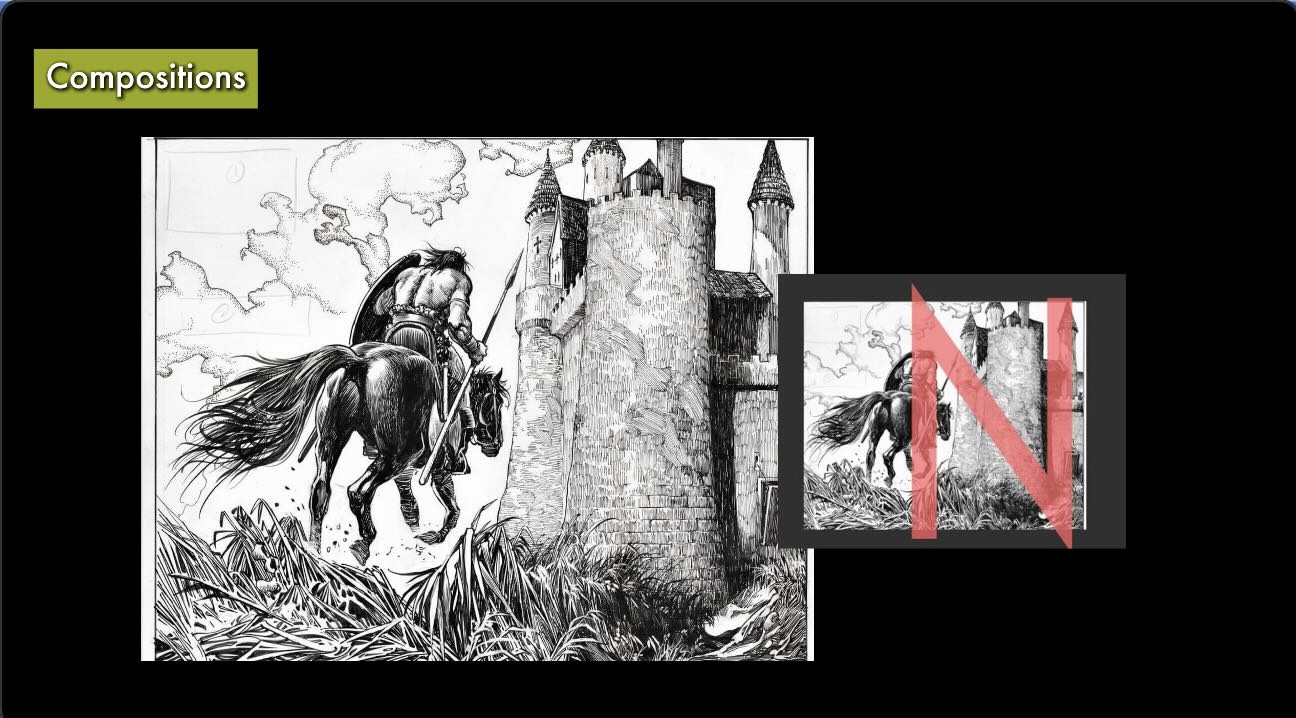
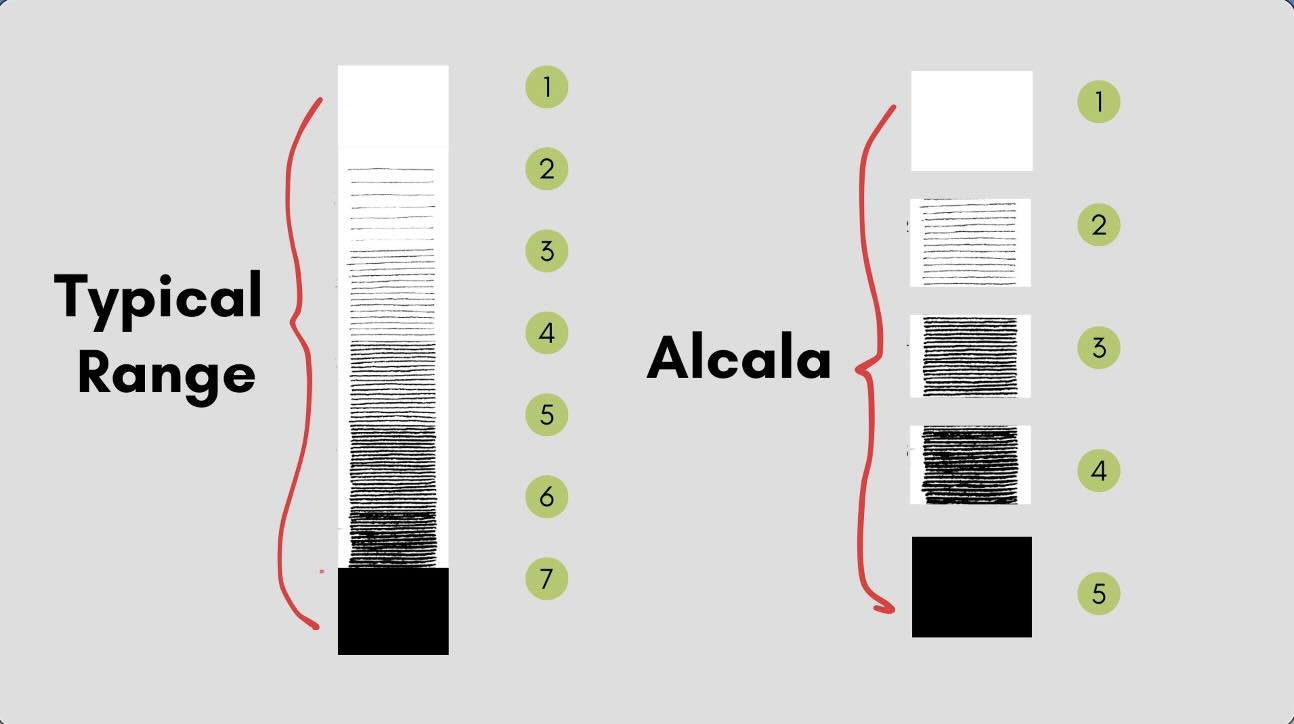
Alcala limits the range of values he uses for rendering. He admitted to using only five values, including black and white.
Alcala prefers to use contrast to frame the main subject or the action.
“The composition is always the structural skeleton beneath the rendering.” – Alfredo Alcala
This naturally leads us to what’s next: observations on techniques and tools.
Techniques and Tools
‘Technique’ is the detail-design, and may include:
- Line weights
- Stroke direction
- Textures
- And the spaces between the marks
What techniques were used to build values or create effects?
Does the master use mostly lines, cross-hatches, or any unique textures?
It’s at this point in the process that you’ll want to pay attention to your learning goals.
Are there any effects that you want to emulate in your work?
How about techniques to try?
Knowing what you’d like to learn from this master makes it easier to select the most relevant pieces to study.

📖 Not sure how to determine your learning goals? Check out the Five Steps to Becoming a Better Self-taught Artist.
Tools
What do we know about the master’s tools? If this information is not available, you can take a guess.
Ideally, we want to use the same tools to replicate the effects.
In the book, Alcala shared that he used quills, brushes and his homemade brush pen.
If you don’t have quills, brushes or brush pens, aim to substitute with similar tools for your studies.
Beginners will appreciate Fude Pens, a line of soft felt makers for similar effects, such as:
What Else? What else do you want to learn from this master?
This could include how he does:
- Visual storytelling (cinematic, evocative, symbolic…)
- Linear and atmospheric perspectives
- Gestures, proportions, anatomy
- Character and environment design
- Hair, textiles, weather, etc.
Now you’re ready to start the subject studies.
III. Subject Studies
Doing subject studies helps further understand how the master made decisions through imitation (copying).
A full scene can be overwhelming.
I therefore do mini-studies by copying portions of the image for my practice session.
This could be a sample of a comic book panel or a smaller section of one of the illustrations on the page.
I first rough-sketch my study sample on lesser-quality paper to get a feel for the proportions.
Then I redraw it more cleanly with a pencil in my good Moleskine sketchbook.
I do all my Master Studies in the same sketchbook to make it easier to monitor progress over time.
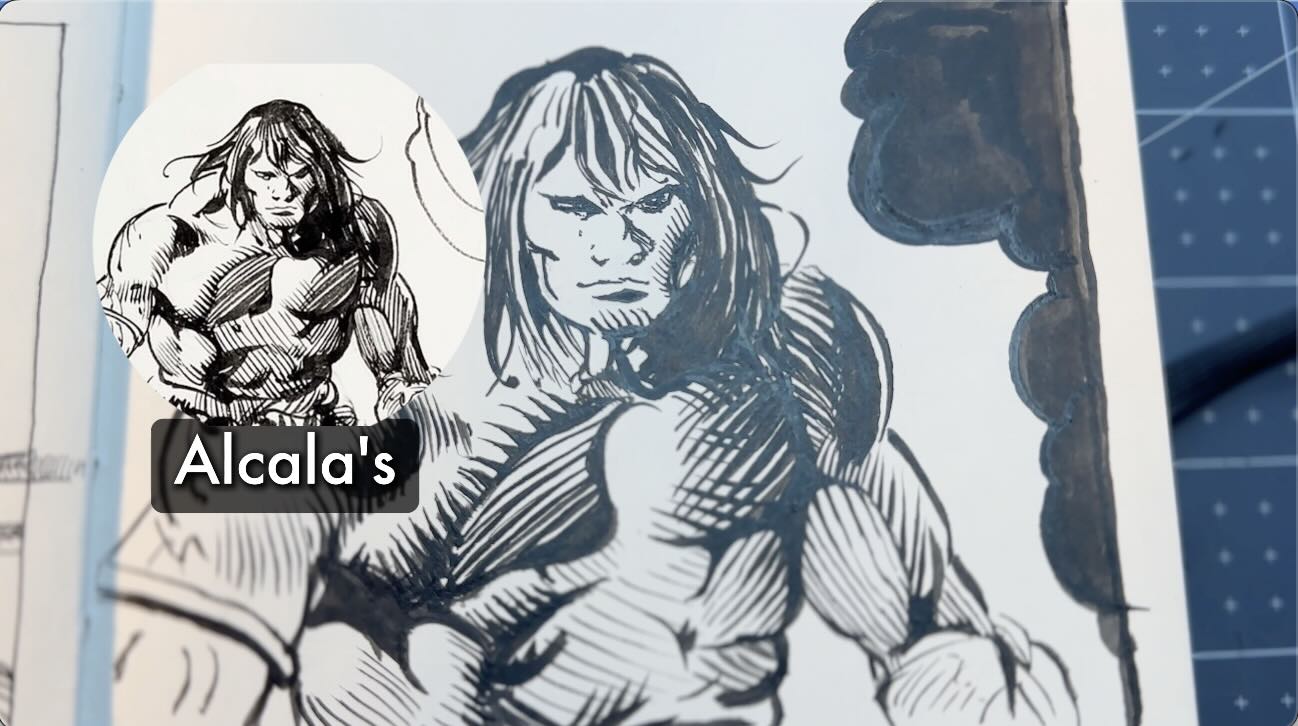
Dating each study all in the same sketchbook saves me from searching through piles of sketchpads or loose sheets whenever I want to compare past drawings.
Also, the Moleskine paper is of high enough quality to handle wet and dry medium, like lots of ink so it’s my first choice.
For the ink application, the tool is a barrier for me because I rarely render with a brush. It’s not my favourite.
I have 3 objectives for these studies:
- Gain better control of the brush
- Render using only 5 values
- Put the contrasts in the right spots
For advice on brushwork, I turned to Marvel’s Ryan Benjamin.
In this YouTube video, Ryan goes through a warm-up sequence. He says it’s critical to get confident with what the tools can do.
🎓 Want to learn more about what the tools can do? Check out Ryan Benjamin’s courses on Proko.
In the warmup, we go thick-to-thin strokes using both pushing and pulling motions using different sizes and types of brushes.
I also rehearsed the textures used in my chosen study images for additional practice before inking the pencil underdrawings in my sketchbook.
I chose two images. They each showcase the master’s inking skills and best meet my three learning objectives.
Once the sketchbook studies are complete, the next steps are to apply the learnings and assess progress.
IV. Apply Learnings and Assess Progress
Apply Learnings
To get the full benefit of each Master Study, reflect and take notes.
What were the top things you learned as a result of going through the observation process?
You probably noticed even more things by doing the study.
Did anything surprise you, was there an outcome you didn’t expect?
These are important questions because they tell you more about your preferences and what will help you grow as an artist.
Pay attention to your responses (how you feel about it).
You can either:
- Apply the learnings in your next project, or;
- decide you didn’t like the outcomes enough to practice those any further.
So, continue to practice what you learned with the intention to emulate this master’s style in your work or not.
For example, I was surprised master Alcala uses so few values in his compositions. It’s not my style and I didn’t love the results.
I’m more interested in a style of illustration that shows a broad range of values, more like masters Franklin Booth and Bernie Wrightson.
So I’ll pass on further practicing rendering with only five values.
I was inspired by master Alcala’s precise control of his inking instruments.
Brushwork hasn’t been my thing so far. But when I copied Alcala’s works, I liked the outcome enough to want to continue practicing rendering sections of my creations with brushes.
Another step you can take after this is to immediately render an original piece in the style you just practiced.
Meaning, that you would draw a subject of your choice from references or imagination, and incorporate what you liked from your Master Study.
This helps further commit your observations to memory and anchor the learnings.
Assess Progress
As mentioned, date the pages in your studies and all of your work.
You can repeat the entire process with the same master later in your art journey to see if you observe or interpret things differently.
I hope this article gave you fresh ideas on developing observation skills to get your desired results with your pen and ink studies.
All the resources and tools used to create these studies are listed below.
Resources
- Heritage Auctions (Website)
- Ryan Benjamin brushpen rendering (Youtube video)
- Alfredo Alcala Kindle Book (on Amazon)
- Ryan Benjamin Courses on Proko
- Adjustable Tabletop Easel
- Pentel Arts Brush Pen
- Pentel Arts Color Brush Pen
- Kuretake Bimoji Fude Pen
- Speedball Crowquill Set
- Staedtler Lead Holder
- Speedball Super Black India Ink
- Moleskine Art Sketchbook




Thanks for featuring my father in your feature. My dad was sekf-taught and did not even finish elementary in Manila. He invented a ‘fountain-brush’ in early 1950s. Even with his time consuming style, he was the fastest and most prolific artist as mentioned in old articles.
Thank you for reading the article and your support. Your dad is a legend!