Are you ready to draw a wondrous border?
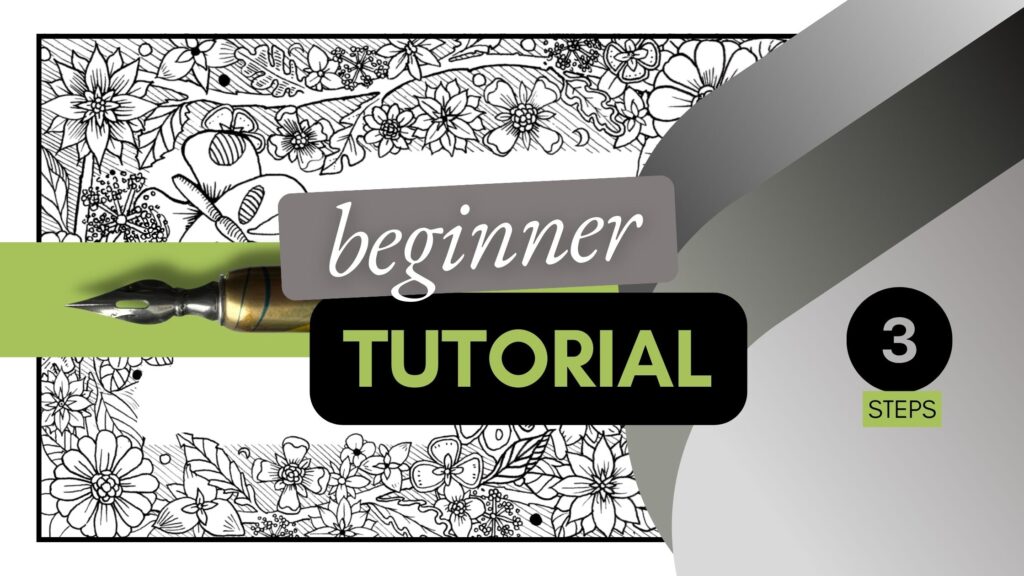
In this beginner-level pen and ink tutorial, we’ll be illustrating a wondrous border in 3 steps. It’s easy to make, but not quick. If you like drawing details, then you’ll love this project.
Disclosure: Some of the links on this page are affiliate links. I earn a reward or small commission when you use those links at no cost to you. Read more about the Affiliate Disclosure on the Terms page.
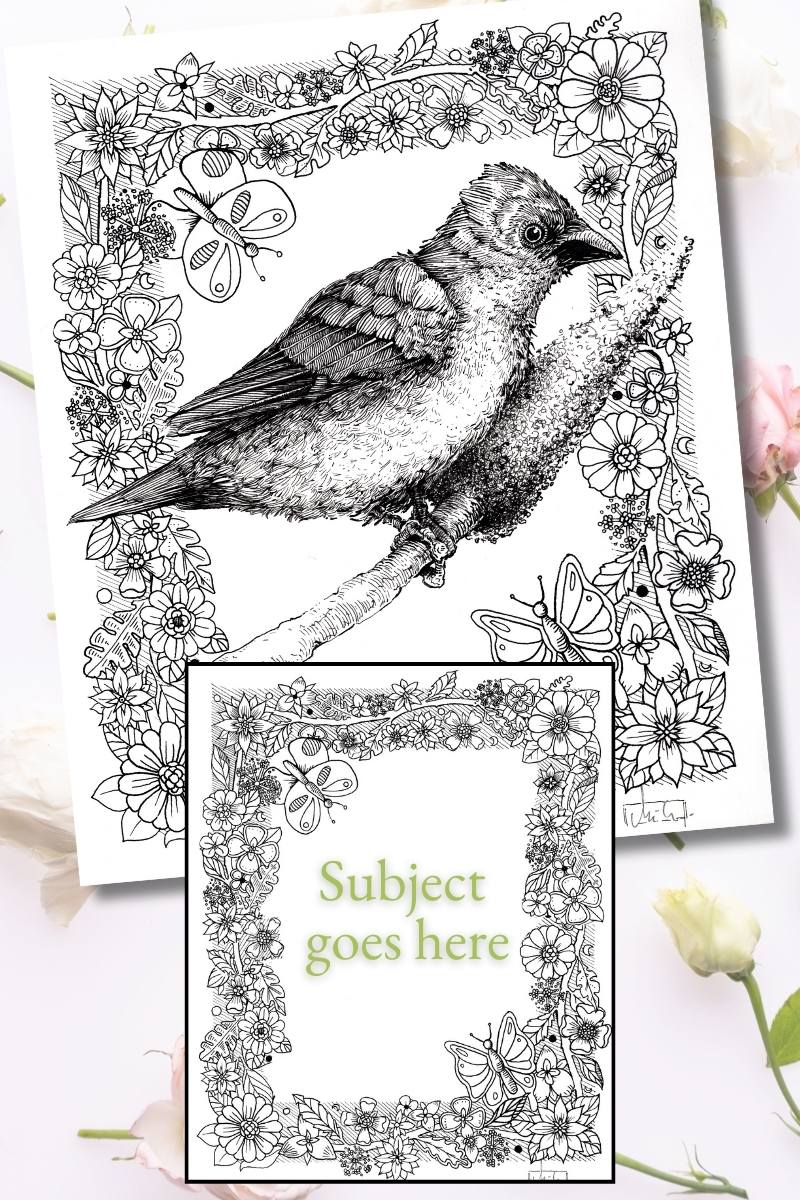
The border illustration has a floral-forest theme. For more border theme ideas, additional resources, and links to all my tools, scroll to the Resources section of this article.
Project: Floral Border illustration
Level: Beginner
Medium: Pen and ink
Time to complete: ~3-5 hours
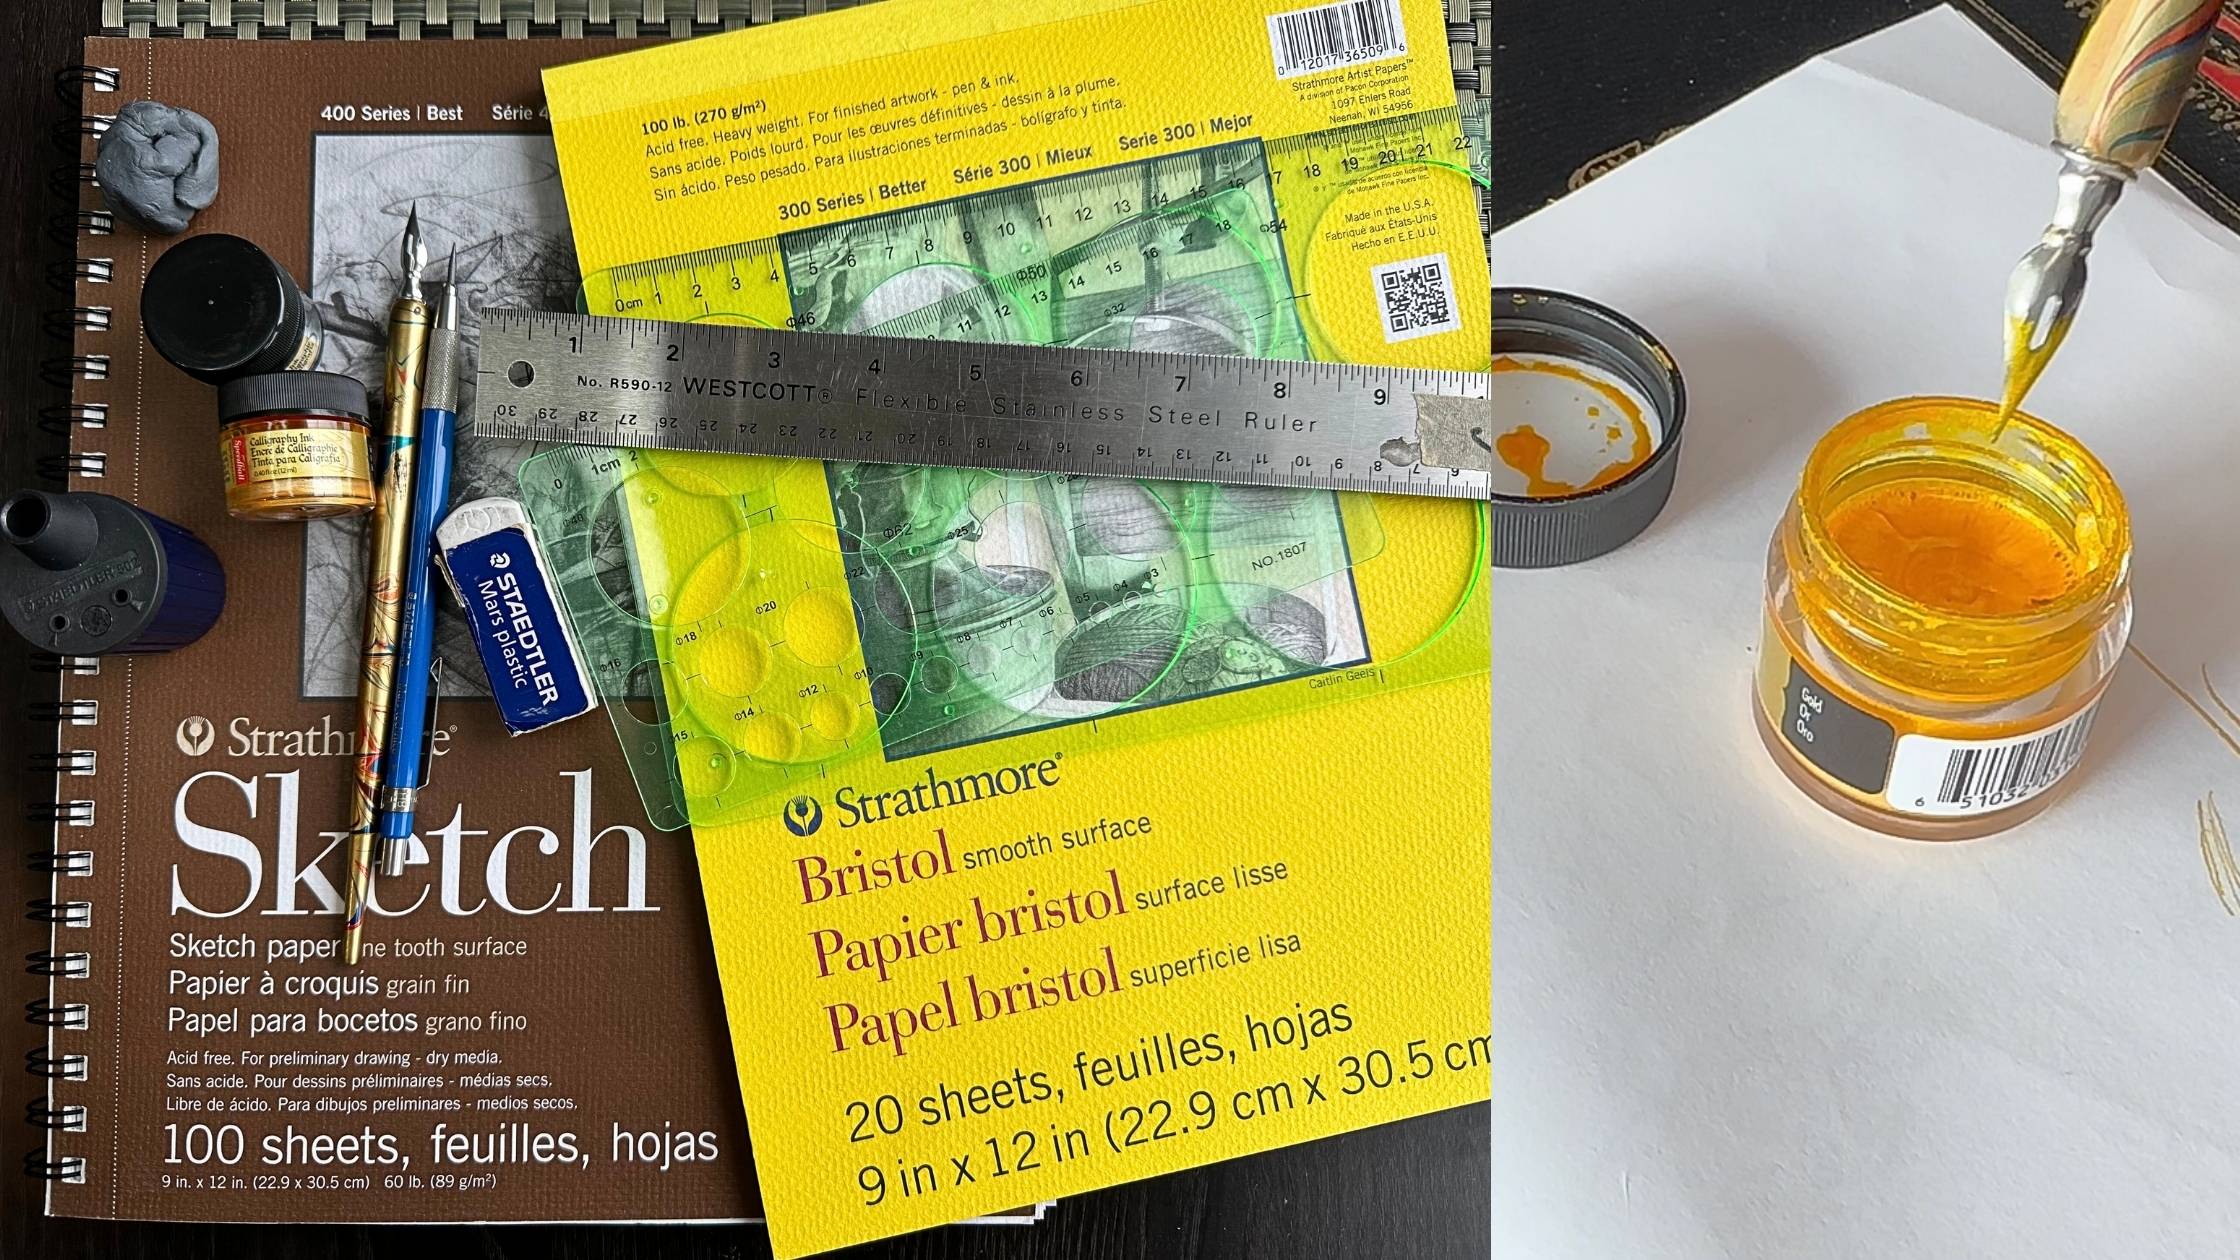
Art Supplies and Materials
For this tutorial, the main art supplies are:
- Sketching paper
- Lead pencil
- Plastic eraser
- Bristol Inking paper
- Ruler
- Geometric circle stencils
- A dip pen
- Liquid ink
You’ll find the full list of supplies (with Brand names) in the Resources section.
Step 1 – Sketch the Border Elements
First, we’ll sketch a design for each of the border elements.
Your designs don’t need to be polished drawings, just sketches. These sketches are important as they will guide the construction of our wondrous pen and ink border.
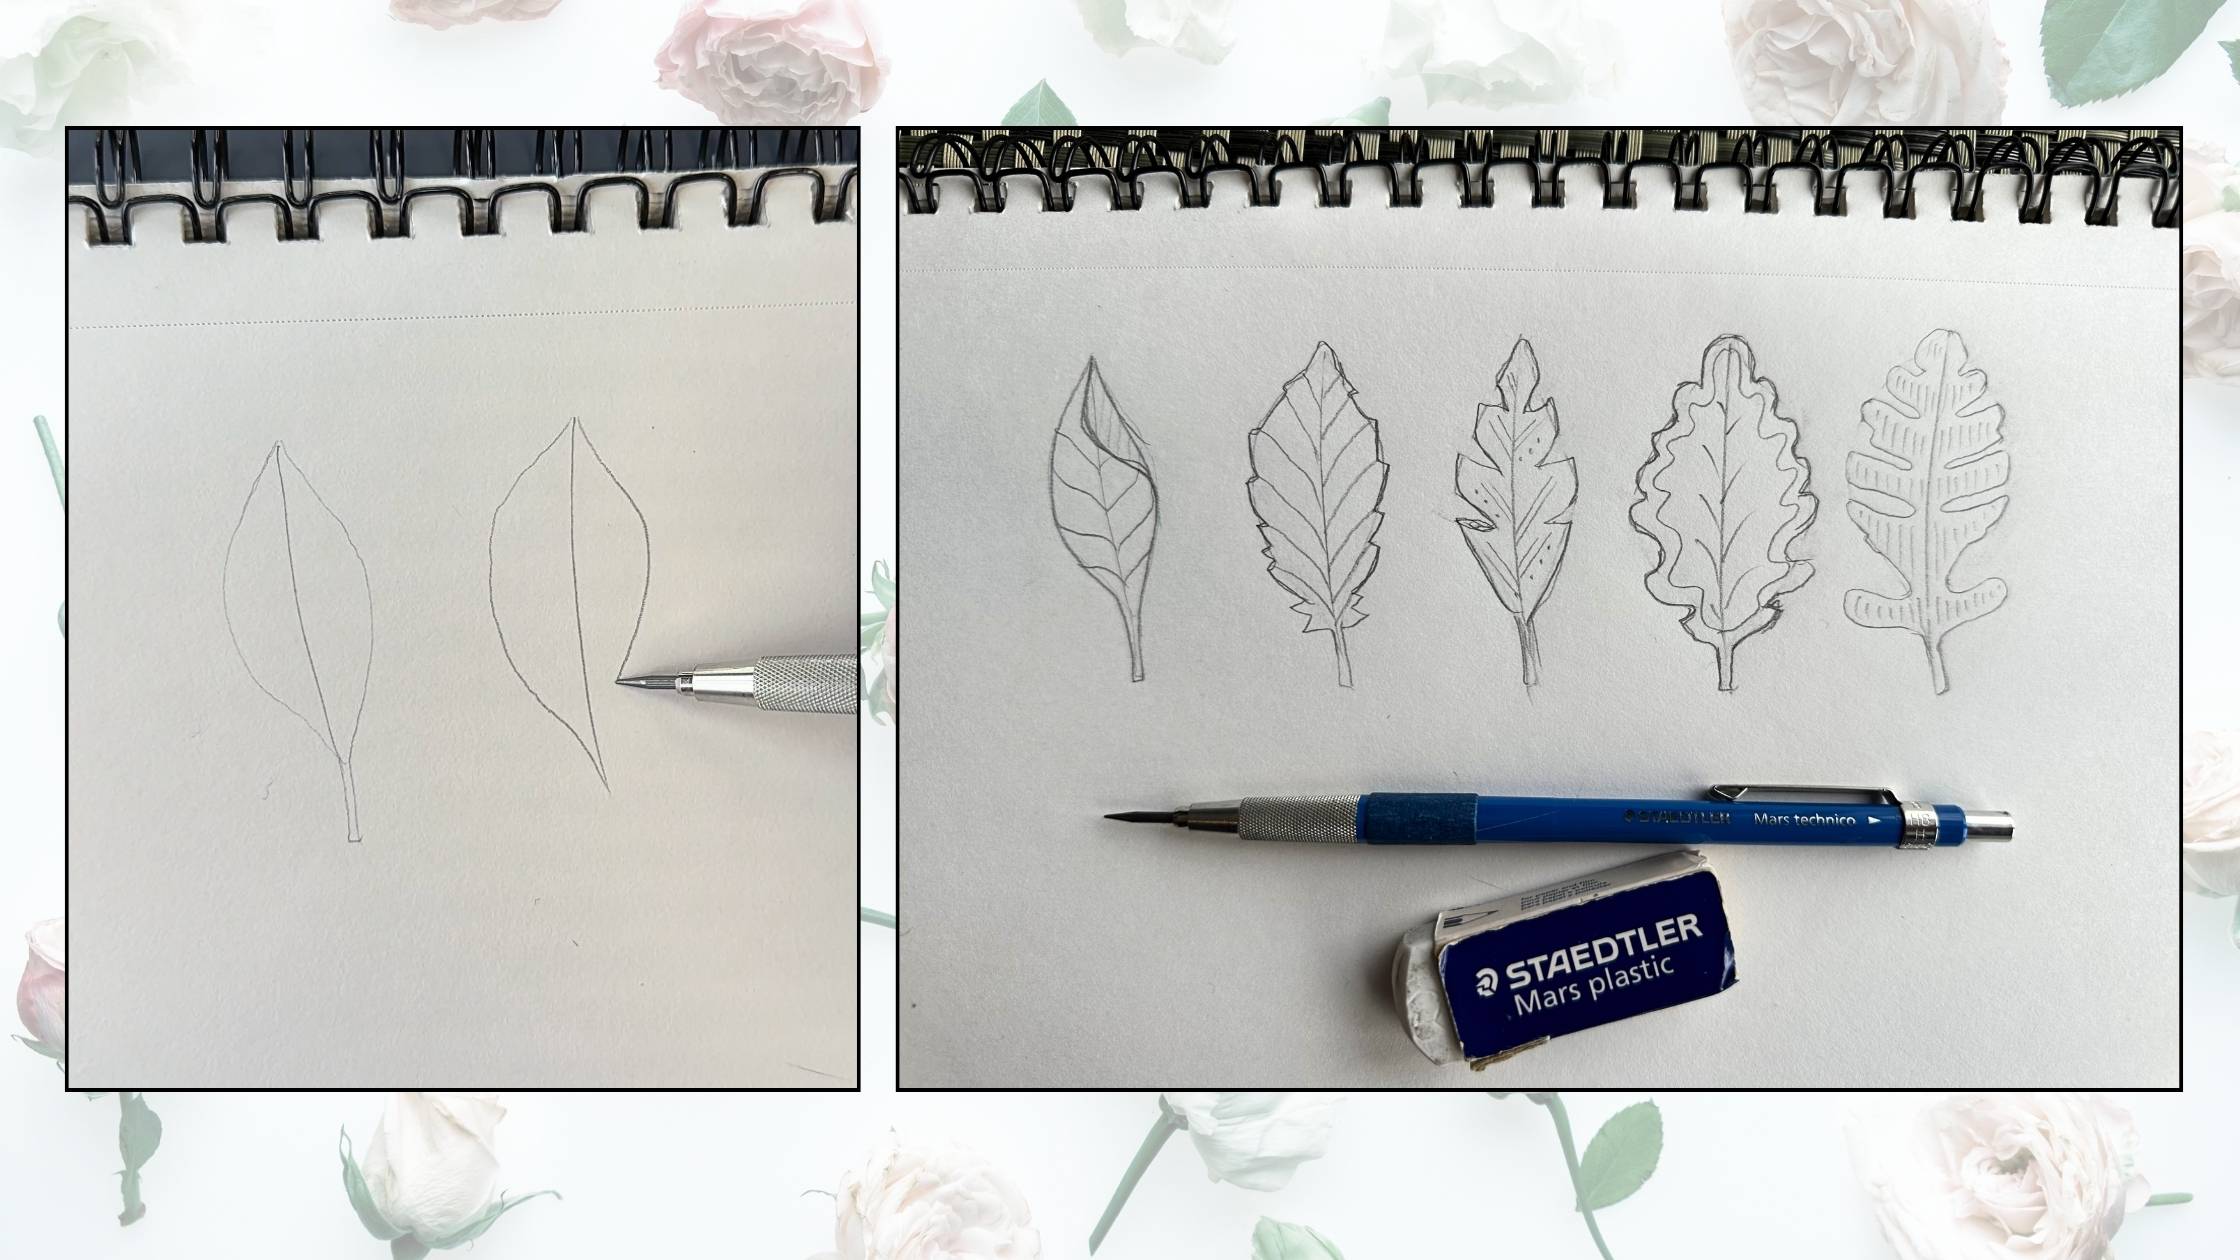
Sketch the Leaf Designs
Using a pencil, on your sketching paper we’ll draft 5 leaf designs.
Start with a single stroke for the stem, then add the outline of the leaf shape, one side at a time.
Complete the stem while drawing the second side of the leaf.
Draw four more outlines. Next, we’ll vary the shapes of our designs and add embellishing details.
Start with the edges of the leaf shapes. Examples of shapes can be:
- a fold on one side
- serrated edges
- dents
- lobed
- parted
For leaf details, add veins.
Position some of the vein lines at an angle like fish bones, and some with a staggered effect.
Sketch the Flower Designs
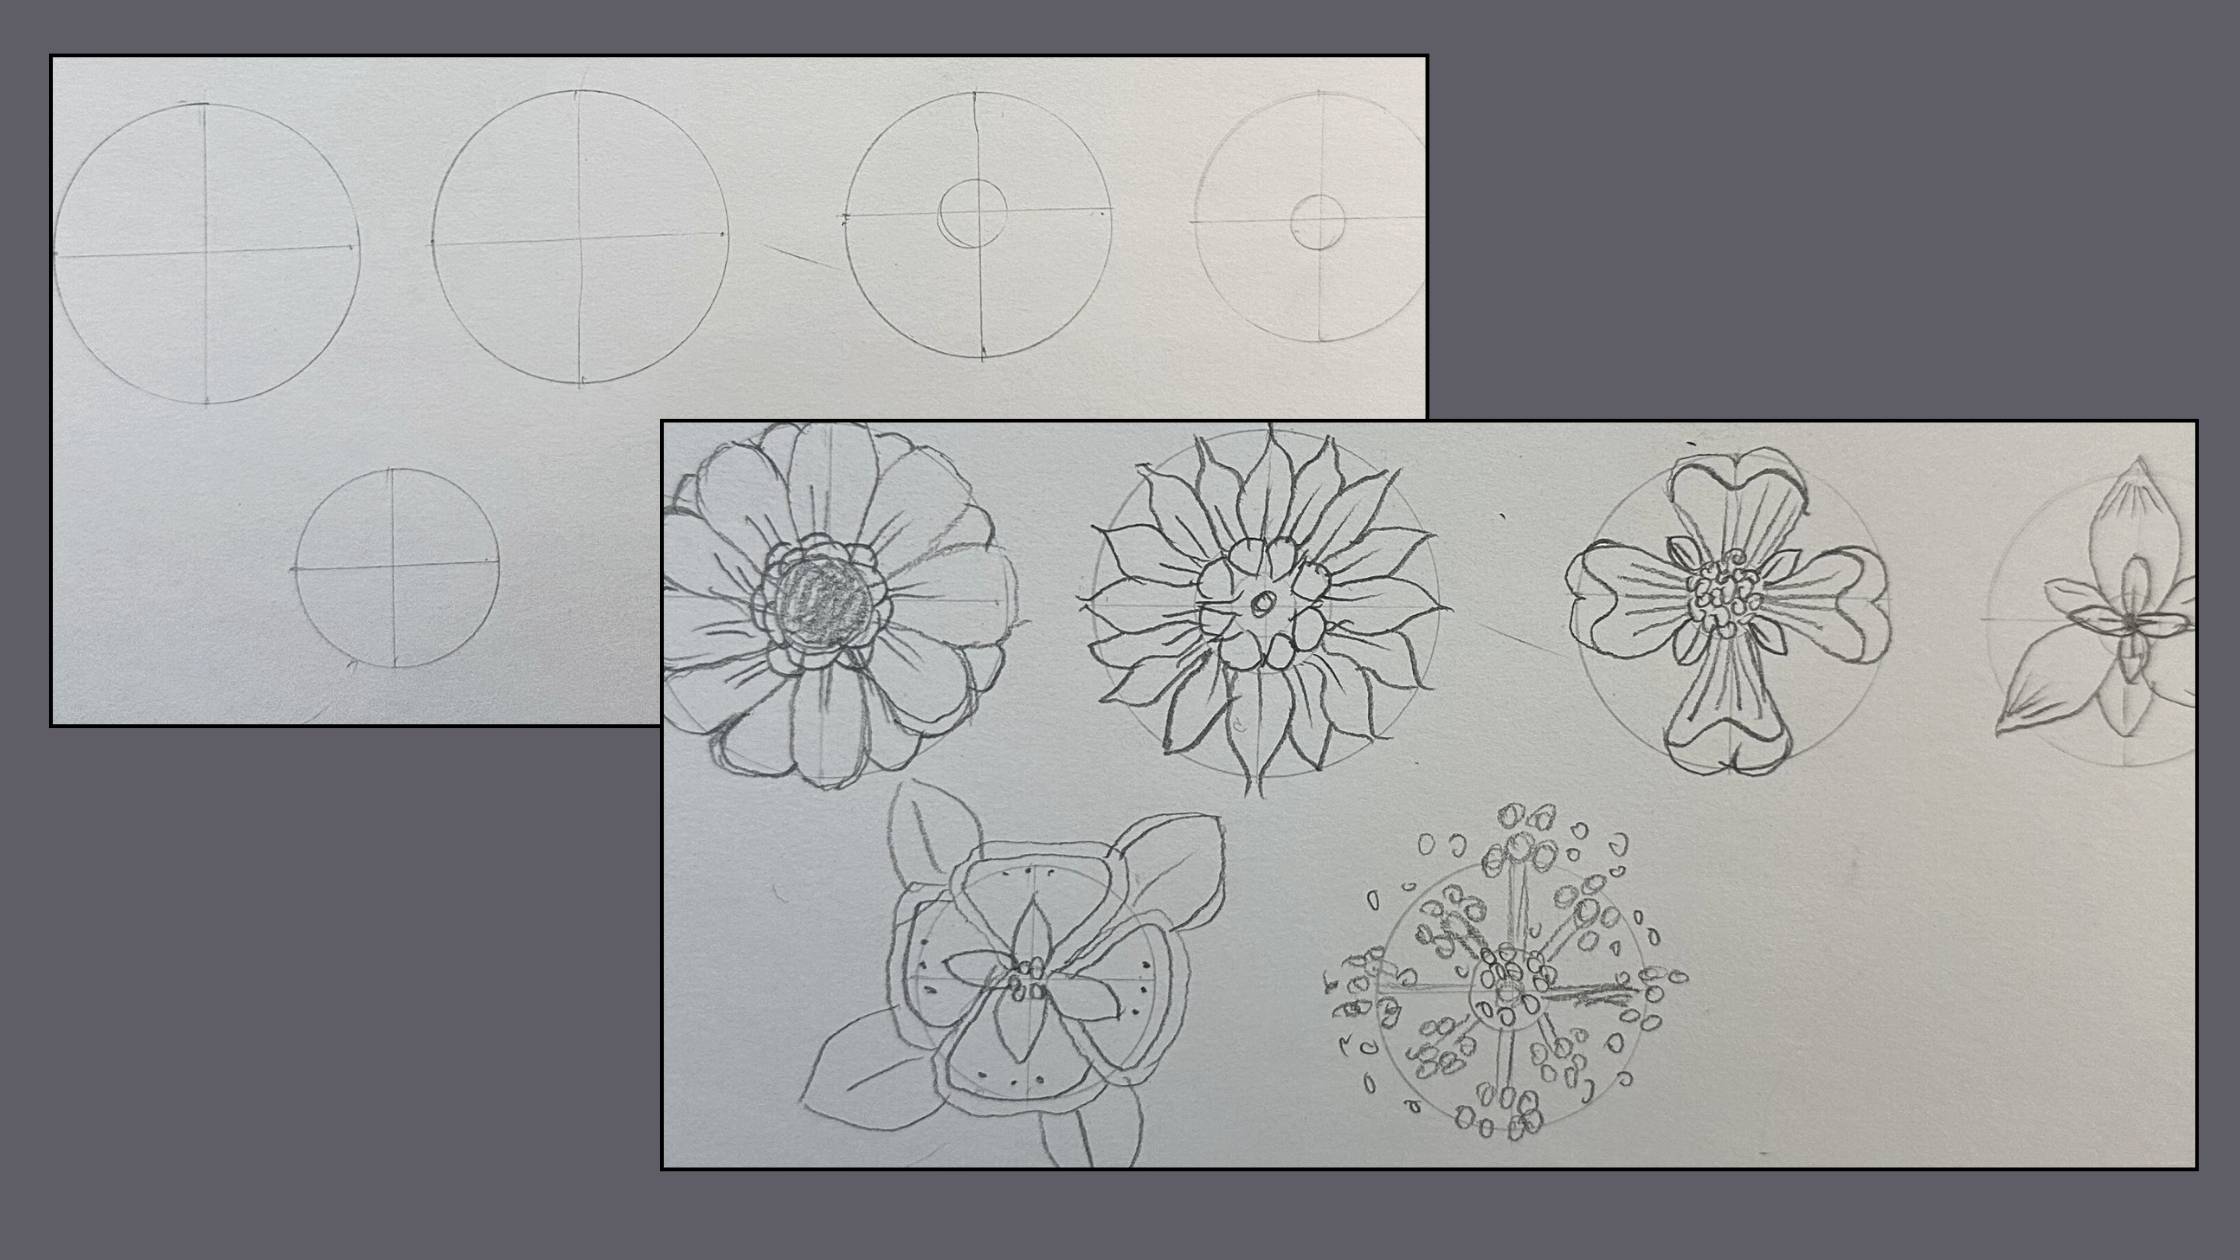
Next, create 6 floral designs.
I’m using geometric stencil templates to make circles. If you don’t have this tool, circular objects will work or you can draw freehand.
Start with 6 circles of numerous sizes, then divide each into quarter sections. Use the centre line dashes from the template to mark the centre lines, then use the edge of the template as a ruler to divide the circles in four.
We quarter the circles so that it’s easier to mirror the design. It’s a trick to keep the drawing symmetrically in proportion.
I’ve also drawn a smaller circle in the middle of each one.
Create flower variations by overlapping petals clockwise. Or draw petals on the guidelines, then add further petals within the gaps.
Continue to develop your creations.
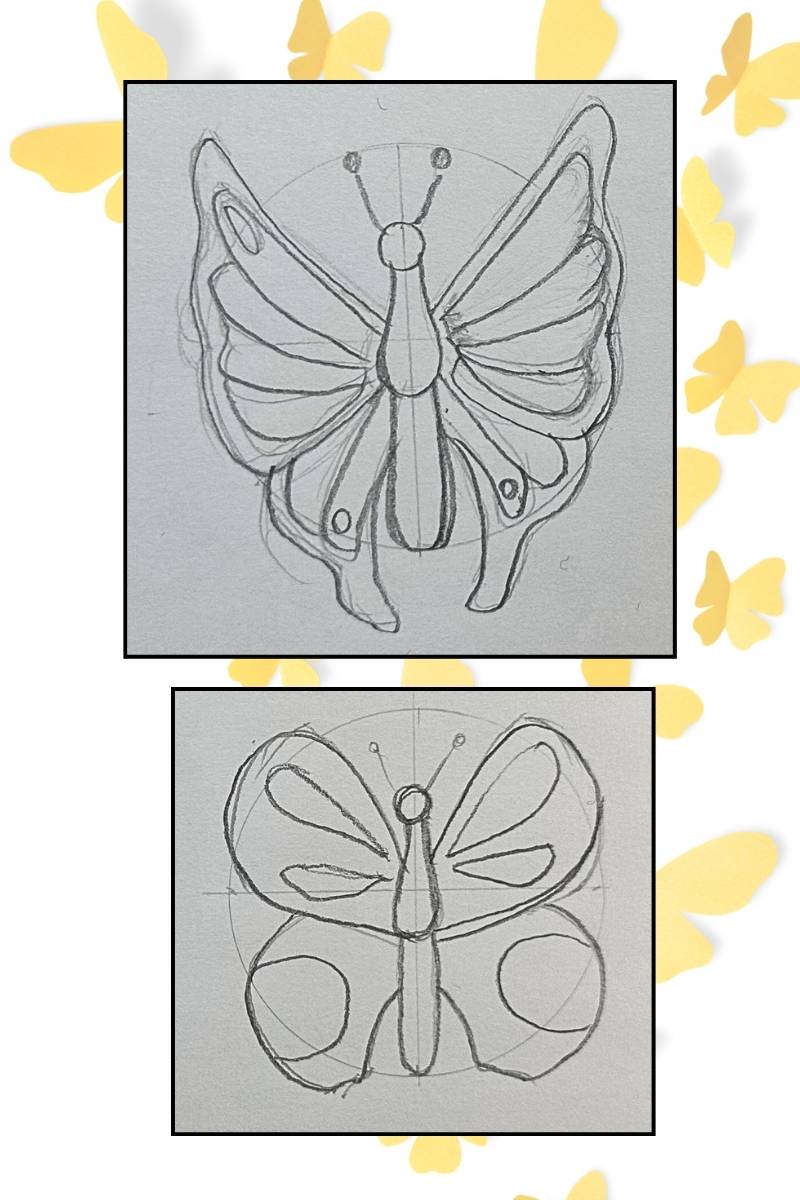
Design 2 Butterflies
Sketch two butterfly designs.
Start with quartering two circles. These circles are slightly larger than the flowers.
Draw a small circle for the head, attach an elongated teardrop for the body, then extend another slender shape for the tail.
Attach a main wing on both sides of the body. Aim for symmetry. Then sketch smaller wings tucked underneath the main wings. Add the antennae.
Add markings on the wings and refine the shapes as you like.
Determine the Size and Dimensions of your Border
For this tutorial, you have three options for the size and dimensions of your border.
Border Format Option 1
Start from scratch. Use a blank sheet of Bristol inking paper to create your border. Suggested size: 9×12 inch (22.86 cm x 30.48 cm) sheet for 8.5 x 11.5 inches (21.59 cm x 29.21 cm) border. You can draw the border from this tutorial and add a subject to the composition afterwards.
Border Format Option 2
Border an existing subject. If you have an illustration that has no background and at least 1.5 inches (3.81 cm) of space around it, you can use it for this border tutorial.

Border Format Option 3
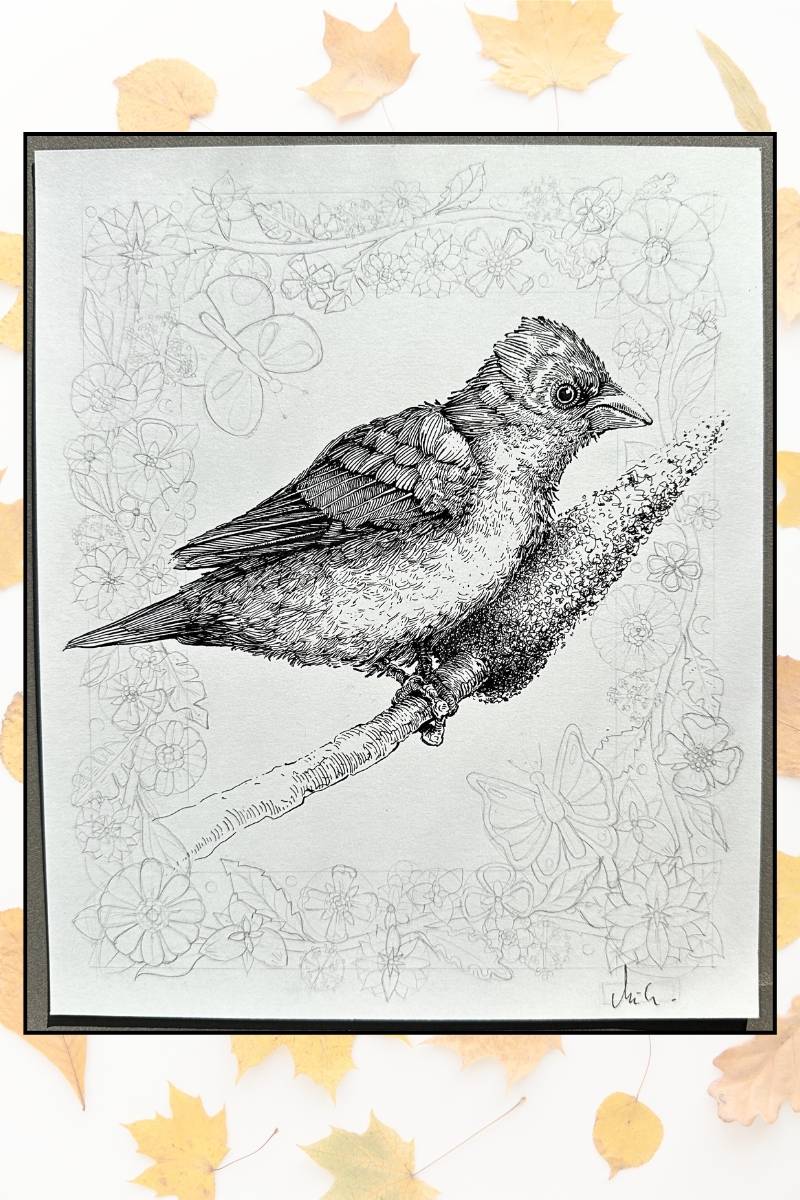
I’ll be using this Bunting Bird image for the tutorial. The sheet dimensions are 7.5 x 9 inches (19.05 cm x 22.86 cm).
I created the image in this Step-by-step drawing of a bird with dip pen and ink YouTube tutorial. If you’ve previously done that bird tutorial, and still have your artwork, then you have the option to add a border to your bird illustration.
Essentially, the format is a vertical rectangle.
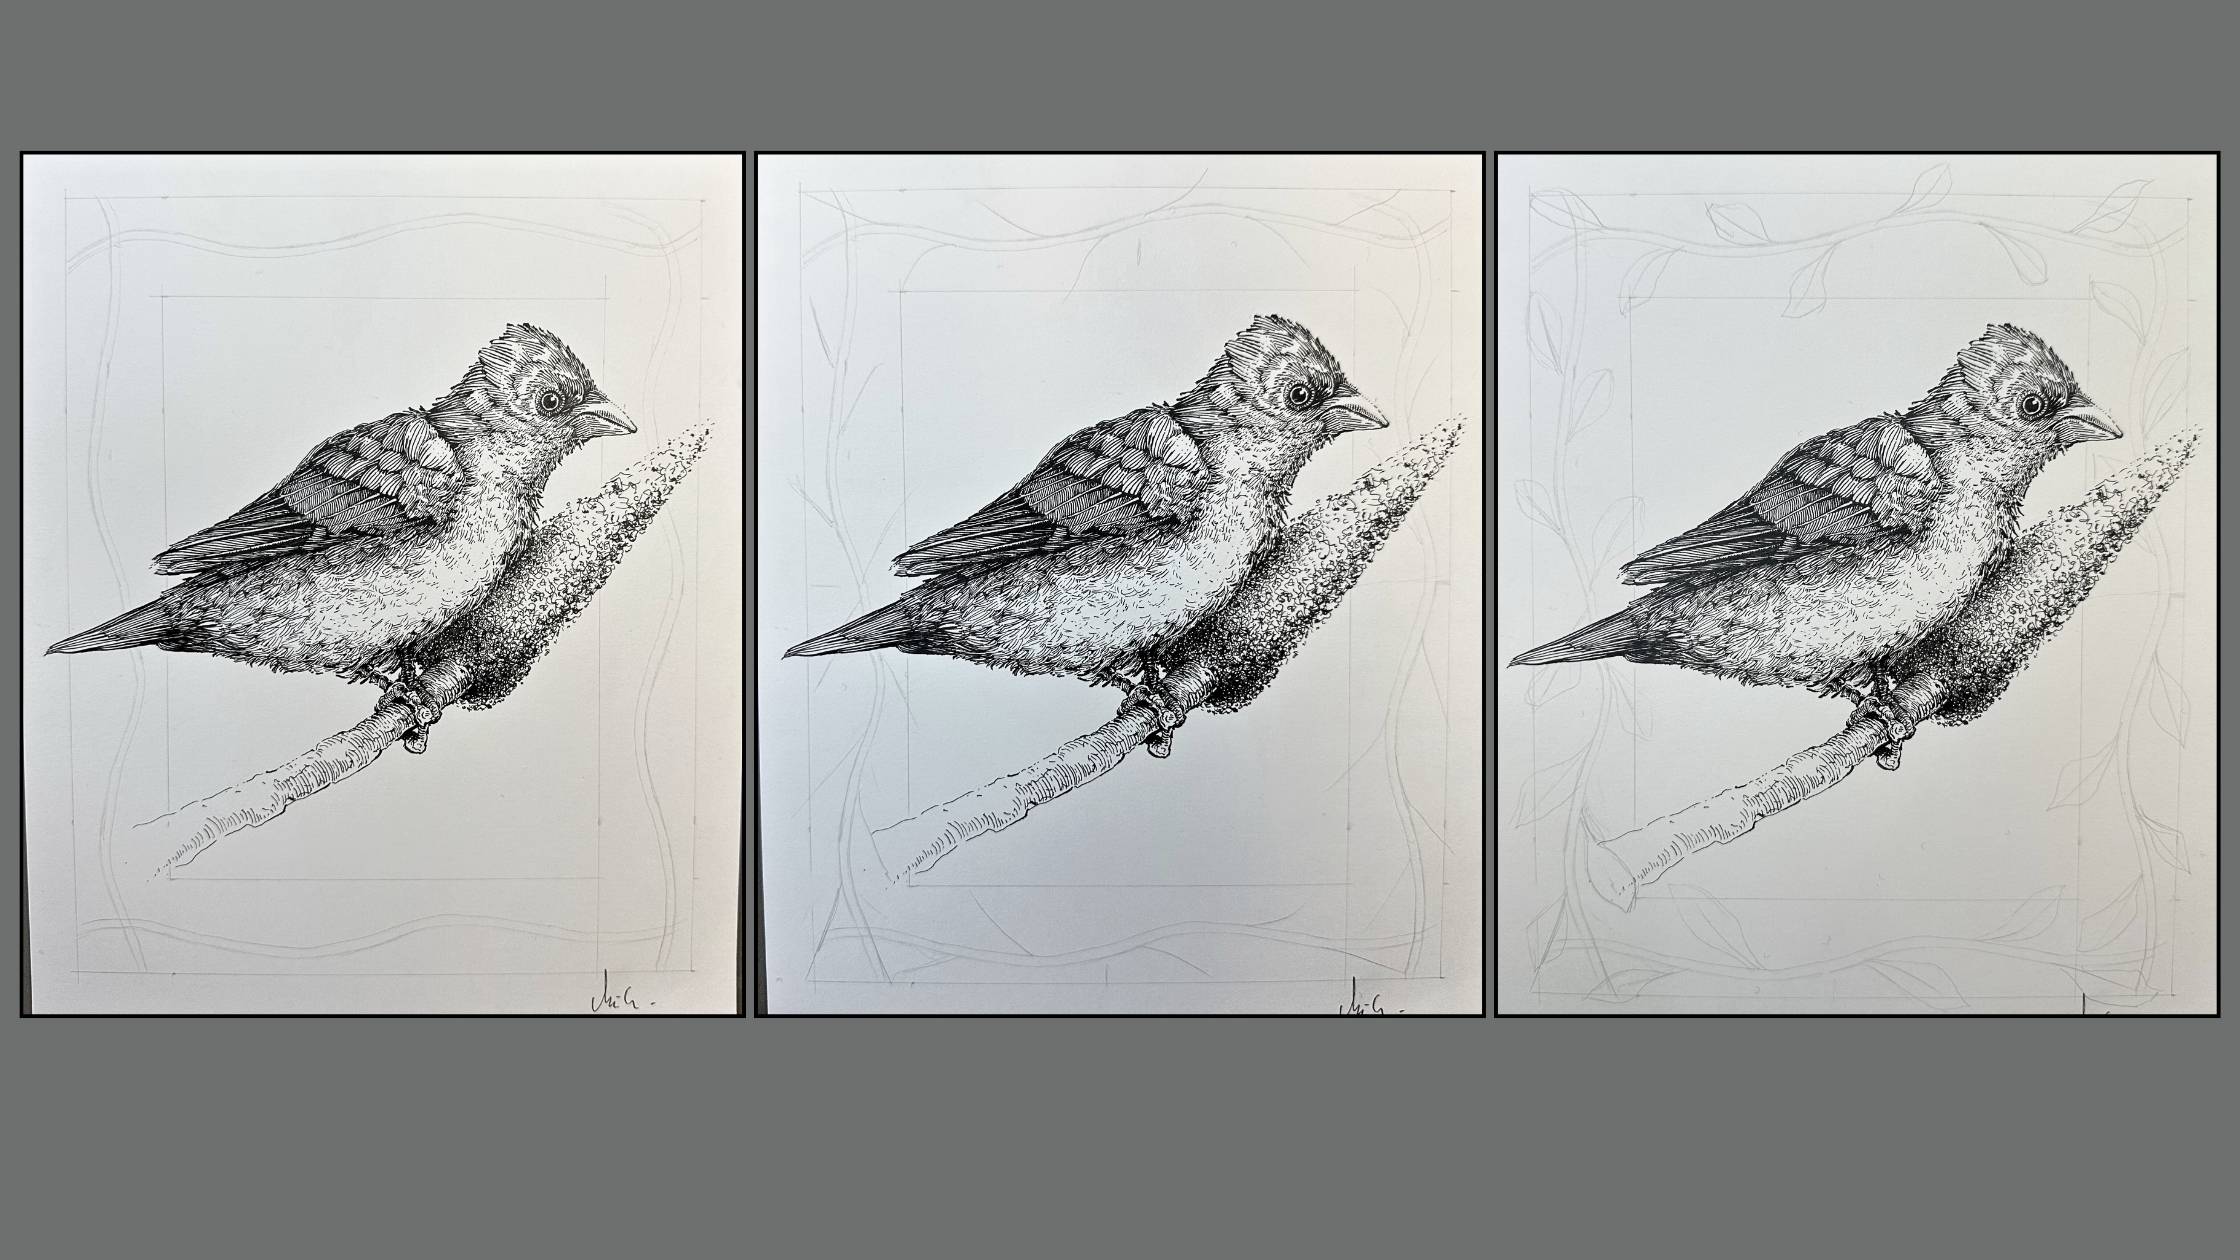
Step 2 – Draw the Border in Pencil
Using a ruler and light pressure on your pencil, draw a one-inch border (2.54 cm), half an inch (1.27 cm) from the edges of your Bristol inking paper.
Draw the Vine
Draw a curvy line, roughly in the centre of the border boundaries from top to bottom. Aim for a smooth and silky line, not bumpy.
Pair your silky line parallel with another to create a vine.
Add Leaves to the Vine
Leaf stems will go on the vine first, then the leaf outlines.
Mark the halfway points, (the middle of the picture plane) with a light dash.
Starting from the top of the border, moving towards the bottom, add the leaf stems. Stagger the leaf stems in an upward direction until you reach that centre mark, then flip the stems to a downward direction.
Don’t draw too many. Reserve free space between the stems to fit the other elements.
Refer to the designs you previously sketched to draw leaf shape outlines onto the stems. Keep your drawing loose and the shapes varied to best reflect your designs.
Keep the pressure light on your pencil so as not to dent or scar the paper. Damage to the paper surface will later interfere with the quality of your ink application.
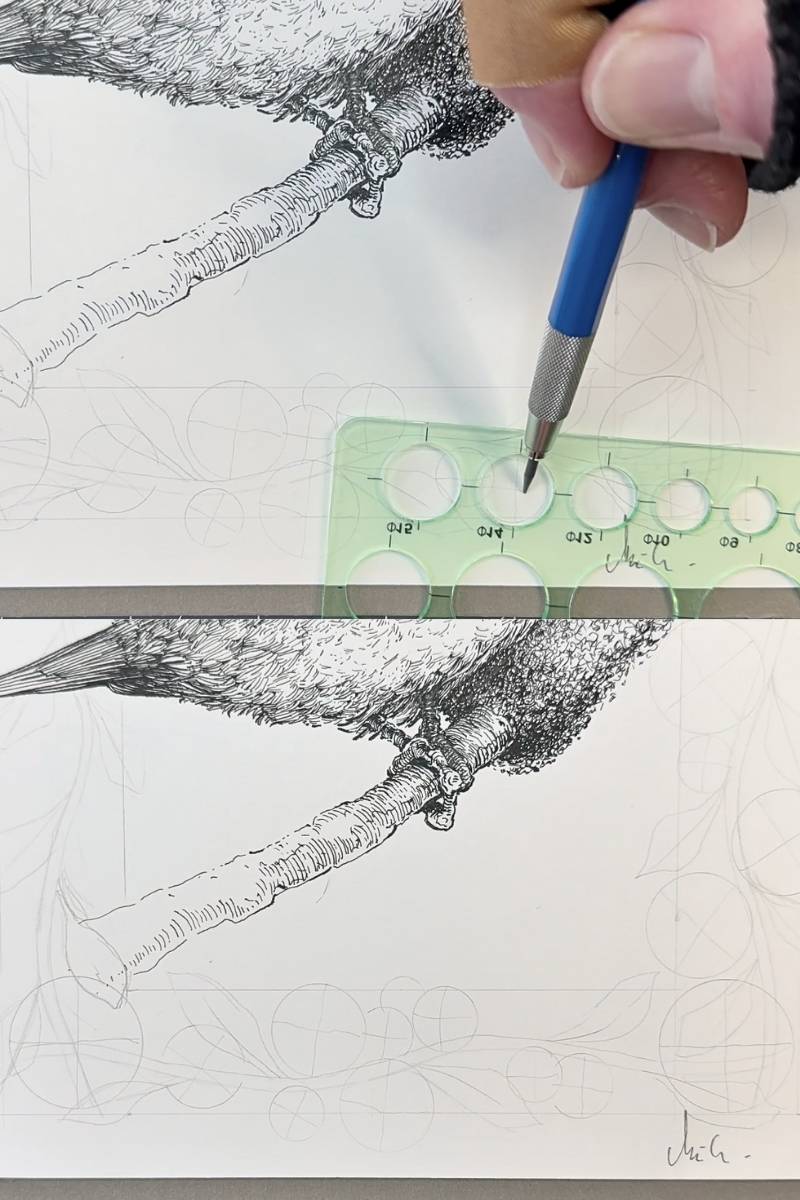
Arrange Flowers on the Vine
Now we will arrange florals and bouquets to the vine.
Using the stencil template, draw a circle at each corner of your border. Remember to also divide in quarters each circle as you draw them.
Continue to add various size circles on the vine, starting from big to medium circles as you fill the remaining space on the vine, within the border boundaries.
Group some of the circles to create a bouquet effect. Imagine the elements are growing from the vine. They would naturally overlap and intertwine.
We’re not yet concerned about how the elements are overlapping, meaning which sits above or beneath. We’ll sort that out later. At this point, your pencil drawing will have crisscrossing lines as you add elements to the composition.
Once you’re satisfied with the placement of your circles. Add smaller circles in each flower centre.
Adorn with Butterflies
Position two circles for the butterflies on the opposing, inside corners of the border, above and below the subject. Use those circles as guides to draw in your butterflies.
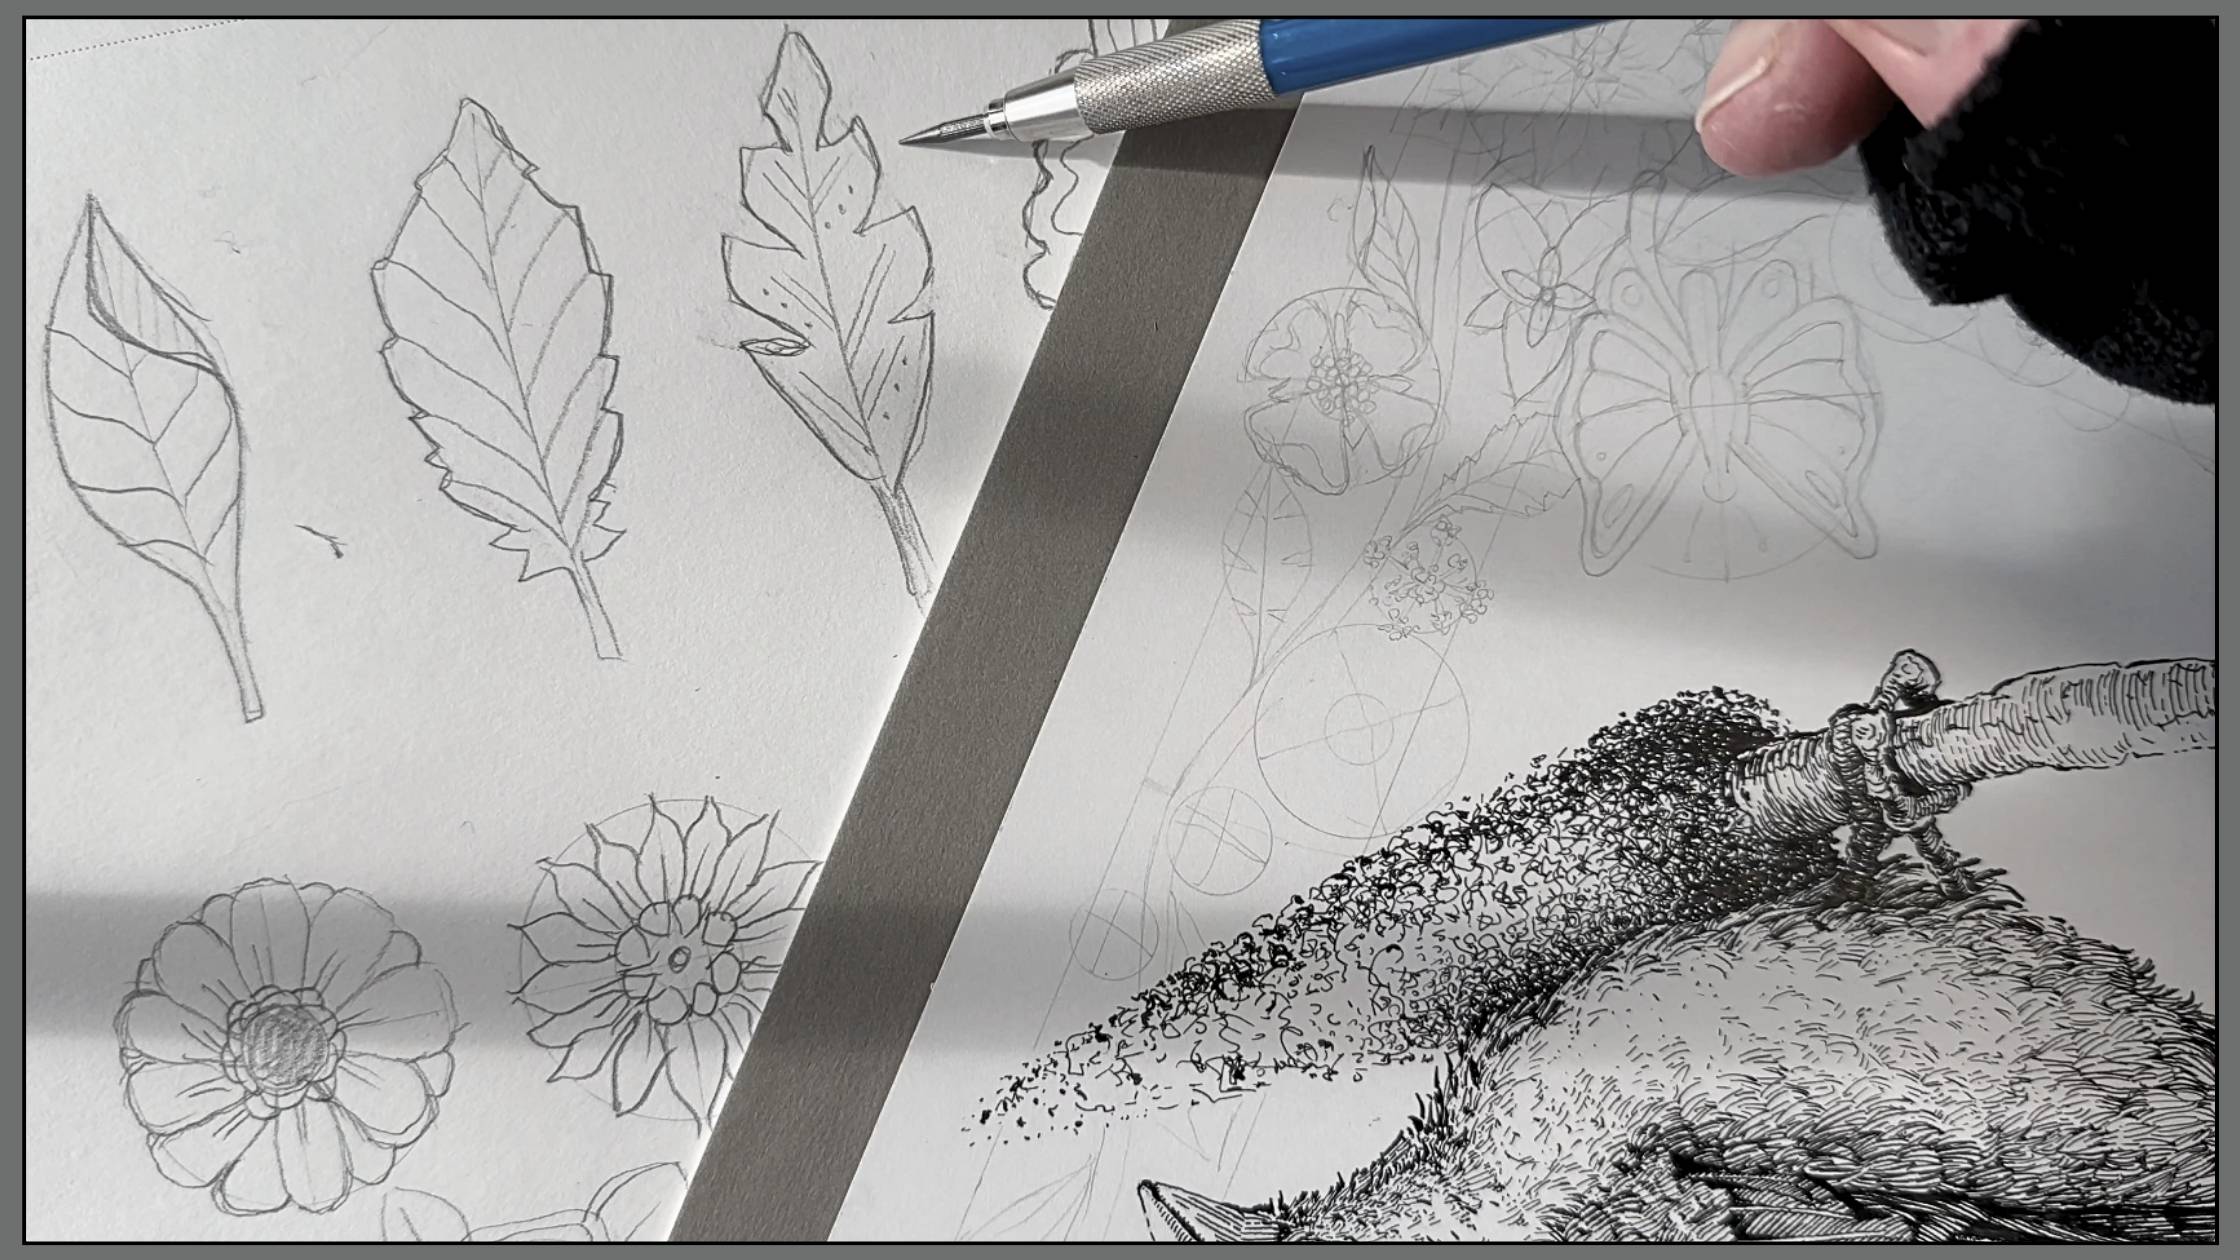
Refine the Pencil Drawing
It’s time to refine your pencil drawing.
Proceed to draw details for the leaves and flowers. This part is efficient since we’ve already sketched the designs as a guideline. Simply follow your plan.
Decide which elements will be on top and underneath to achieve a lively arrangement. For example, a few of the flowers can go under the leaves.
Erase criss-crossing lines (as best you can), for the elements that are on top. Then re-emphasize what you’ve chosen to overlap by gently going over those strokes in pencil. Continue to keep a light touch to safeguard the paper surface.
Decorate with Ornaments
To make the piece look extra special, we’ll balance gaps in the border by judiciously decorating with ornamental:
- Thorns to the vine
- Mini circles
- Half-moon crescents
Step 3 – Ink your Wondrous Border
Begin inking your wondrous border illustration from top to bottom of the picture plane.
Start with a corner flower. Ink the elements that sit on the top layer of the border composition first.
If you are right-handed, ink the elements inside the border from left to right as you make your way down the picture plane. This helps prevent smears.
I’m using a Speedball Hunt 512 dip pen with Speedball Super Black India ink on Strathmore Bristol smooth paper.
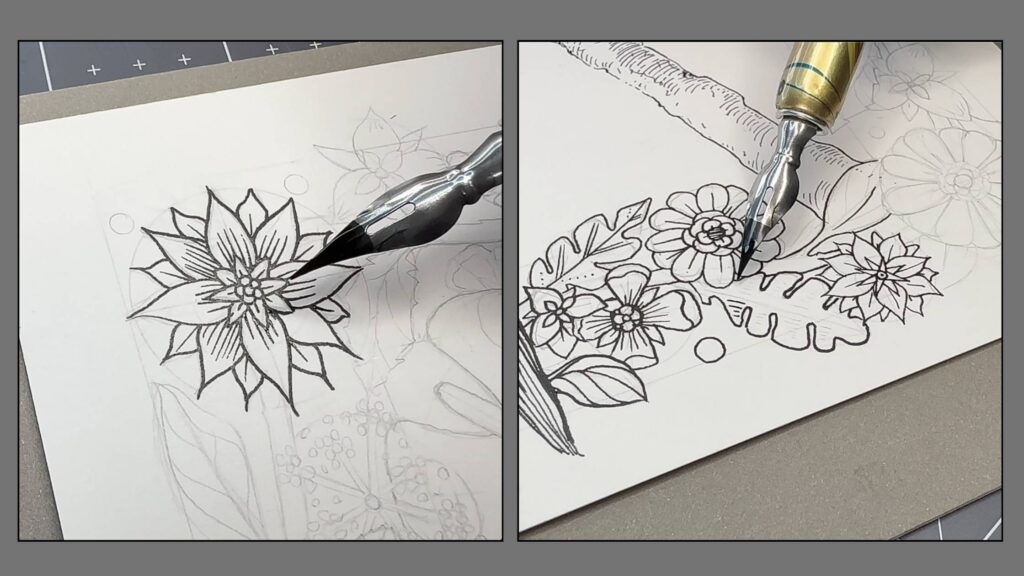
If you’re inking with fine liner pens, use a medium-sized tip, like a 03 or 05 to outline this design. With the option to switch to a 02 or 01 for the embellishing details inside the elements.
Take your time and enjoy the process.
Once you’ve completed the ink application, we’ll make our final design pop by rendering a background texture.
Add a Background Texture
The background texture consists of evenly spaced lines of equal weight. I’ve switched to a Crow quill 102 nib, equivalent to a size 01 tip if you’re using fine-liner pens. Render the lines in a diagonal direction, within the 1-inch border guidelines.
How to Fix a Mistake
Despite training and plans in place, mistakes can still happen.
It’s best not to push the pace with ink in hand. Take your time. Periodically take a step back to double-check that your inking is going as planned.
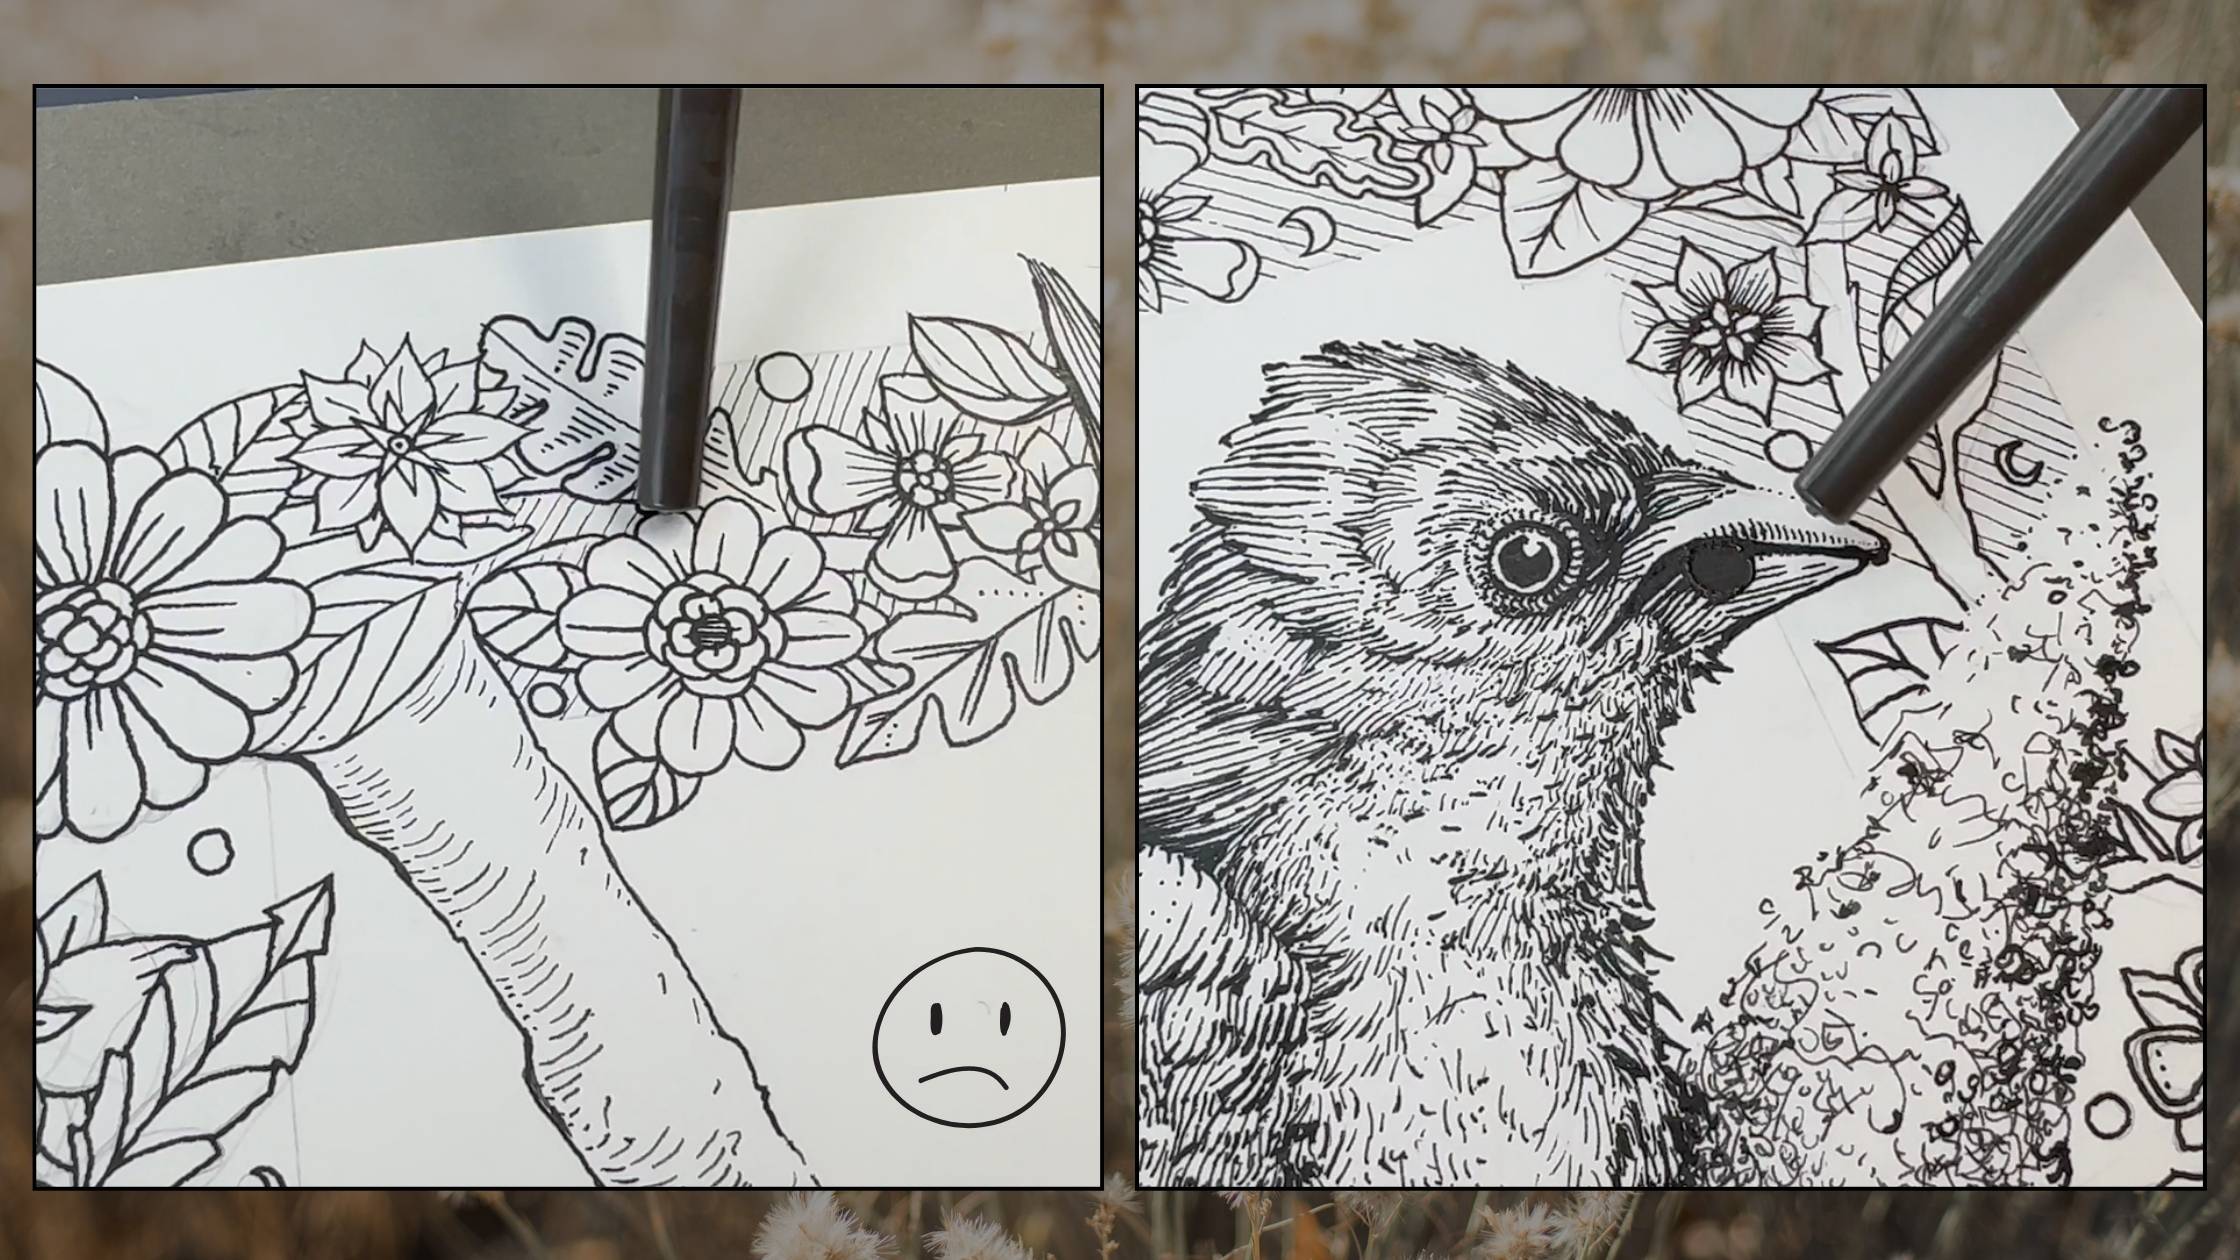
I blundered a couple of times while inking the piece.
Some of the background texture ended up on a portion of the vine by error. Then, a drop of ink accidentally leaked from my Crow quill and landed on the bird’s beak.
When mistakes happen, it means I’m rushing or getting tired. So, I take a break.
Whiteout as cover-up doesn’t look good on original artwork. Whiteout only works well if you intend to scan the artwork, either to make prints from the illustration or to share art online.
One solution is to add additional marks in the blunder area.
For the vine, the rendering mistake is subtle and blends as though it was intentional. The blob repair on the bird’s beak gave a disappointing result, however, the risk is what’s exhilarating about drawing traditionally with pen and ink.
Add Colour to the Border
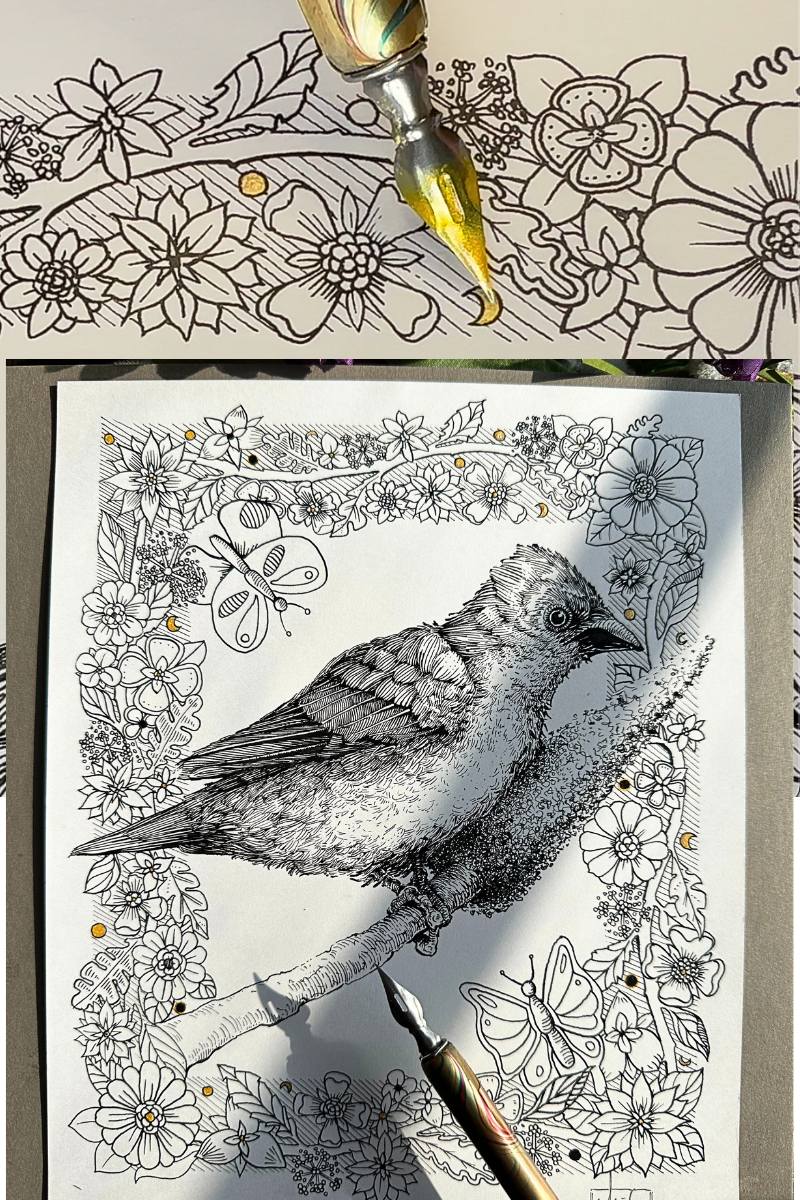
Do you want to add a dash of colour to your border?
I used Speedball’s acrylic, water-resistant gold ink to accent the ornaments.
Whatever colour medium you have on hand will work for small spots of colour. If you’re thinking of doing a more fulsome colour treatment to your border, use a medium that will mix well with the type of ink you have used (pigment-based, waterproof?).
To learn more about it, read this Mixed Media Inks blog article by Altenew.
Once the ink has dried, erase the pencil lines from your design.
Congrats!
I hope that you enjoyed this 3-step process to draw a wondrous border in pen and ink. If you did, leave a comment and feel free to Pin or share the article with other pen and ink enthusiasts.
Resources
Explore the additional resources and list of supplies below for your next pen and ink project.
Step-by-step drawing of a bird with dip pen and ink (Video)
Johanna Basford (Motifs Book Series)
Kerby Rosanes (Motifs Book Series)
Wildflower Designs and Motifs (Book)
You’ll have endless possibilities by combining border themes:
- Flowers, plants, trees
- Fruit, nuts, garden veggies
- Animals, insects, creatures
- Forest, ocean, mountains, desert
- Natural elements (sun, moon, stars, seashells)
- Objects (hearts, boats, architecture)
- Magical/fantasy (faeries, cherubs, gargoyles)
- Decorative Ornaments (cultural, historical)
🎨 TOOLS, MATERIALS and SUPPLIES ↓↓↓
Strathmore 400 Sketch fine tooth
Staedtler Mars Technico Lead Holder
Strathmore 300 Bristol Smooth 9×12
Stainless steel ruler, 12-inch/30cm
Speedball Hunt 512 bowl nib 2pc
Speedball super black India ink 2oz
Speedball Color Pigmented Acrylic Ink Set
29.5″ x 19.75″ Adjustable Tabletop Easel

You can take my dip pen class for free on Skillshare with a 30-day trial (and have access to all their courses). Or own it forever, when you purchase my course from Udemy.

