Ways to draw together remotely
Walden lives in the US and I’m based in Canada. We both worked on this Sandman illustration using traditional mediums but achieved our final goal remotely through digital means.

In this article, I share tips on how to do an art collaboration, as I talk about my Sandman collab with professional comic artist Walden Wong.
We’ll look at:
Disclosure: Some of the links on this page are affiliate links. I earn a reward or small commission when you use those links at no cost to you. Read more about the Affiliate Disclosure on the Terms page.
What’s an art collab?
An art collaboration is a project completed by multiple artists. We each contribute to the same art piece.
3 common ways to do an art collab
Popular ways to do an artist collaboration are to:
- Add a layer
- Build together
- Cross-pollinate
Collab 01 – Add a layer
The most common collaboration is when each artist adds a component or a layer to a main art piece. For example, in the comic book industry in North America, as part of a huge team, it is common to have at least a dedicated:
- Penciller
- Inker
- Colourist
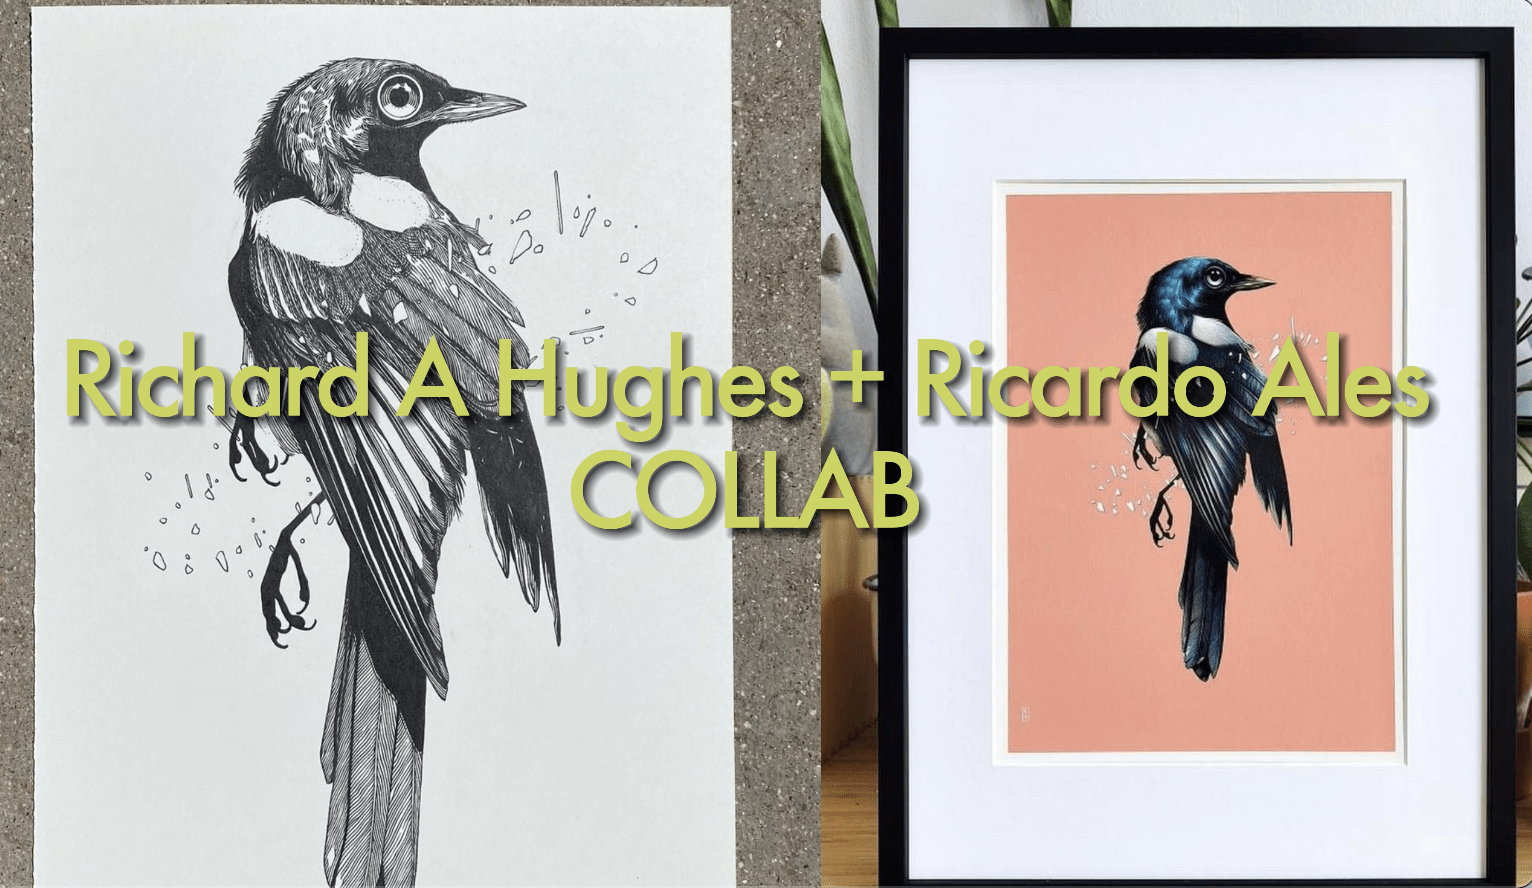
Using acrylics, Richard A Hughes coloured one of Ricardo Ales’ pen and ink illustrations:
Collab 02 – Build together
Another way is for one artist to complete a piece from start to finish leaving space on the picture plane for another artist to add to the composition, thus building the scene together.
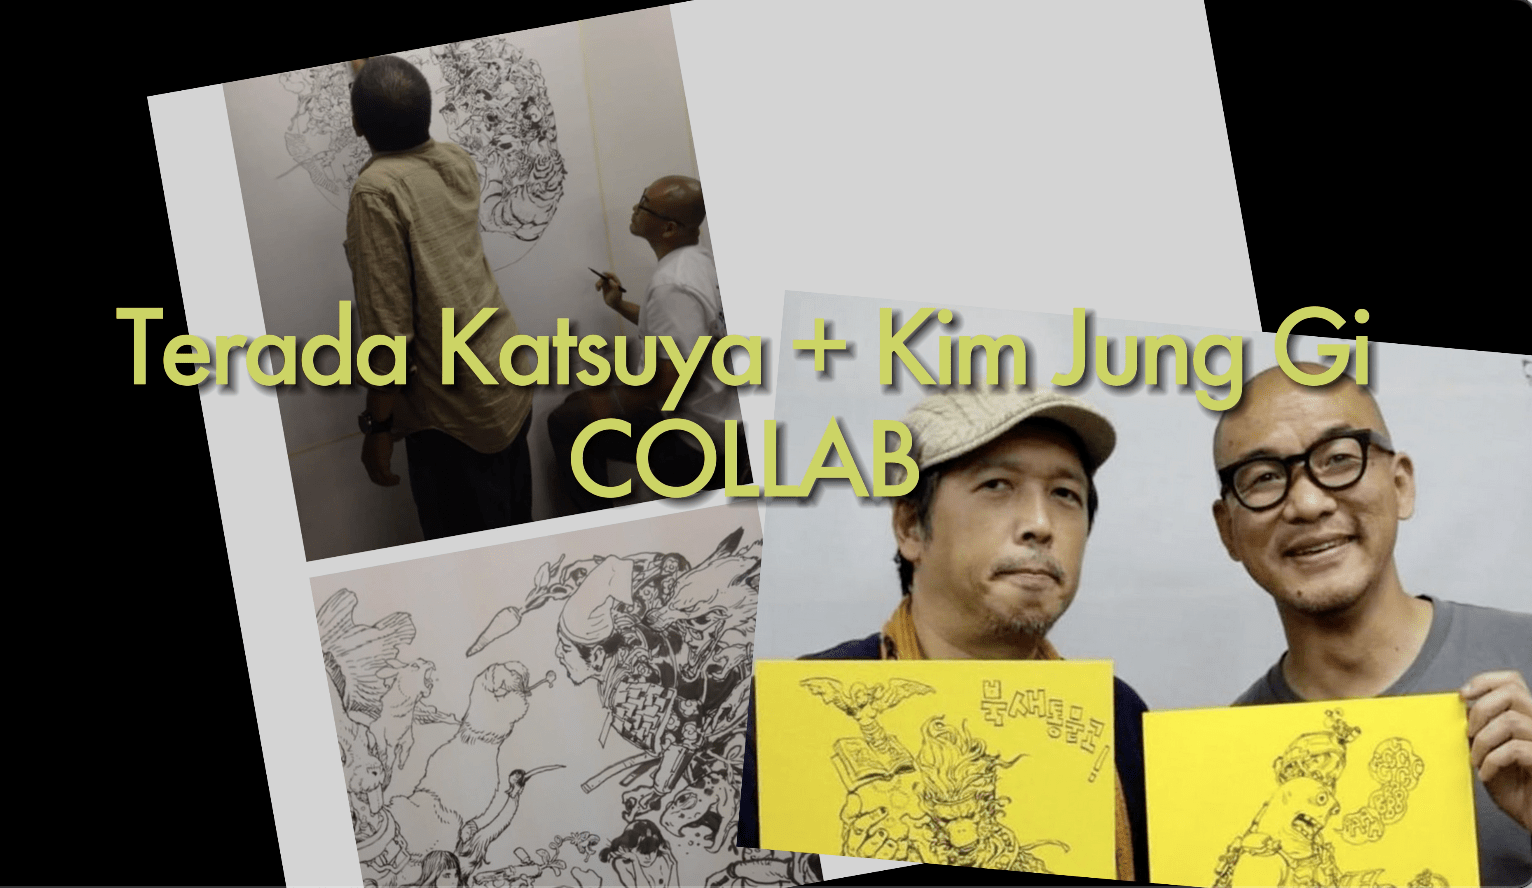
This can be done remotely, though probably quite energizing to draw together in person. A famous in-person collaboration that comes to mind is of great masters Kim Jung Gi and Terada Katsuya working side by side on a painting as a tribute to Jean Giraud (Mœbius).
Collab 03 – Cross-pollinate
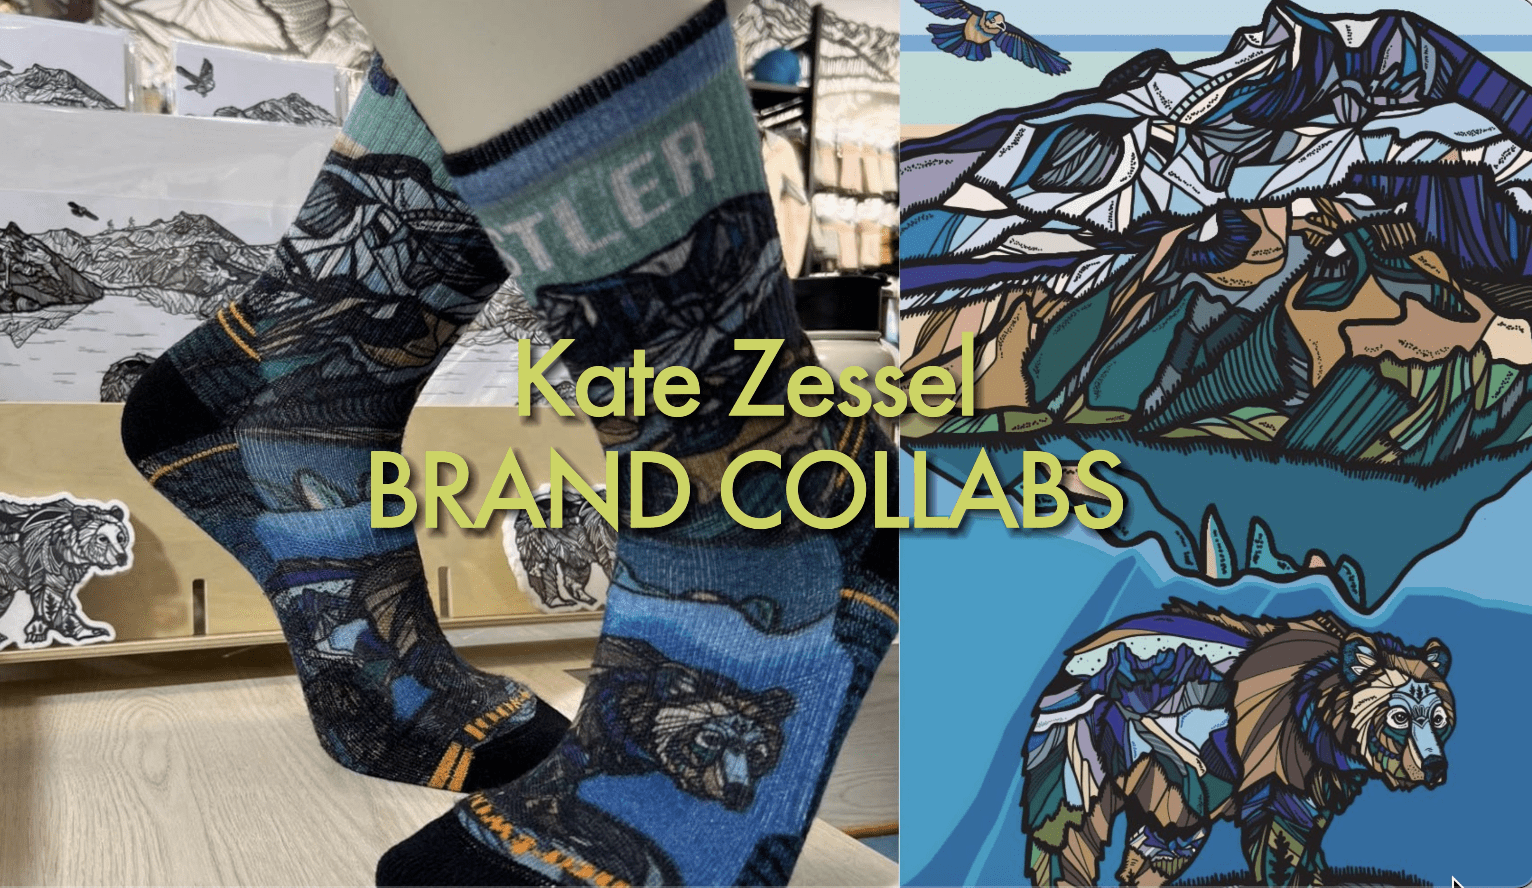
Another approach we often see is when a visual artist collaborates with a writer, musician, or brand to create something unique for their fans.
Benefits of doing an artist collab
The terms of agreement for an art collab can be purely intrinsic or for monetary value.
The three main benefits of working with another artist for intrinsic value are that it can:
- Increase your knowledge;
- Ignite fresh ideas, and;
- Boost fan engagement.
Benefit 01 – Increase knowledge
When you team up on a creative project with another artist, you trade tips on your approach to doing the collab, as well on your:
- workflow methods
- techniques
- style
- tools, materials
… and so on. You learn a lot.
Walden Wong has a wealth of experience collaborating remotely with other artists. He’s worked on high-profile projects with major studios, including Marvel, DC, Dark Horse, and more.
I’ve worked remotely with art directors, writers, and graphic designers but never with a pro inker, so I was keen to learn the tricks of his trade.
I knew that teaming up with Walden would make me a better artist. I definitely took some notes throughout our process. You can read about my lessons learned further in this article.
Benefit 02 – Ignite fresh ideas
Seeing collective ideas come to life can inspire more collaborations. It’s exciting to see the results of collabs and this naturally ignites more creativity.
It can broaden your contacts and exposure for your art, opening opportunities for:
- commission work
- paid partnerships
- invitations from art galleries
- attracting a great mentor
- taking part in super interesting projects
Benefit 03 – Boost fan engagement
Many social media platforms make it easy with built-in collaboration features. For my collab with Walden, we happen to also be working with a brand, using Speedball Art products to create our piece, which made it a 3-way collab on our Instagram feeds.
Whether you’re collaborating with a peer or a company, from my experience, it’s best to discuss the terms of agreement up-front to avoid a potentially awkward conversation after the fact.
Terms of Agreement
This is a complex legal topic and not my area of expertise, though I do advise discussing the conditions of your agreement.
It’s customary for an artist to retain copyrights to their artwork but what happens when it’s created as part of a team? Are you collaborating solely for personal growth or will you be selling the products of your co-creation?
What happens to the artwork?
Whether it’s intended for your portfolio or as a fun keepsake, here are other standard avenues for your co-created artwork:
Collab with a peer
- Donate or give away
- Raffle off for a charity or cause
- Split revenue from sales
Partner with a brand
- Sell usage rights for a flat fee
- Sell royalty % for a term (e.g.: 2 years)
- Exchange for swag
For my three-way collab with Walden and Speedball Art, we received free products to demo. So, we had an ‘exchange for swag’ agreement with a brand partner.
Since Walden and I each ended up with an original piece, we agreed to share the praise but keep 100% of whatever revenue we generated from our separate sales efforts.
Had there been a single piece of art created from our collab, we might have discussed revenue split options.
Keep in mind that it’s reasonable to also factor in the hours of labour required to publish, reproduce, promote, and market a piece of artwork. This can shift the revenue split percentage in favour of who agrees to invest the most energy into the profit-generating component of a collab agreement.
Monetary value can quickly complicate a collab, and so a lot of artists opt for the “friendly-exchange” conditions of terms.
The key to a good collaboration
You may or may not know each other outside of social media.
I’m a fan of Walden’s work from watching his YouTube channel, but we’ve never met in person. I commented on one of his posts about a collab, and lucky for me he agreed it would be fun.
I asked Richard how his collaboration with Ricardo came about:
“We had been following each other for a while and I enjoyed his work – it felt similar to mine but in a different medium. I just decided to DM and ask if he’d be interested in me painting one of his designs. I chose a piece we were both happy with and it was a really enjoyable challenge. The feedback was really rewarding.”
– Richard A Hughes
Whether there’s an established relationship or not, the key for this process to go well is clear communication.
With Walden being in a different time zone, it was easier with our schedules to communicate by direct messages on Instagram and by email.
Since Walden and I would be creating artwork from scratch, we discussed the direction for the piece.
This included:
- Subject, format, medium
- Who would do what, how, and by when
For the subject, we liked The Sandman story because it would showcase our specialties combining ravens for me and a character for Walden.
Our medium is pen and ink. Walden is versatile but I work primarily with dip pens and brushes, so we settled on doing the piece traditionally using our Speedball products.
BTW: you’ll find a list of the art supplies that I used on this project in the RESOURCES section further below. ↓↓↓
We leveraged digital tools to facilitate working remotely within a fast turnaround to coincide with the October launch of Speedball’s new IG account dedicated to drawing, illustration, and painting.
We opted for a format that fits my scanner which is 8.5×11”.
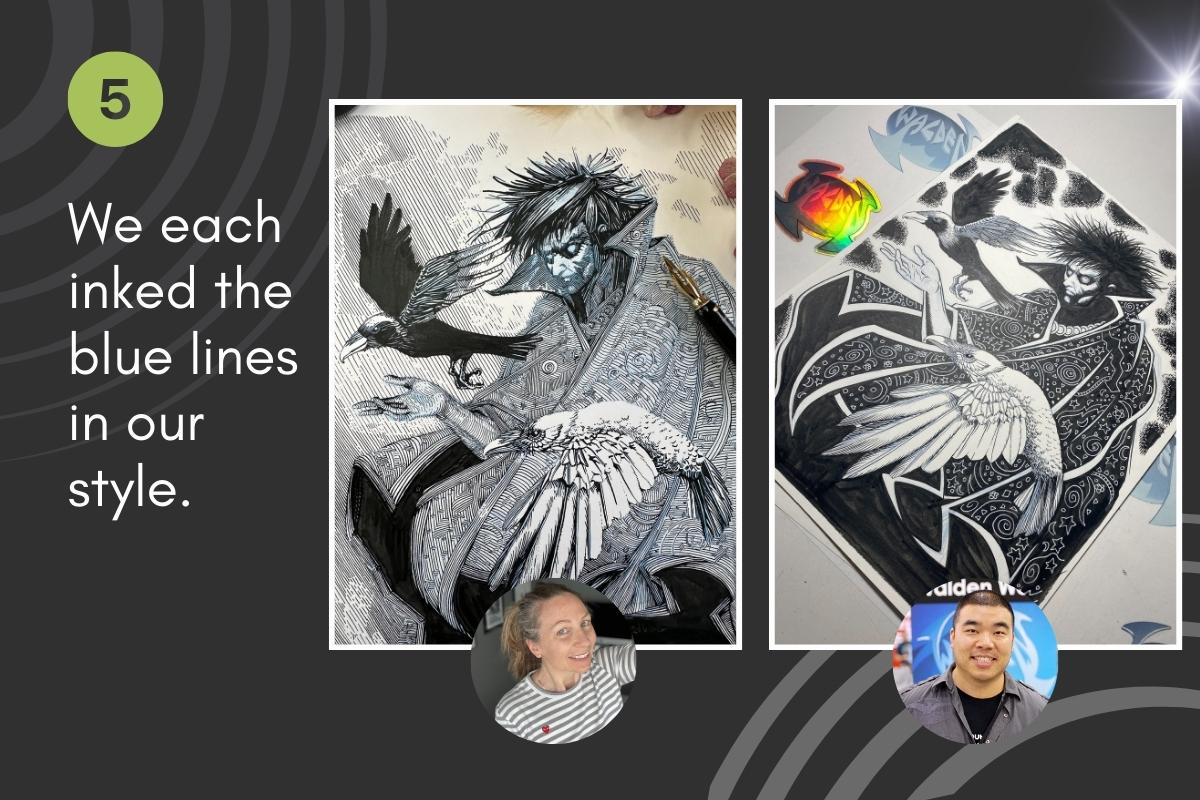
In the end, we have two interpretations of one concept that we created together.
Also, check out my FAQ page for more info on the tools, supplies, and materials that I use in my studio.
The Sandman collab process
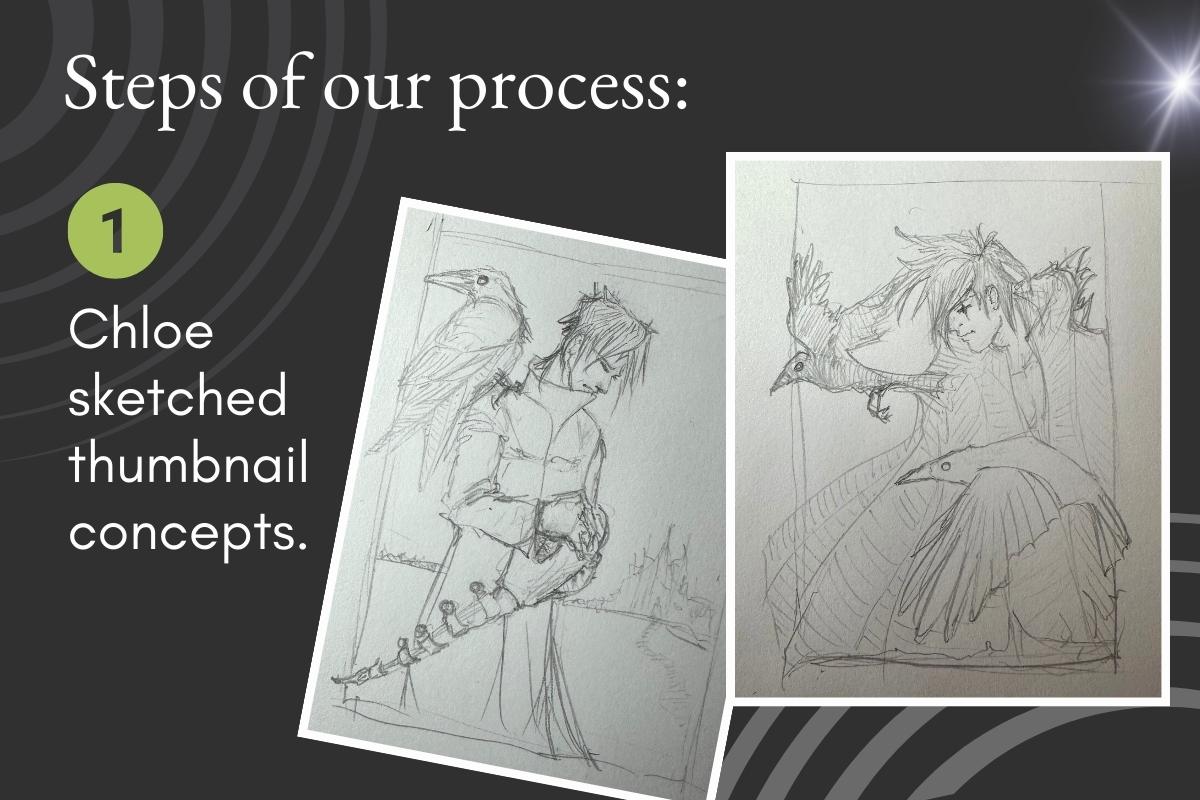
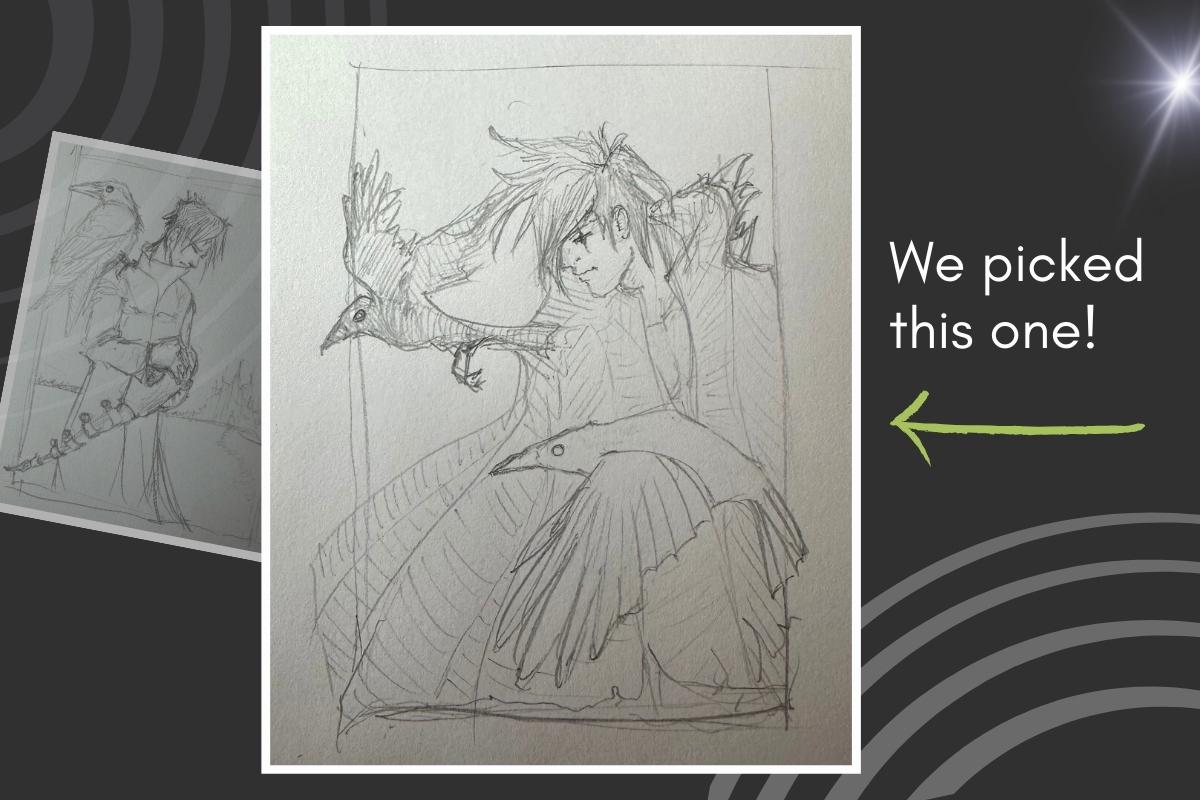
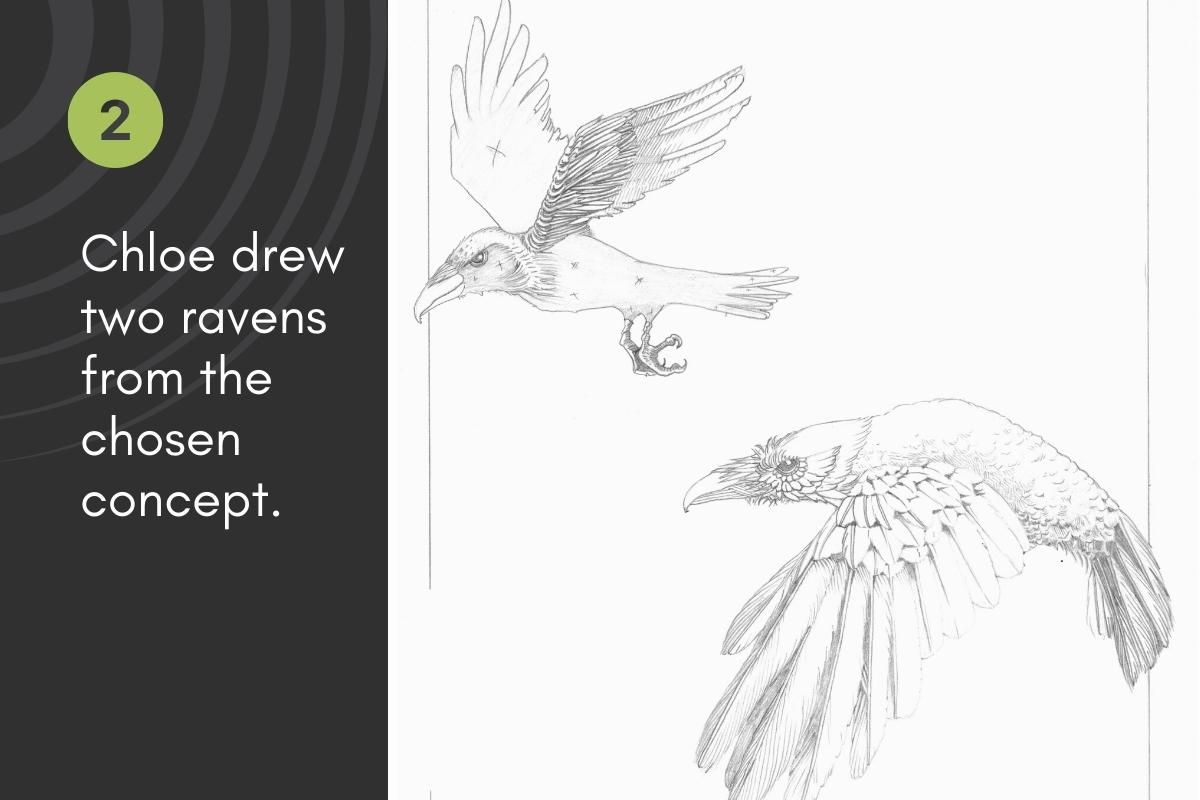
I sketched two thumbnail concepts. We chose one. From that concept, I created two ravens.
I drew the ravens using an H graphite pencil to mark where the ink would go. The white of the paper indicates white and the X’s indicate areas of solid black.
I scanned my pencil drawing as a 600 dpi Tiff file and sent it to Walden. Note that 300 dpi is sufficient for reproduction though for drawing, it’s nice to have higher resolution.
We used the free WeTransfer service to send our large digital files back and forth.
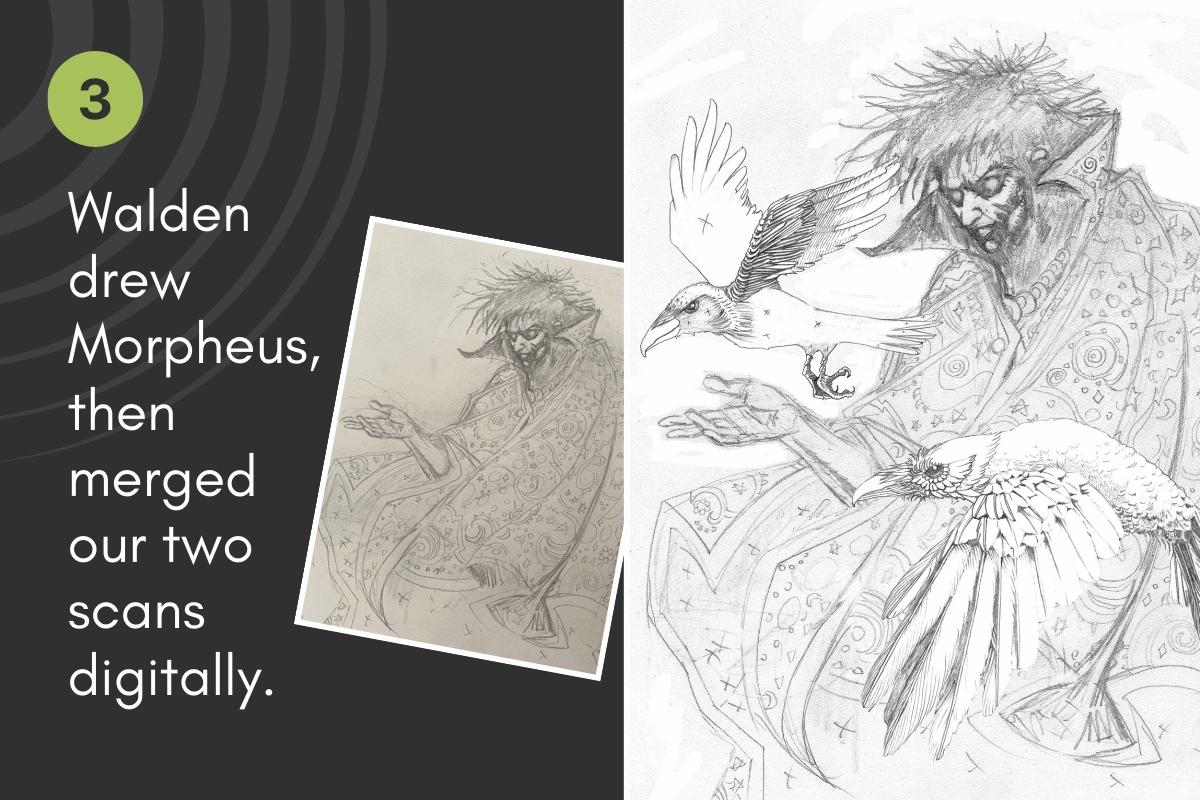
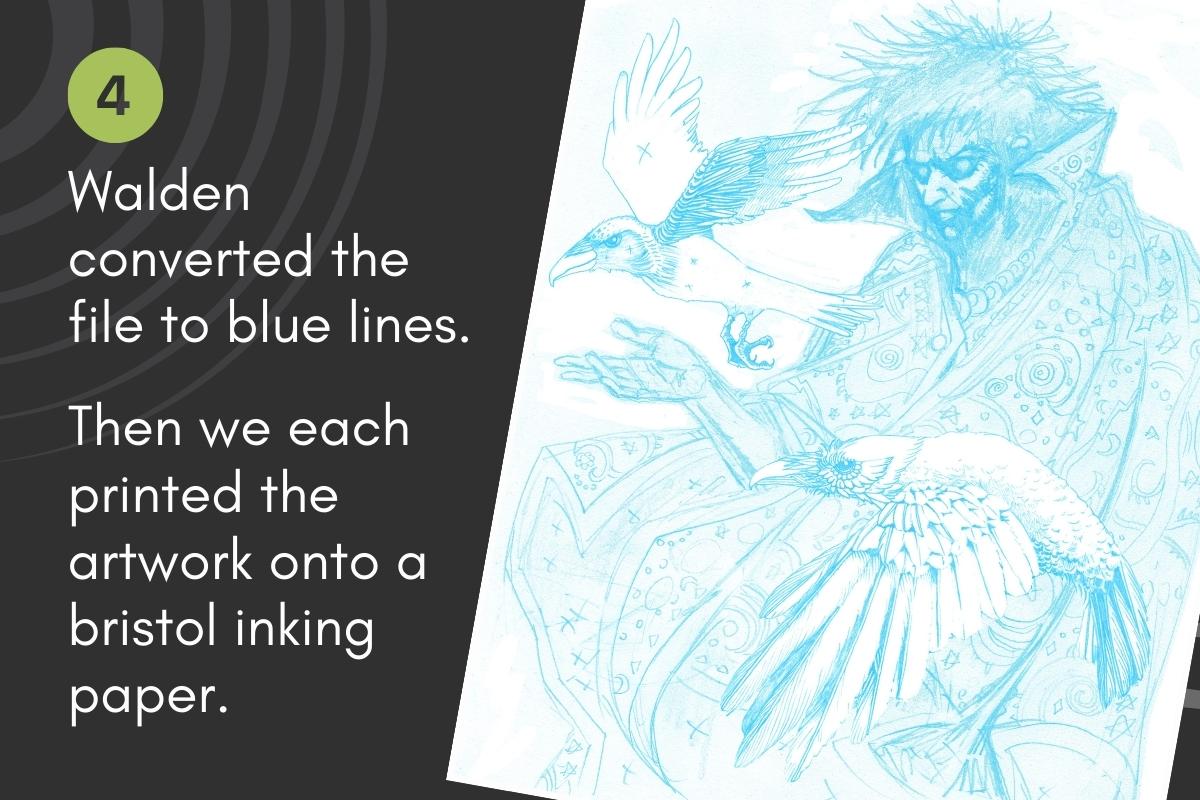
Walden drew the Morpheus character in pencil, merged our two designs, and then converted the file to blue lines in Adobe Photoshop.
Then we each printed the blueline artwork file from our home printers onto a Bristol inking paper. We applied the ink, in our own styles, directly onto the printed blue lines.
At the end, we have two original inked artworks.
By removing the blue lines in Adobe Photoshop, we can reproduce that artwork in black and white. We added our two signatures digitally and I intend to sell prints from my digital version of The Sandman at Comic Conventions.
For the step-by-step on how to create and remove blue lines in Photoshop, you’ll find those links in the RESOURCES section below.
Project highlights and lessons learned
As mentioned earlier, I took notes throughout our process, and below are my reflections on this project.
We discussed alternate ways to execute the artwork and evaluated three options:
Option A – Build together
Using traditional mediums, I would draw and ink the ravens leaving space on the picture plane for the character in the composition, then physically ship that artwork to Walden. Then he would draw and ink Morpheus directly onto the artwork.
The advantage of this is we’d have original artwork without the printed blue lines. The downsides were shipping (time and costs), and we’d have only a single original piece for two artists.
| Advantages | Disadvantages |
| No bluelines on original artwork | Shipping required Only a single original |
Option B – Add a layer
Using traditional mediums, Walden would pencil and ink Morpheus and I would pencil and ink the ravens – each working on our pieces separately. Then we’d scan our respective artworks and merge the composition digitally using Photoshop.
This would have been the quickest. But in the end, we’d have no original artwork, only a digital art collab.
| Advantages | Disadvantages |
| Quick and cheap | No physical original |
Option C – Build together, add a layer, and cross-pollinate
The process that we chose essentially combined all three of the top ways to do an art collab. It was the best scenario for us because it eliminated shipping, plus we got to each keep an original piece.
In addition, this process brought unanticipated benefits that the other options would not have provided.

Process benefit 01
It made me work harder on the pencils.
When I ink my own work, I rush through the underdrawing. I pencil basic contours to map out where the ink will go. The map provides general guidance to indicate changes in plane direction and values but otherwise, the pencil information is sparse.
How would someone else interpret my vague map? Even a pro with all the knowledge and gear would potentially get lost navigating with my map.
The purpose of an underdrawing is to make important decisions prior to the inking stage:
- about the fundamentals (shape, volume, shading, etc.)
- to resolve potential problems
The great Moebius said in an interview that by having a proper pencil drawing he could focus on the artistry of his inking lines rather than on decision-making.
I know by now that my ink application turns out better when I’m more diligent with the underdrawing. Working with Walden helped to solidify this.
Process benefit 02
I got to ink a professional comic artist’s pencils!
Just as I believe that tracing the marks of the Masters is a great way to learn, inking over Walden’s Morpheus was the best practice. I would not have had the chance to ink over Walden’s lines had we opted for the other options.
In addition to the above highlights, the overall benefits of trading knowledge, building on each other’s ideas, boosting fan engagement, and creating a special original piece made this project extremely worthwhile.
I hope that these tips inspired you to reach out to a favourite artist and explore something unique through an art collaboration.
Disclosure: Please note that some of the links below are affiliate links and at no additional cost to you, I’ll earn a commission. See the Terms Page to learn more about my Affiliate Partnerships.
Resources and Supplies
MY GEAR for this project ↓↓↓
Drawing
Inking
Paper
Adjustable Tabletop Easel (large)
Swing Arm Magnifying Desk Lamp
See the tools, supplies, and materials that I use in my studio
Find more tools, plus answers to frequently asked questions (FAQ)
ARTISTS mentioned ↓↓↓
Katsuya Terada + Kim Jung Gi Illustration Works Book
Moebius: The World of Edena – Book by Dark Horse

HOW TO ↓↓↓
How to make blue lines in Photoshop – by Richard Friend
How to print an image as a blue line in Photoshop – by Walden Wong



I am extremely inspired along with your writing skills as smartly as with the structure in your weblog.
Is that this a paid theme or did you modify it yourself?
Anyway keep up the excellent high quality writing, it
is uncommon to look a nice blog like this one today..
Thanks for visiting my blog and the kind words, I appreciate it. This is the Astra Pro theme with Spectra builder. It’s a paid theme, however the free version has a lot of flexibility. It’s made by Brainstorm Force, I watched a lot of their YouTube videos before finally settling on this product and I’m pretty happy with it.