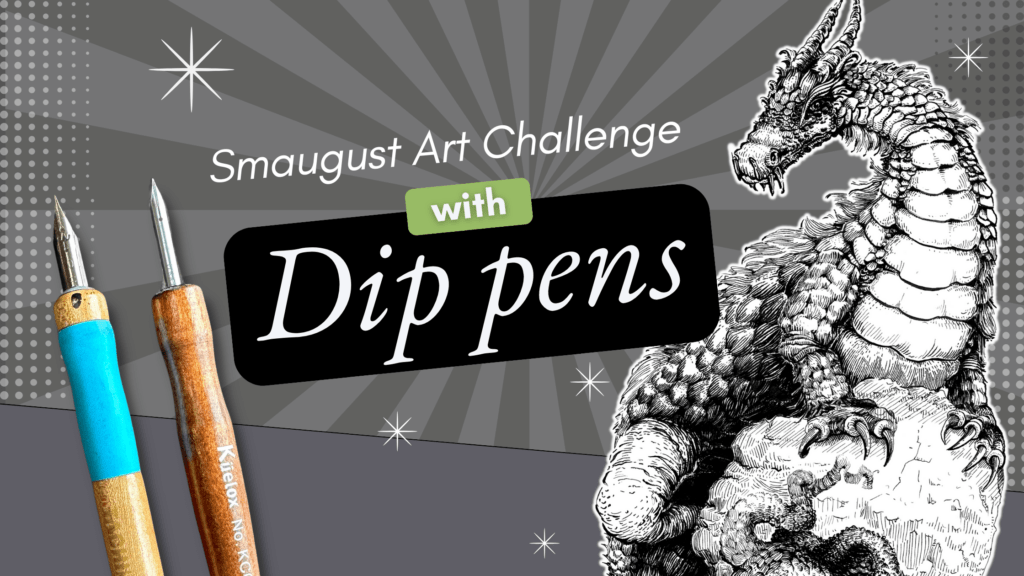
3 exercises to get better at drawing directly to ink
I admire artists who can draw directly to ink without a pencil underdrawing.
I’d like to get better at this, and if you do as well, in this article I share three progressive exercises that will accelerate those skills.
Disclosure: Some of the links on this page are affiliate links. I earn a reward or small commission when you use those links at no cost to you. Read more about the Affiliate Disclosure on the Terms page.
Materials for the exercises
For supplies, I’m using:
- Inexpensive sketching paper
- An inking pen
- A timer or stopwatch of some kind
- Three small boxes of different dimensions
- Quick Poses Tool
Exercise 01 – Lines, eggs, and faces
Duration: 3 intervals of 5 minutes
Helps with: Stroke technique and faces
Level: Beginner

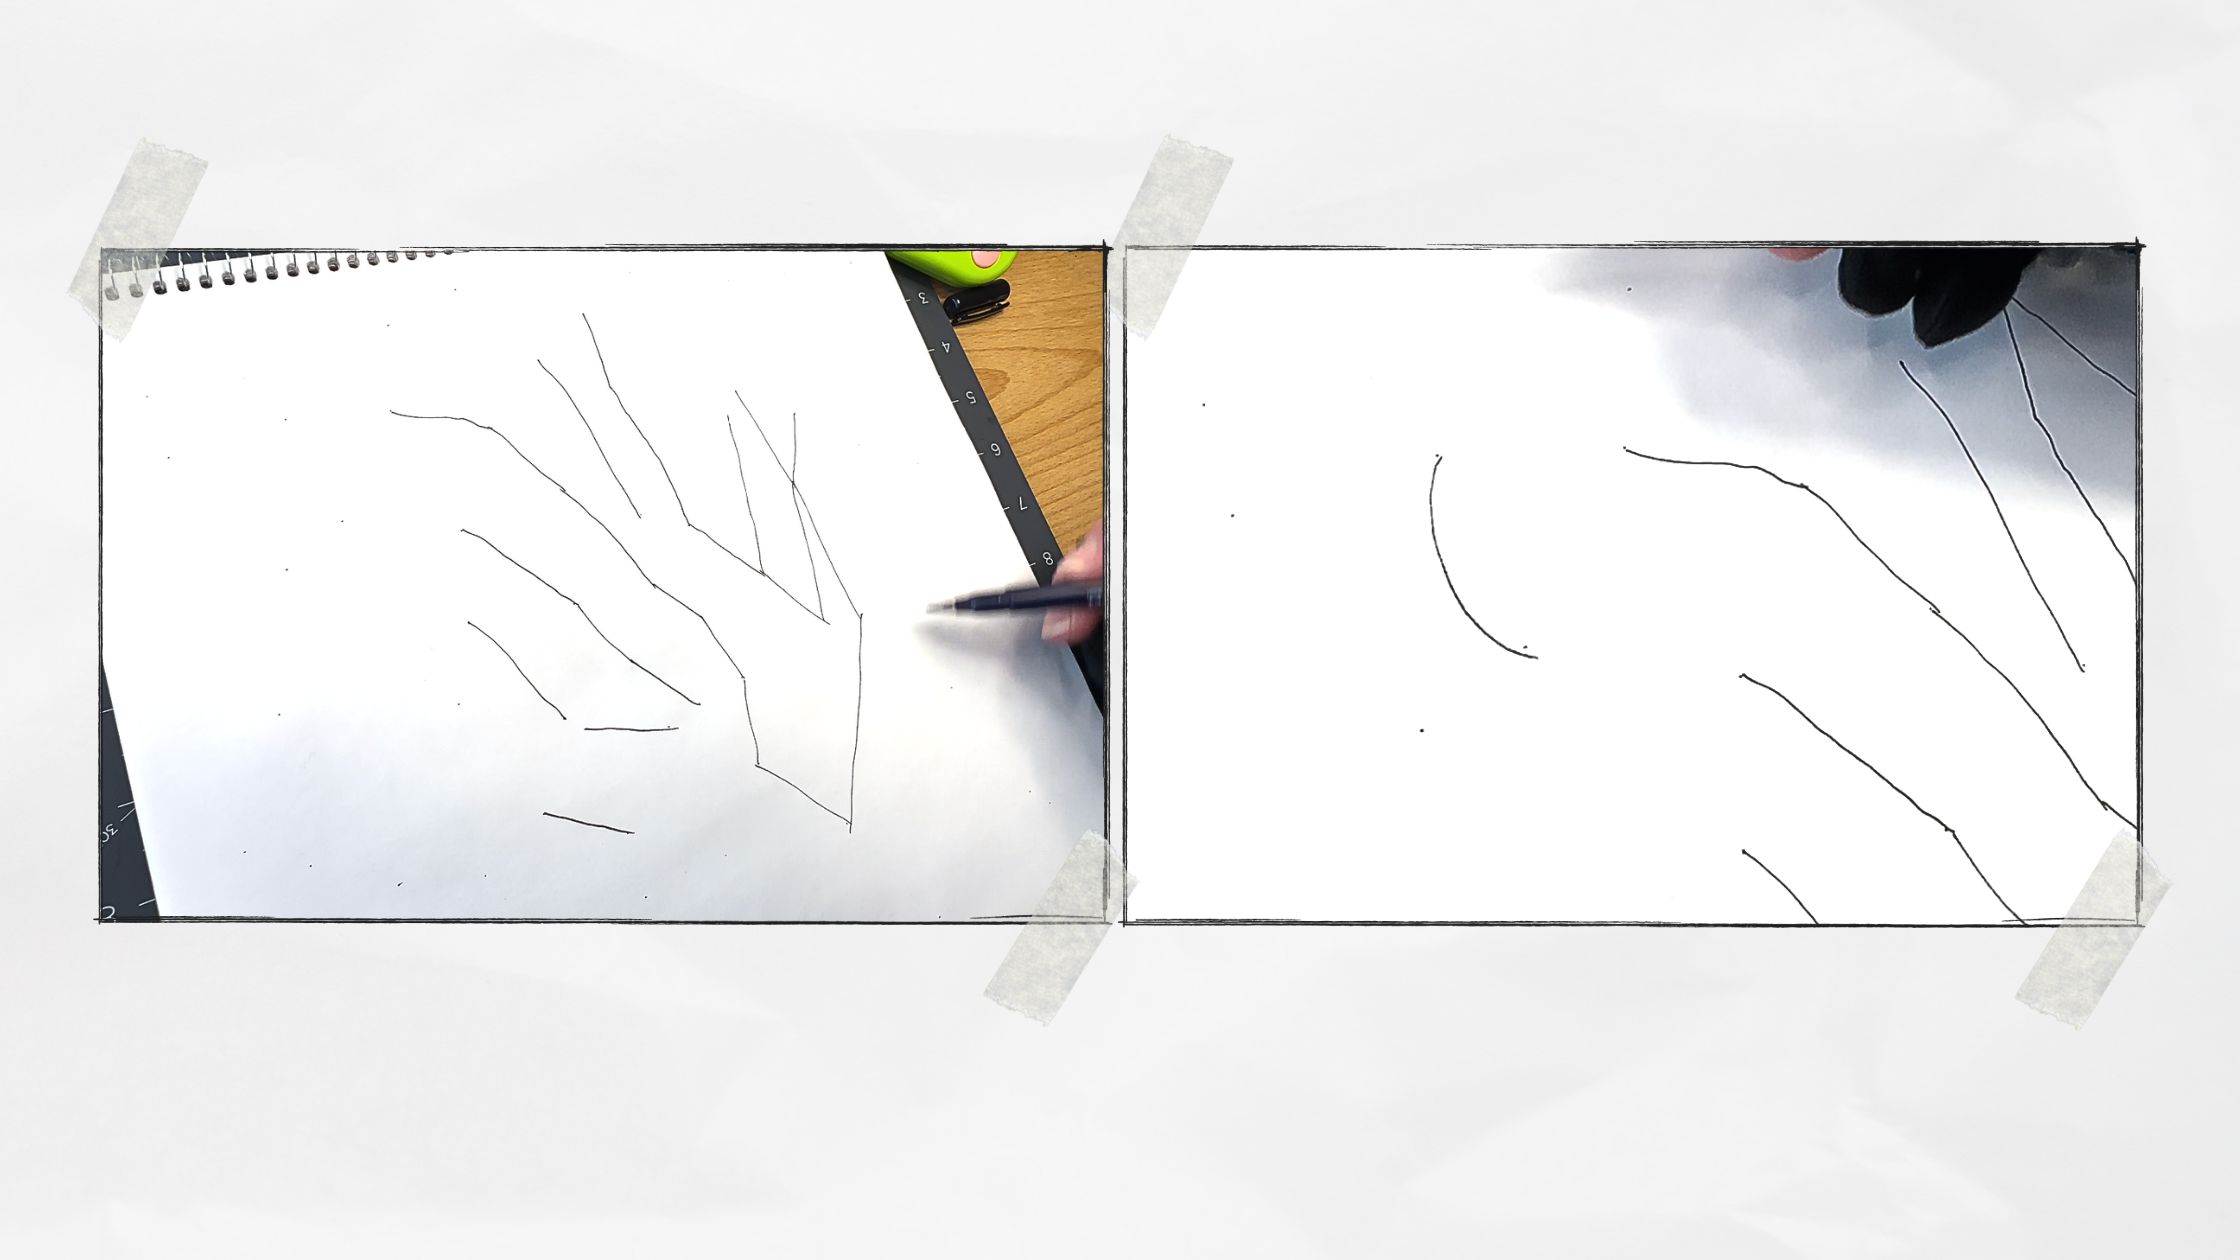
Interval I
Draw many dots, randomly spaced on your paper.
Set your timer to 5 mins. Press start.
Connect the dots with a series of straight lines of different lengths. There’s no particular pattern. Just join dots with straight lines, in any direction.
The trick is to keep your eyes on the dot you’re aiming for.
You’ll notice your lines become smoother as you go along.
Midway, at the 3.5-minute mark, switch to curved lines. Keep connecting the dots using curved lines.
Fill the page. Add more dots if needed. Continue with curved lines until the 5 minutes is up.
Interval II
On a new page, with the timer set to 5 minutes, press start.
Draw a series of egg-shaped ovals.
Be speedy but aim to close the loops. Avoid crossing lines or leaving a gap in the ovals.
The trick is to start fast, then slow down to connect the gap.
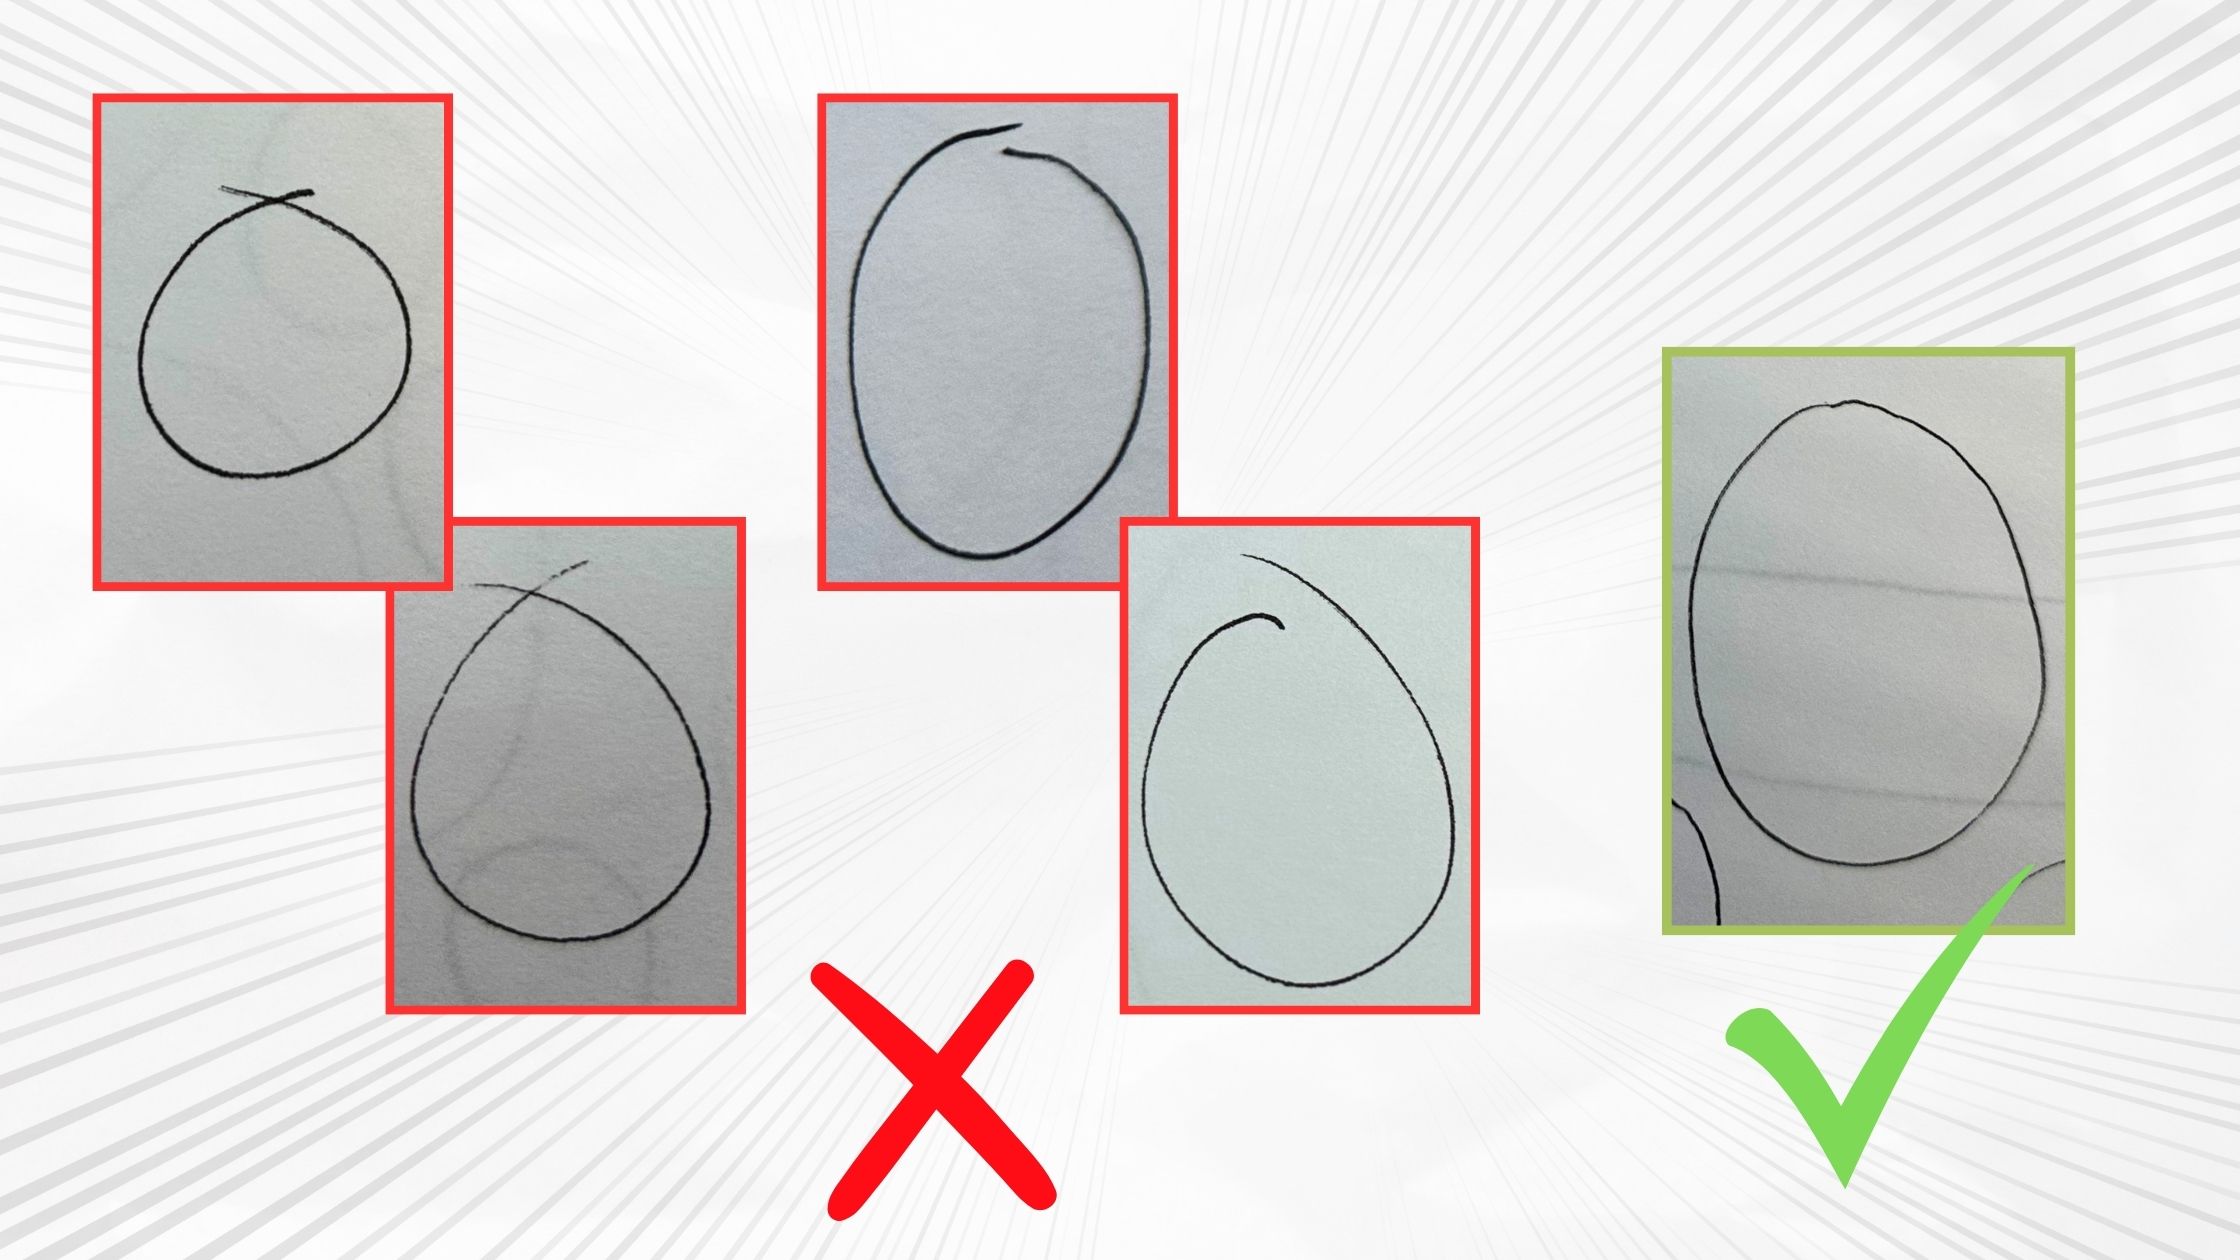
Start with large shapes, then smaller ones as you fill the page.
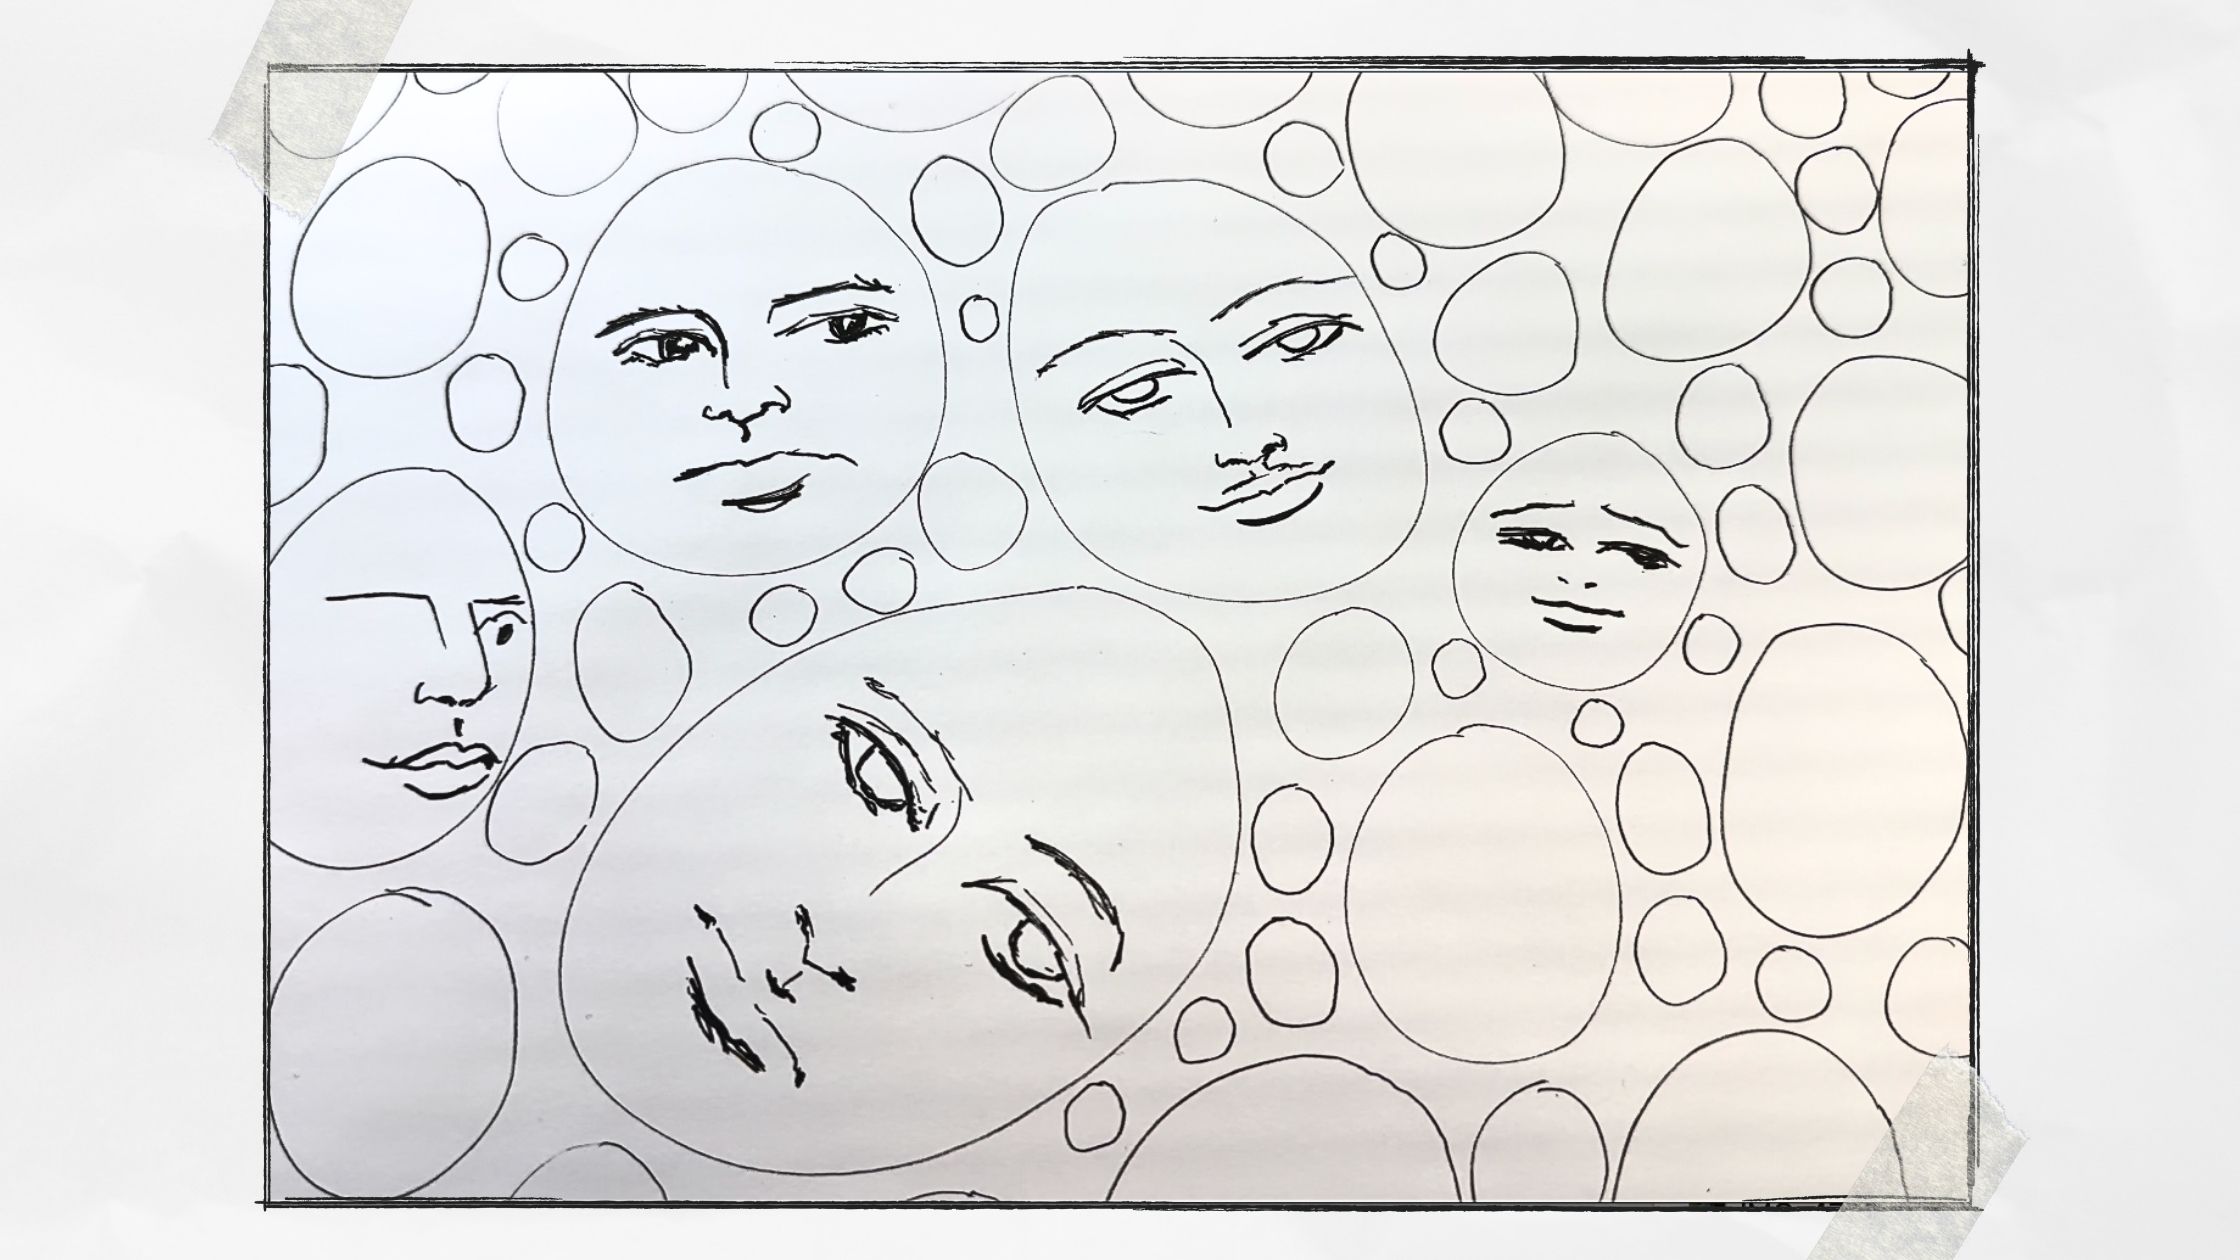
Interval III
For our last 5-minute interval.
From imagination, draw faces on the egg shapes.
Mine are cartoony … if drawing portraits is your thing, I expect you’ll rock this exercise.
Exercise 02 – Boxes in space
Duration: 3 intervals of 5 minutes
Helps with: Hand-eye coordination, perspective, line quality
Level: Beginner-Intermediate
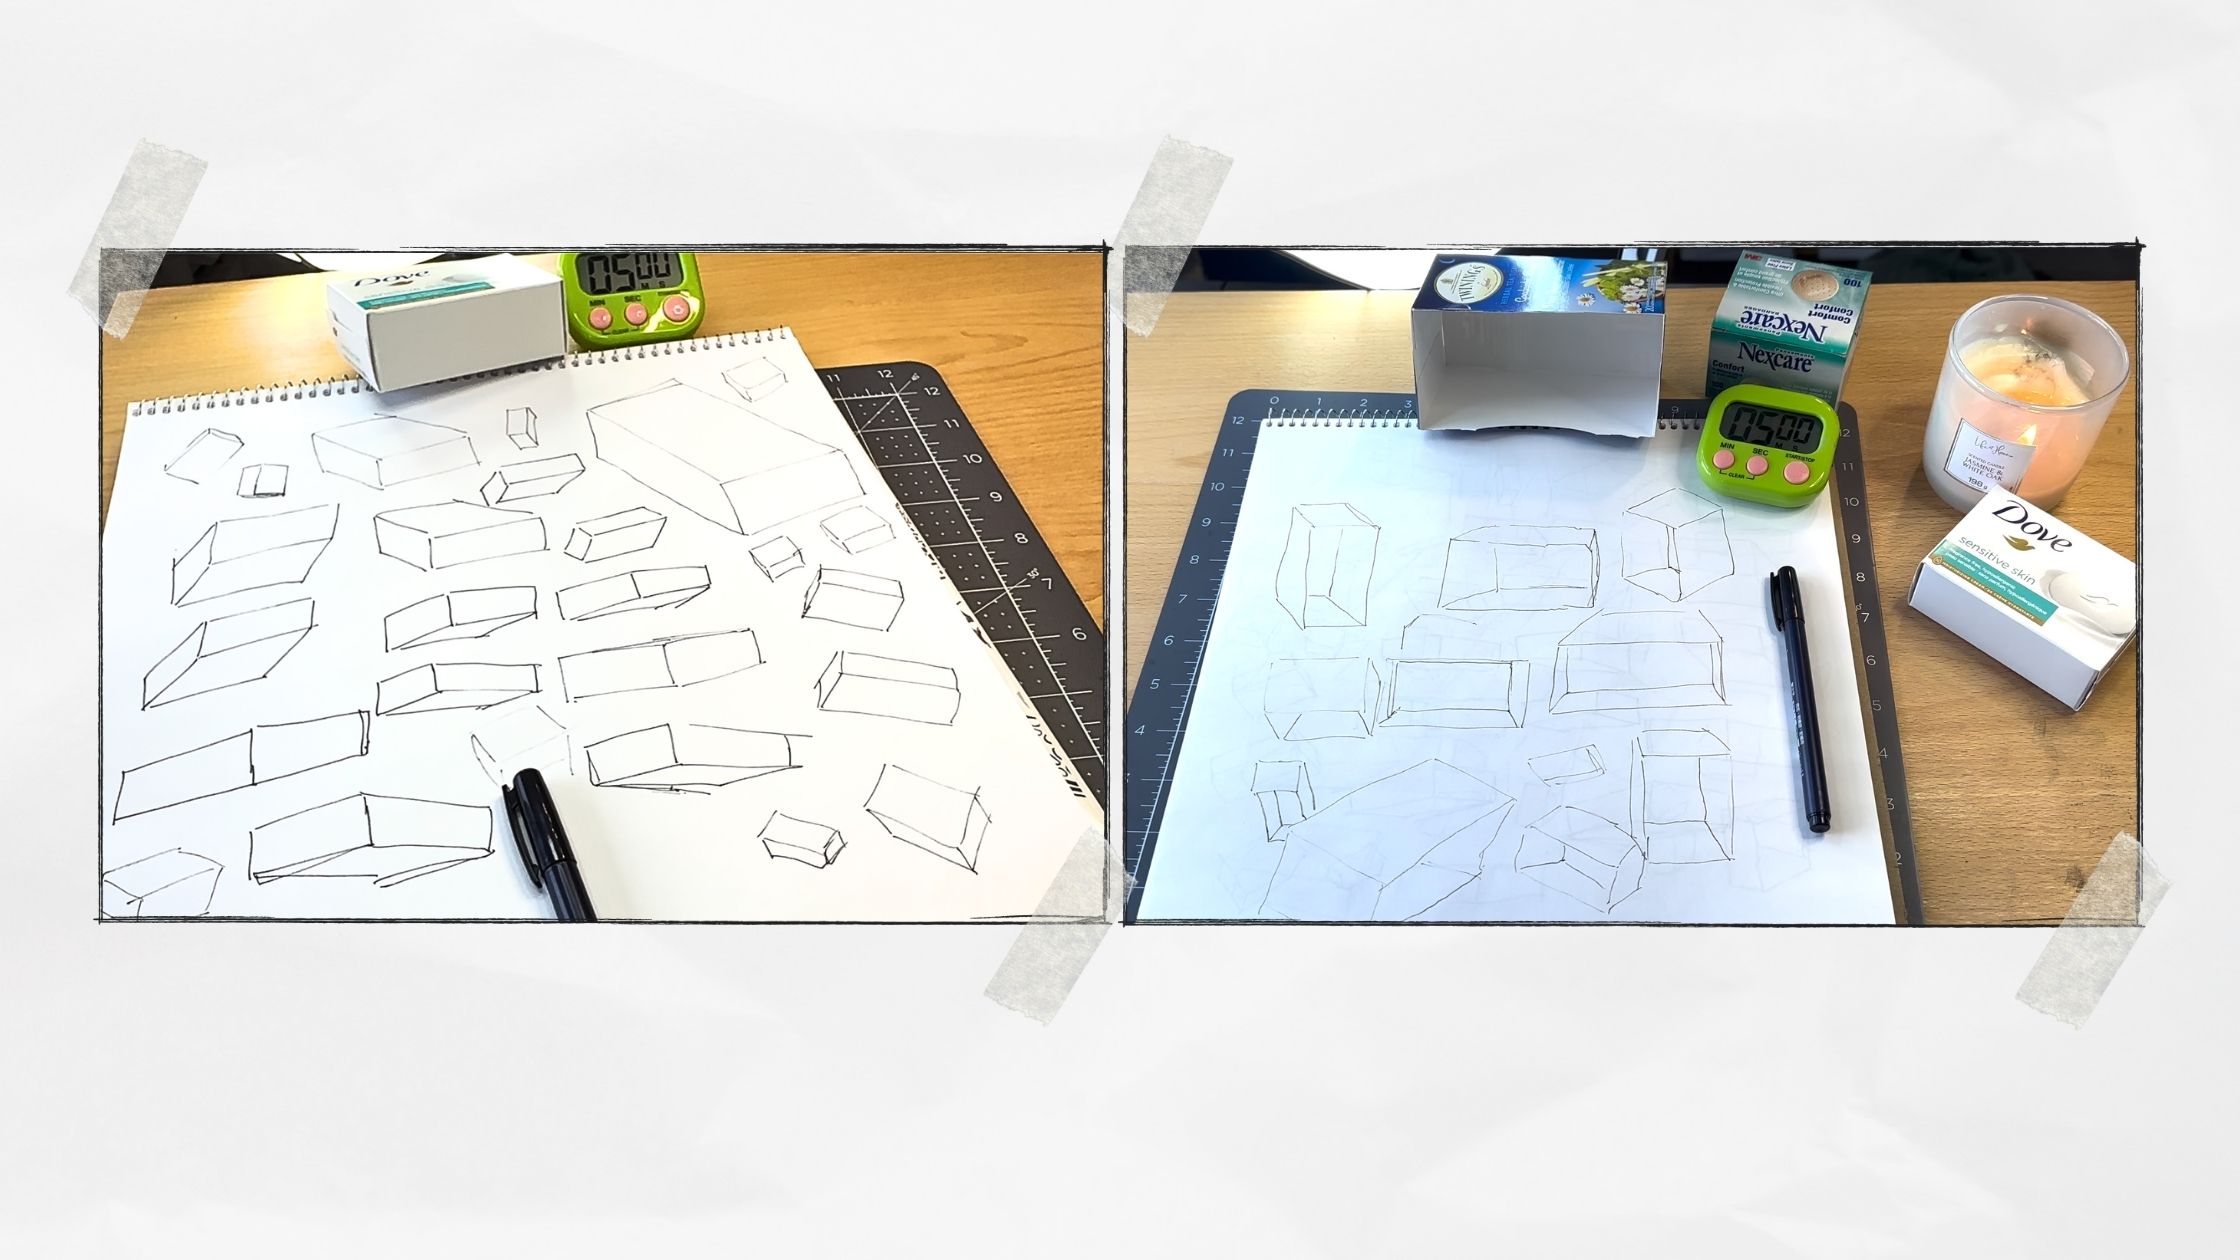
Using three small (household) boxes of different dimensions as reference.
Remove a panel from one of the boxes to show the inside. A tea box works well.
Using your timer, draw each box for 5 minutes from various angles.
You can hold or prop the boxes onto something. Draw each from several vantage points.
Avoid sketching several tentative lines. If the angle is way off, then make the next box a little better.
Strive for decisive, confident strokes.
The goal is to train with assurance, and not rely on being able to erase or ‘undo’ mistakes. Make each line count.
The trick is to keep your eyes on the box as you draw.
Masters recommend we keep our eyes on the subject 70% of the time and 30% on what we’re drawing on the page.

If like me you struggled to keep realistic proportions while changing the perspective, then it’s either due to not enough practice or a gap in know-how.
I’ve taken perspective classes in the past, so I have some prior knowledge. However, I neglected to apply those learnings to my projects by avoiding subjects that require perspective.
This exercise is brutally honest in exposing any areas that need improvement.
Exercise 03 – Line poses
Duration: 8 intervals of 2 minutes
Helps with: Observation skills, decision-making, economy of lines
Level: Intermediate-Advanced
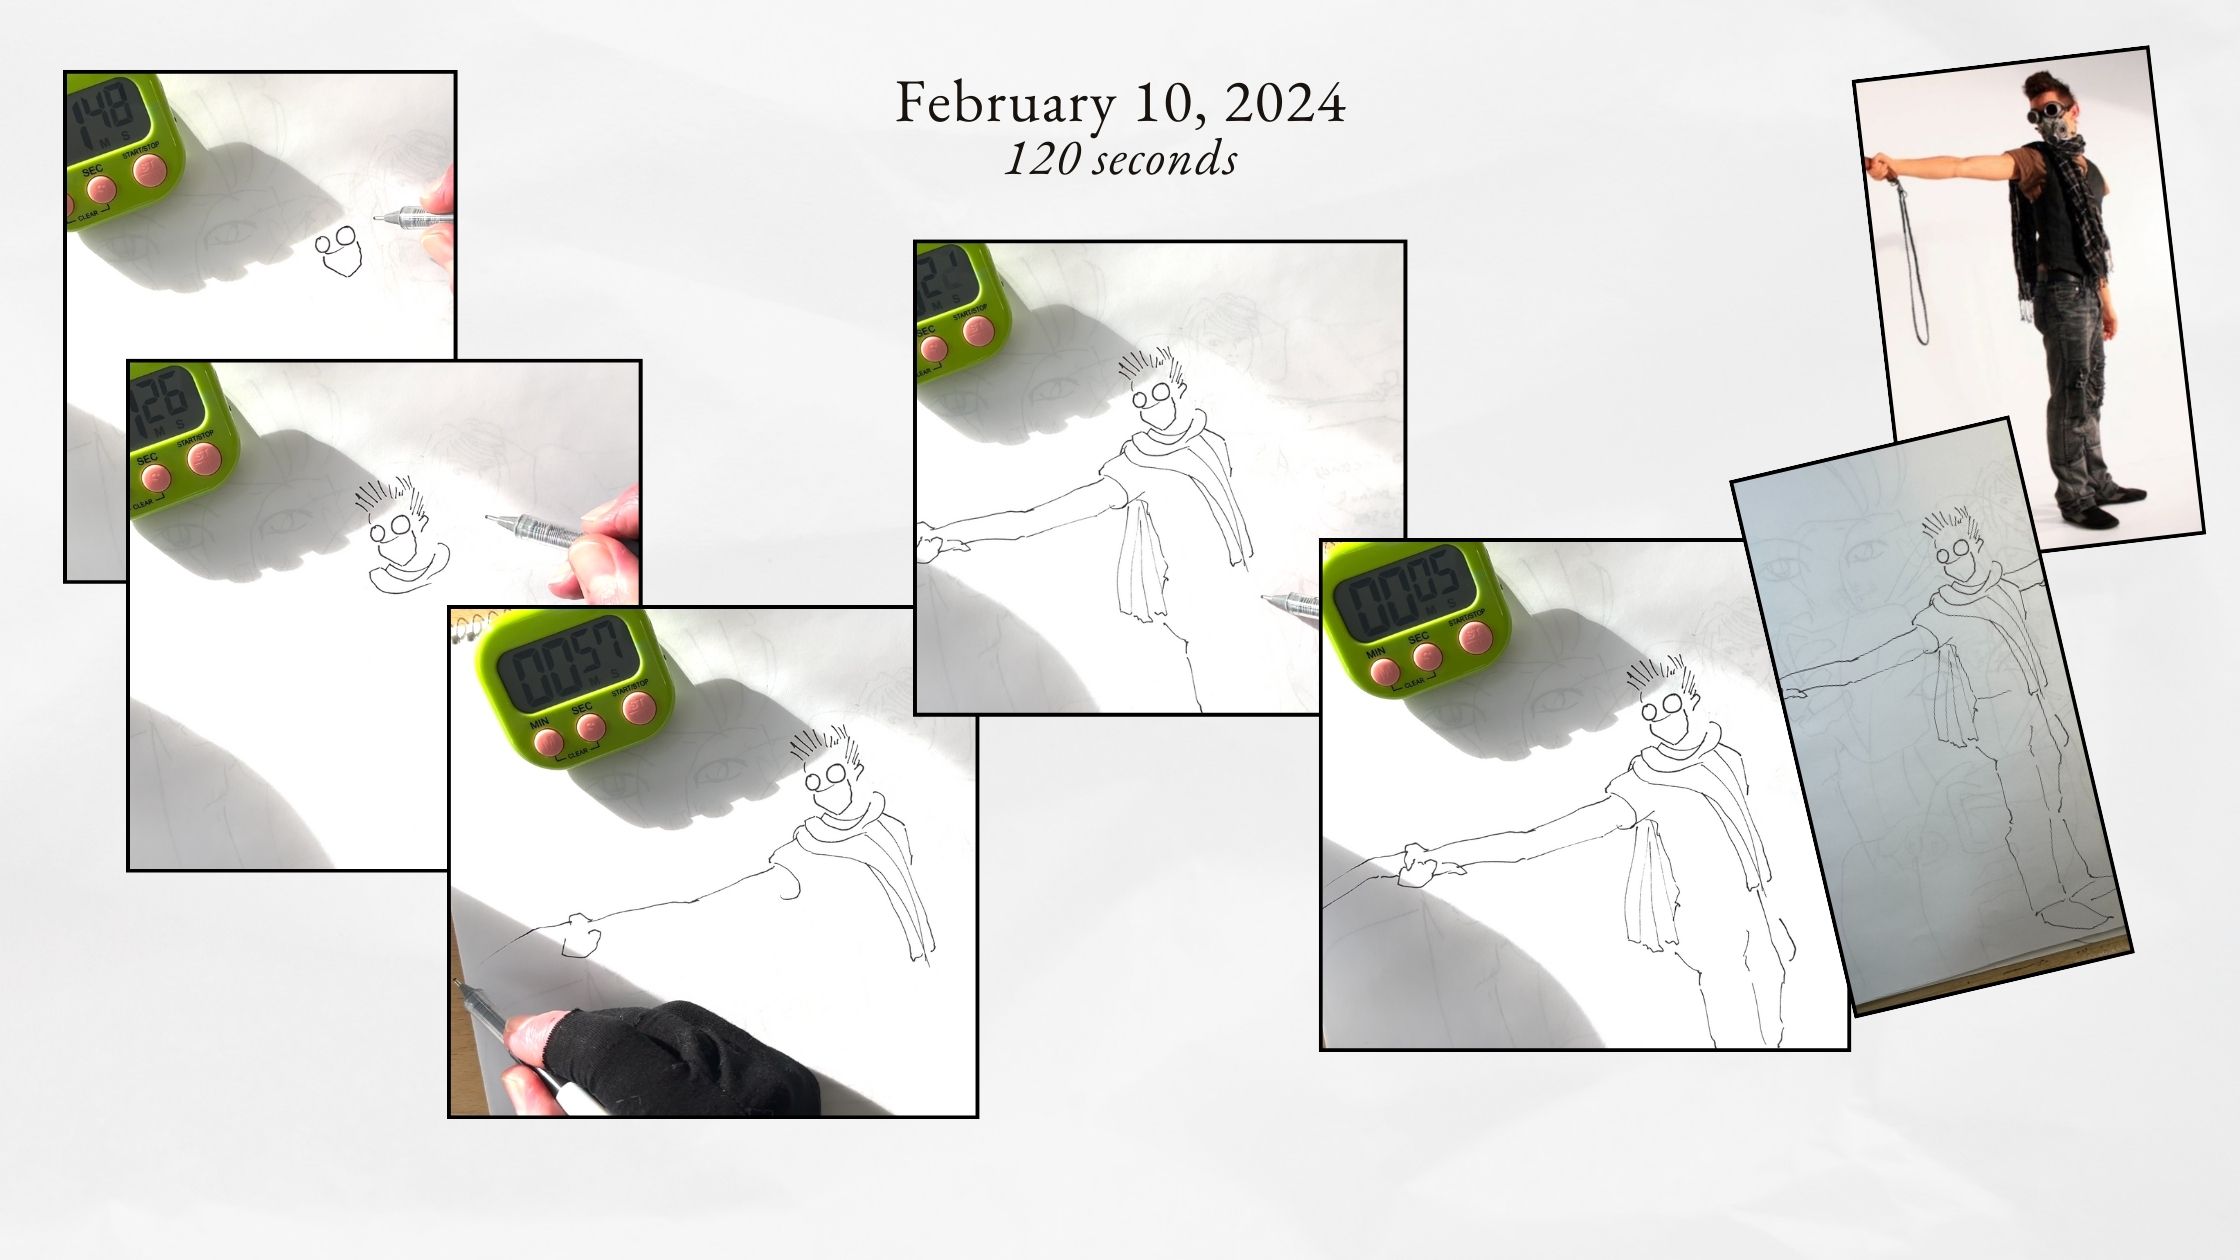
I use a free website called Quick Poses.
Because I need to practice characters, for this session I’ve selected:
- Human Poses (whole figure)
- Gender (all)
- Clothing (yes)
- 120 seconds per pose. Which gives time for 8 poses of ~2 minutes each.
- Select 20 images, in case you want to skip over any of the poses you don’t like.
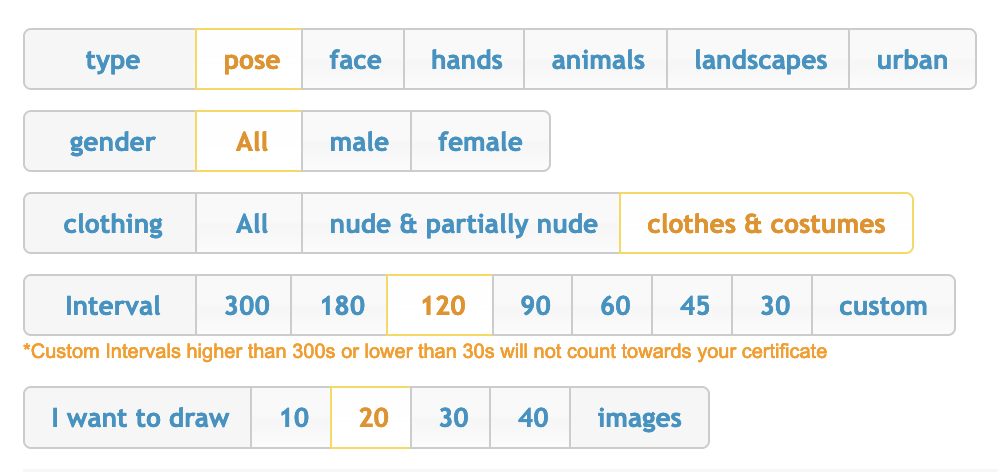
You can adjust the settings to what you most want to practice. Options are:
- Faces
- Hands
- Animals
- Landscapes
- Urban
There are additional customizations, so be sure to explore the tool.
Depending on the size of your paper, allow for 1-2 poses per page so you have space.
The goal of the exercise is to make decisive organized strokes. The mission is to draw the main lines that explain the subject.
We’re less concerned about the correctness of proportions or realistic anatomy; that’s not the point of this exercise.
For the correctness of proportions and anatomy, there are better exercises for that, such as gesture drawings and life drawings of the figure. You’ll find additional recommended resources further below on those topics.
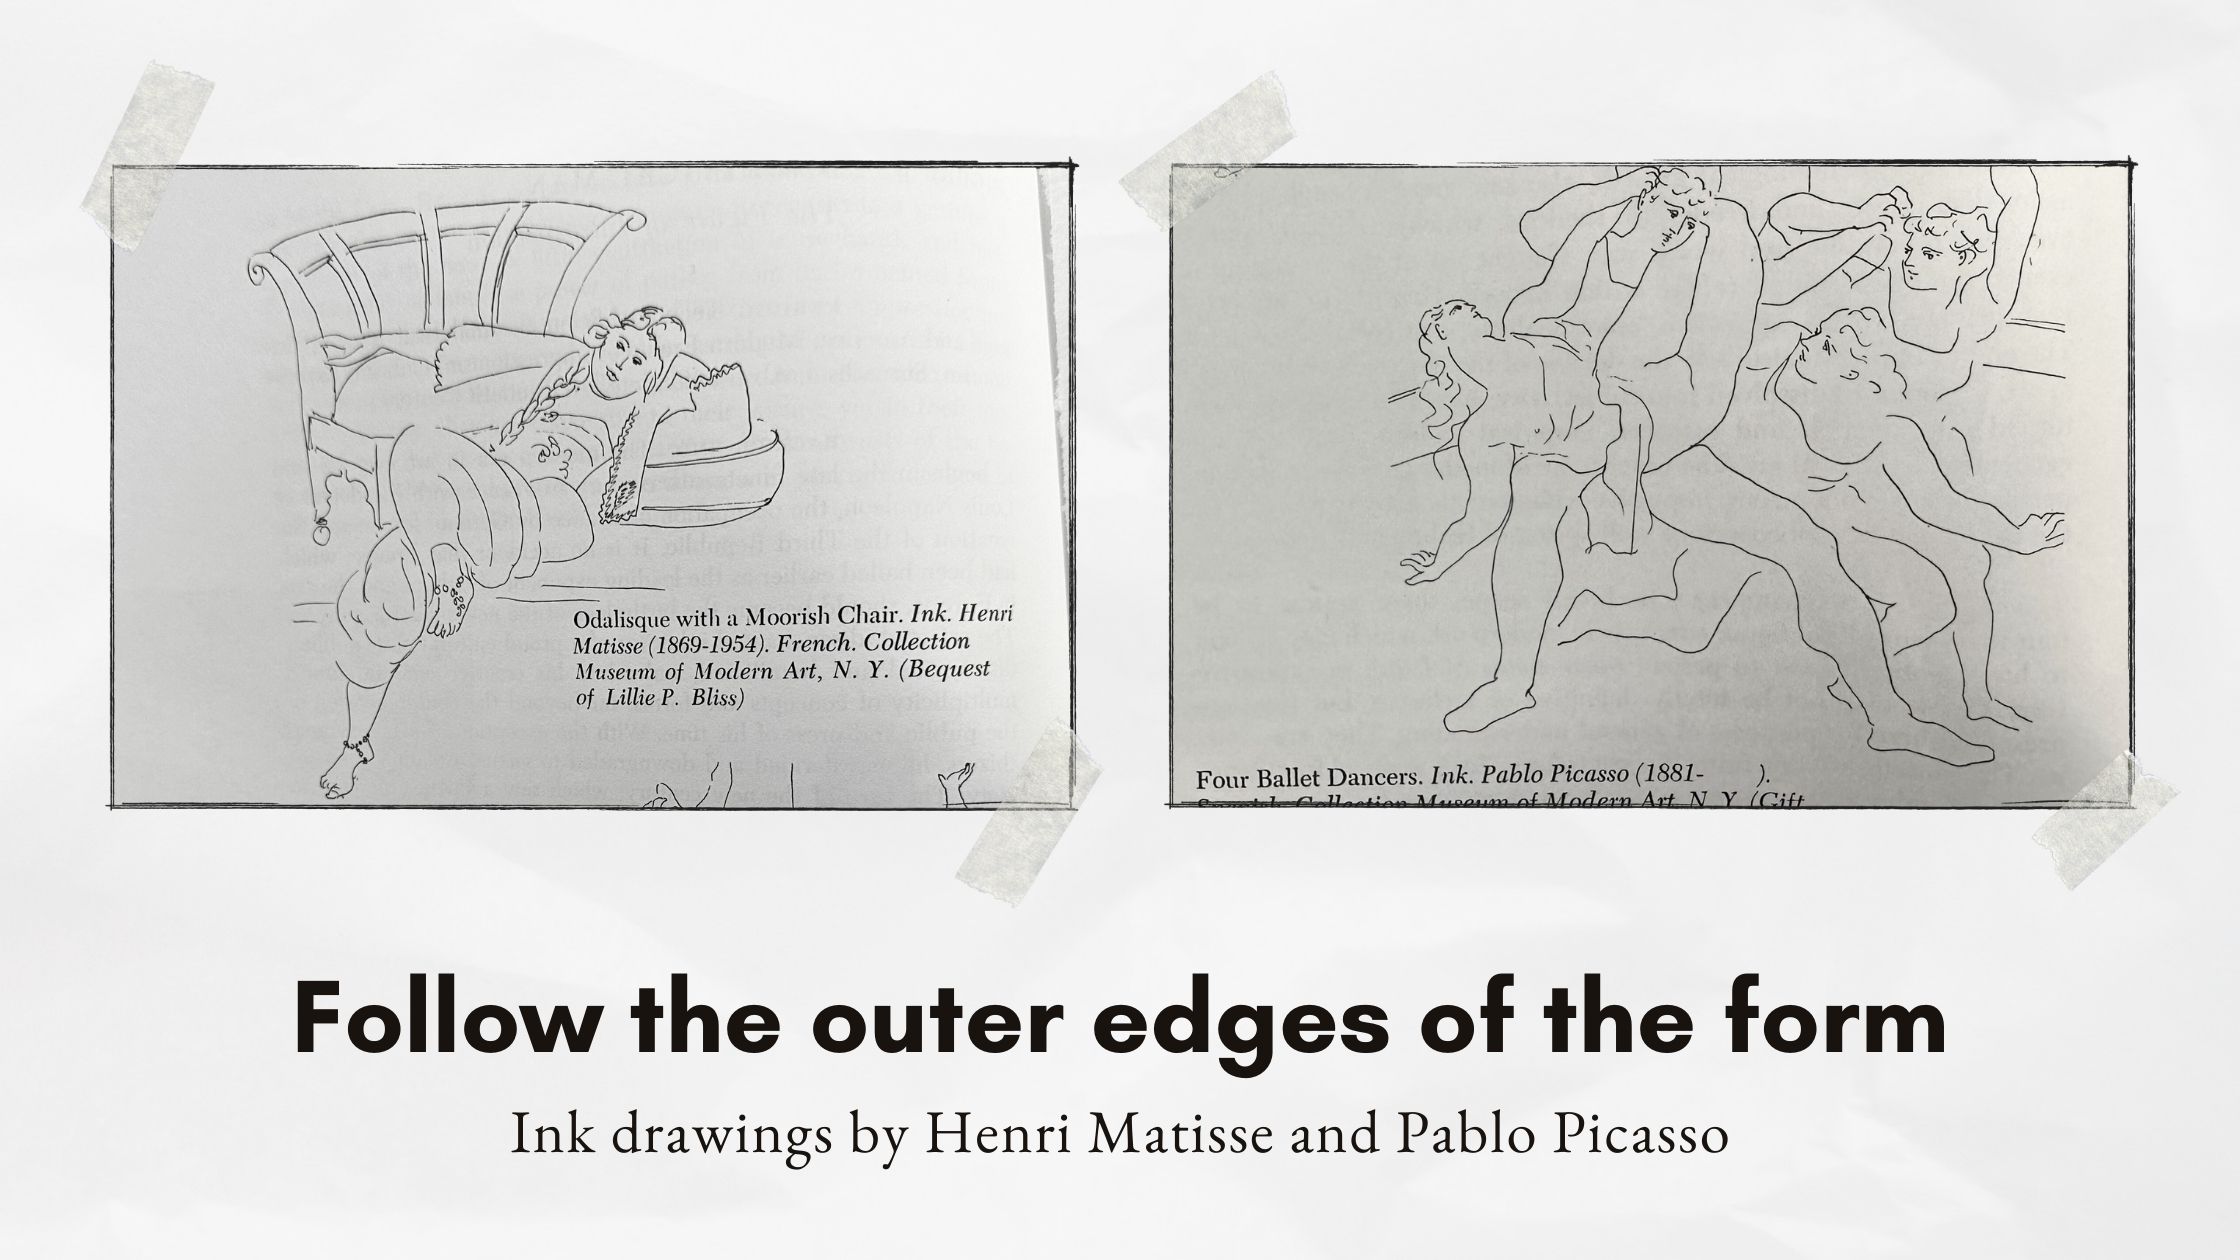
No, this exercise is similar to a contour drawing, where you follow the outer edges of the form.
Use single strokes to explain the pose.
Express what you see in your style using confident marks.
It might not look fantastic as a drawing. The main idea is to develop observation skills and train to make good decisions using minimal strokes.
Below is an example of ink sketches by Matisse and Picasso. I’m not sure if the Masters timed their poses, but this is the exact technique we’re aiming for.
The trick is to take the first few seconds to assess the pose and determine what elements are in the forefront of the picture plane.
It’s almost like putting a puzzle together.
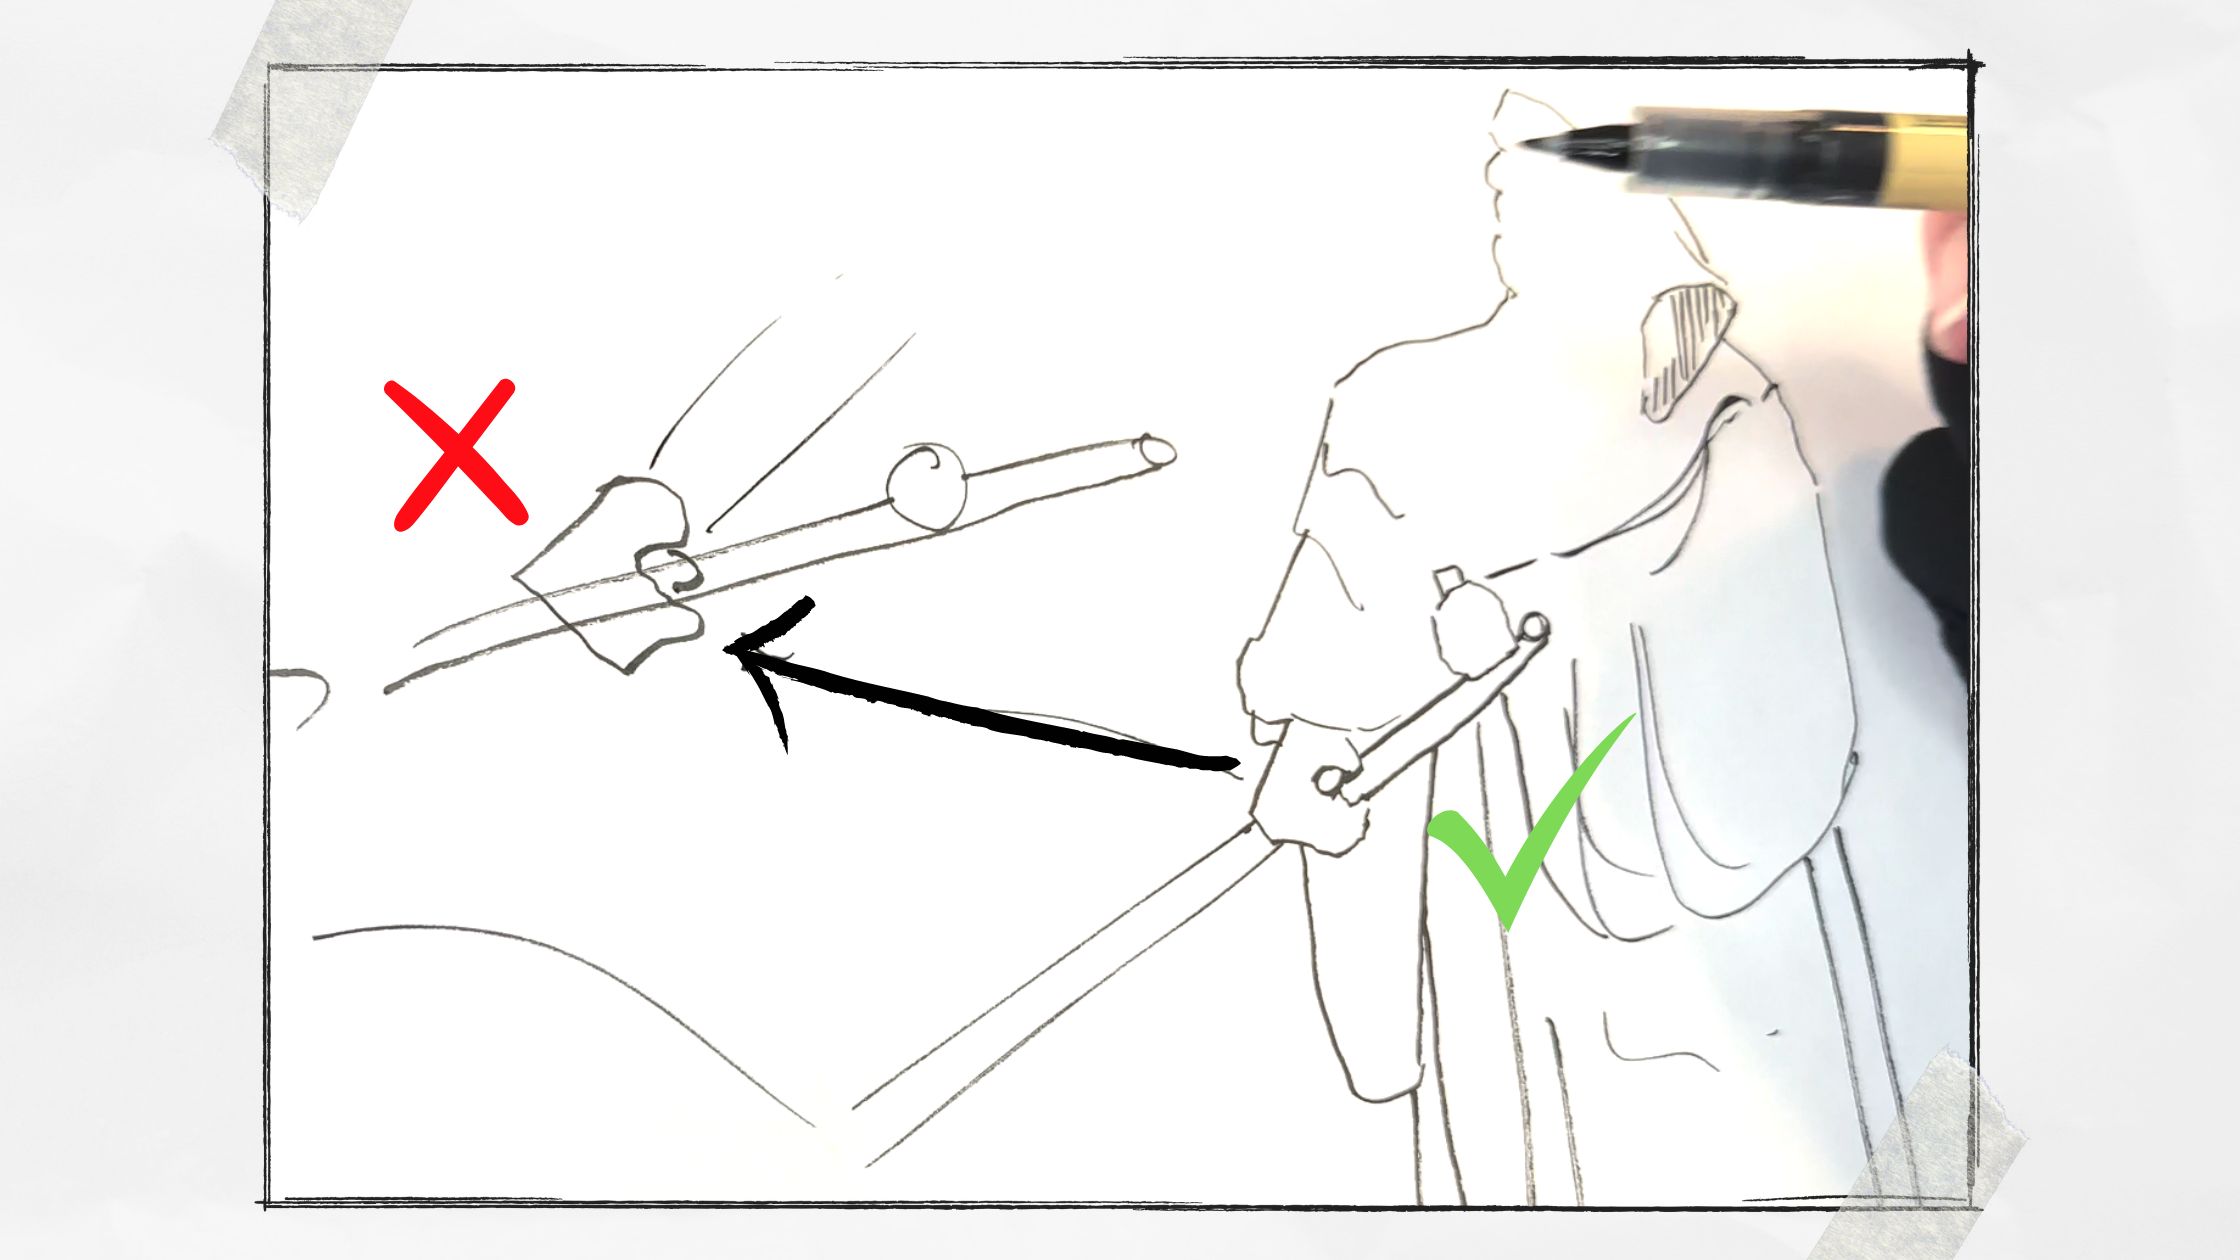
Avoid criss-crossing lines where elements overlap each other on the subject.
For example, below on the spectre where the hand grabs the sickle handle, we need to plan the layering of elements in an instant.
120 seconds flashes by very quickly.
Don’t get discouraged by the results on your first try. I repeated several times the more difficult poses.
You can ease into it. Either adjust the constraint to a longer interval or do the poses untimed.
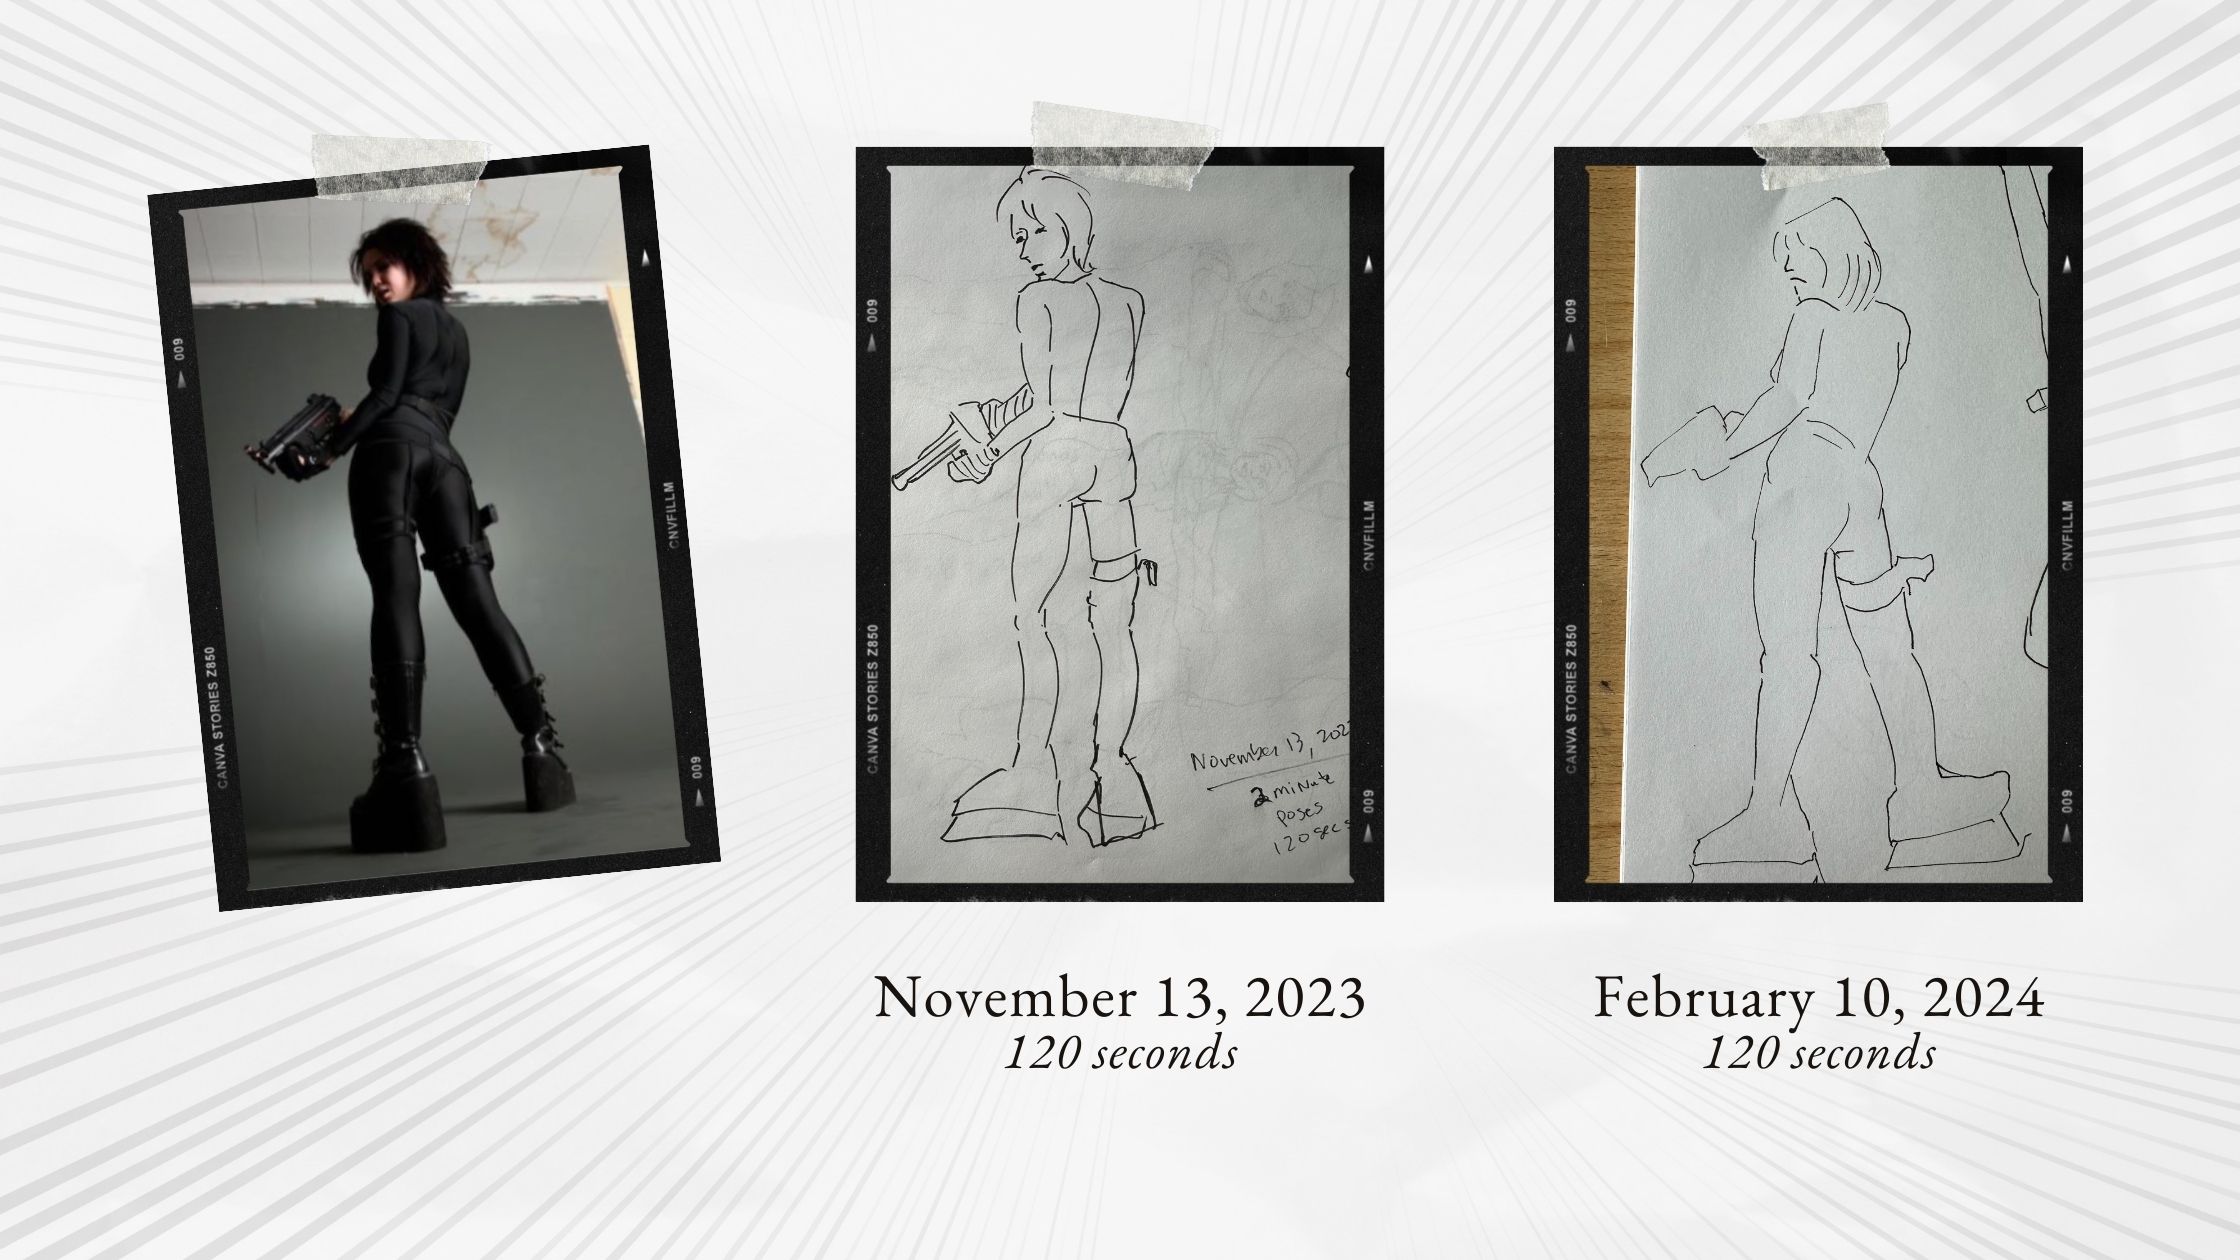
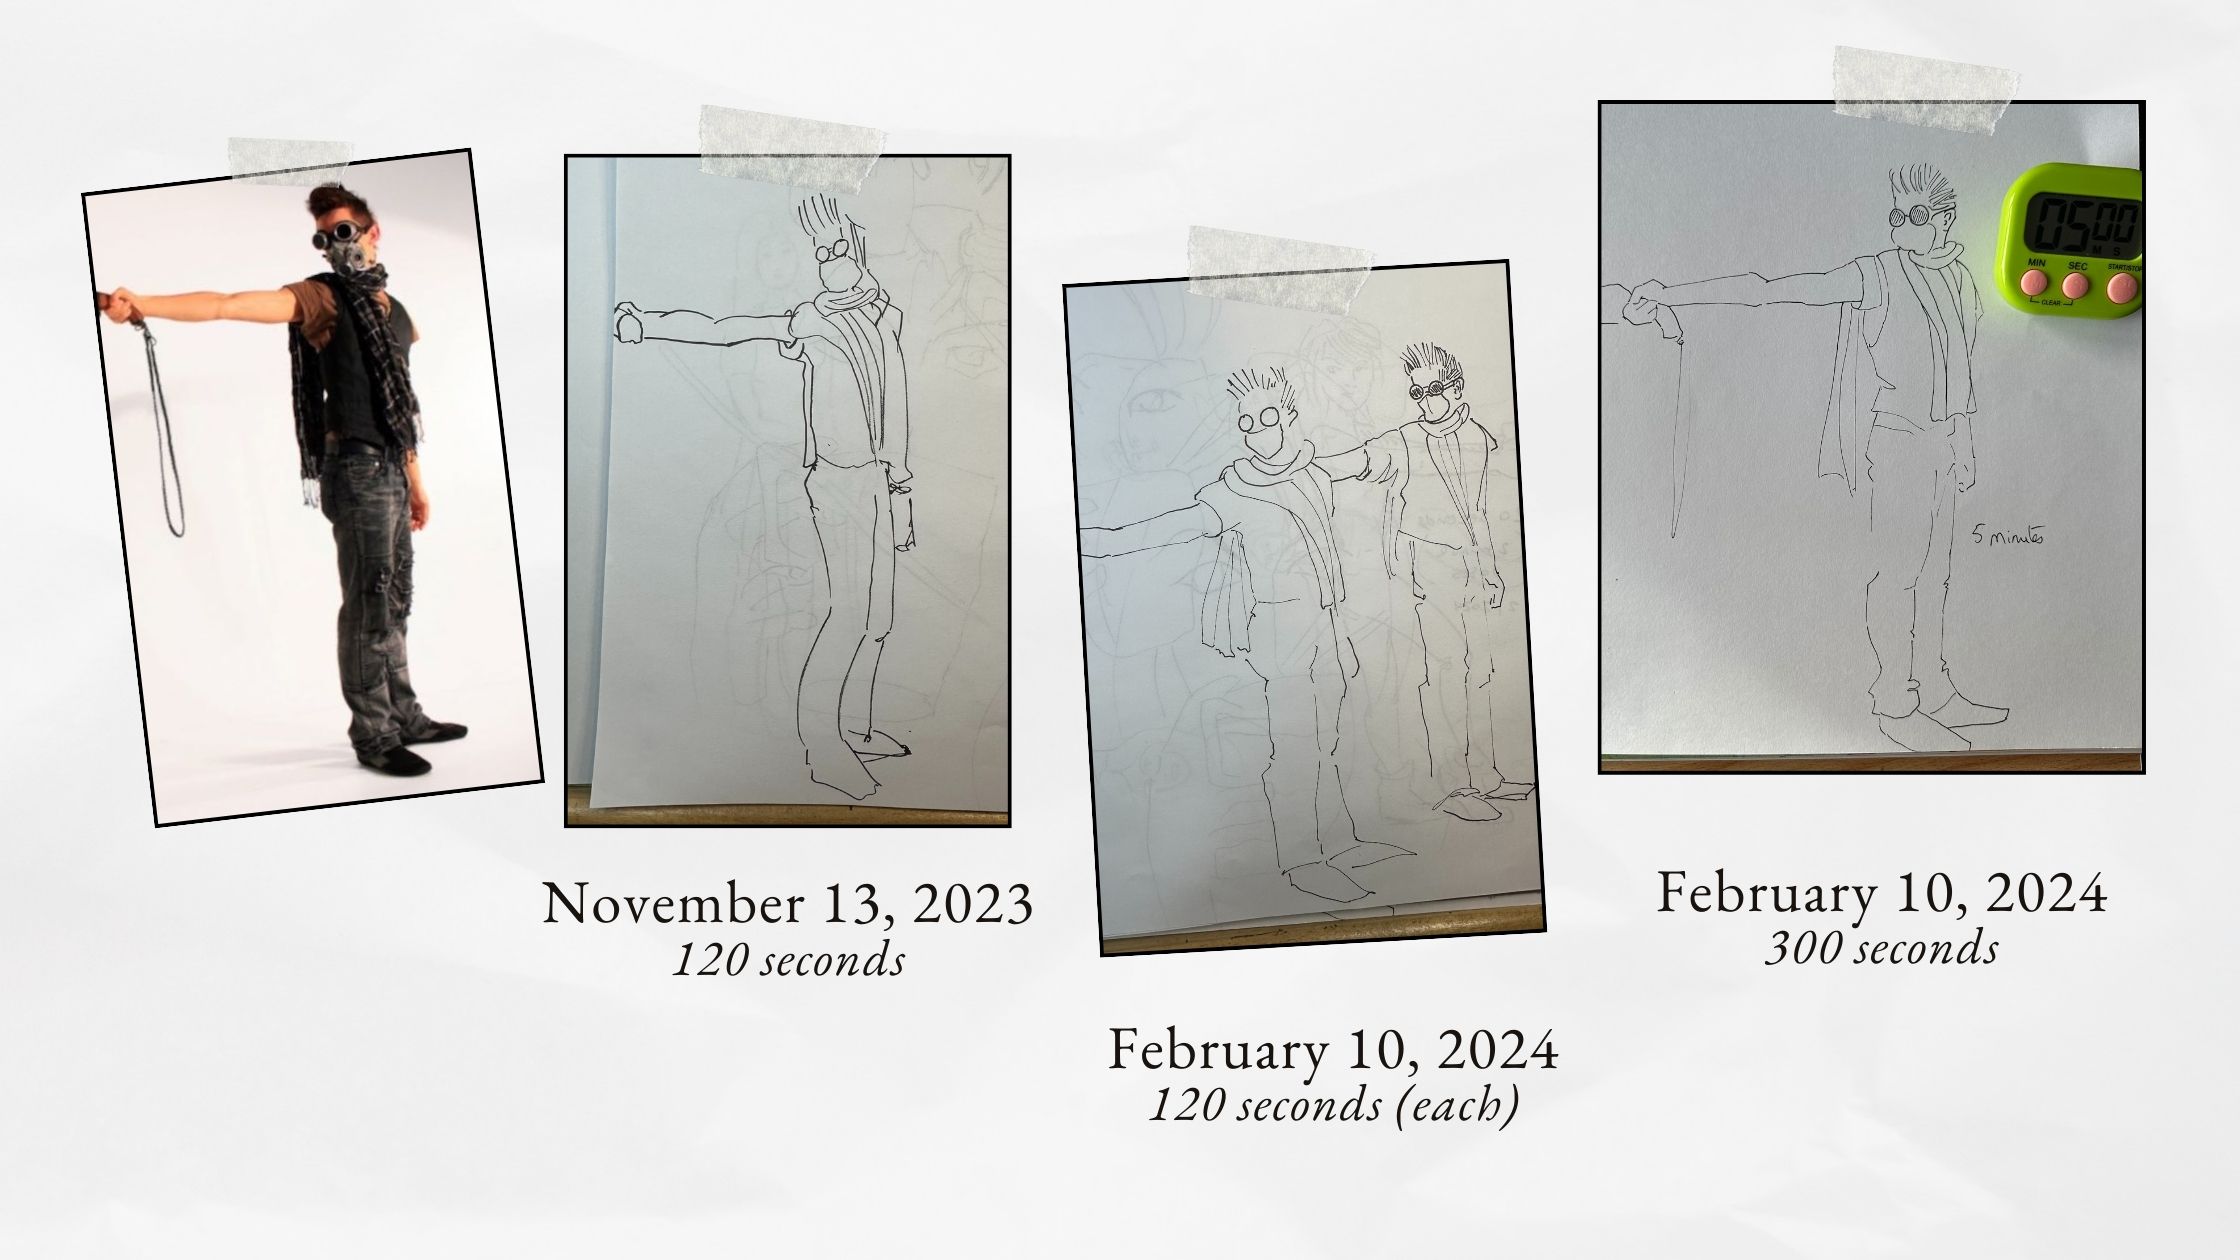
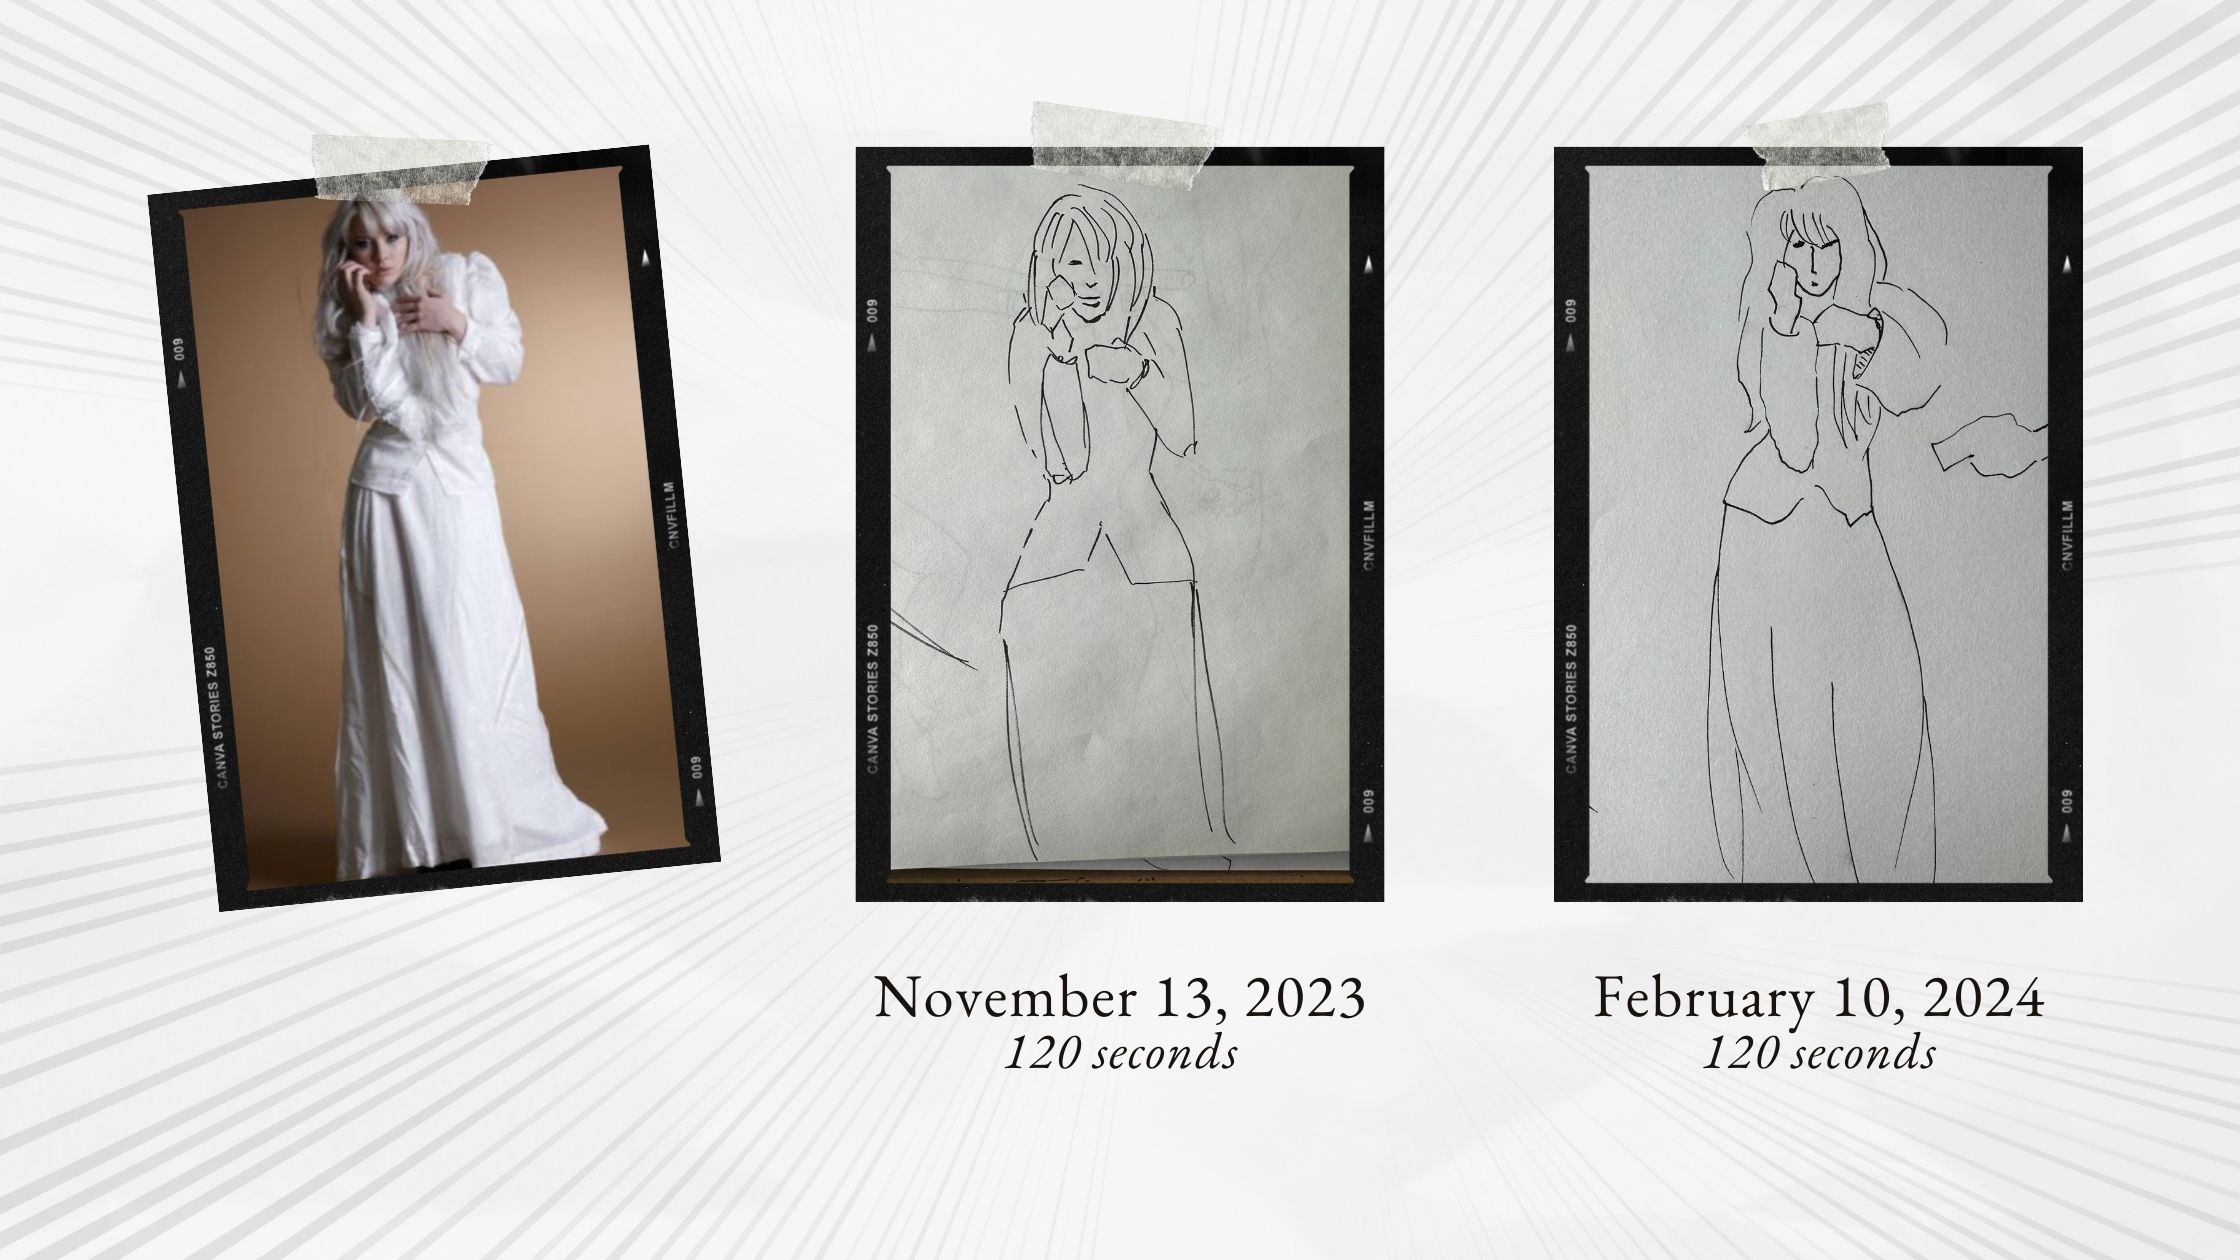
Remember to date your sketches. This makes it easier to assess progress over time.
Below, I used the same pose from three months ago to show you the difference in comparison. I also repeated it from a 2-minute to a 5-minute pose. Which felt like so much time comparatively.
How to use the Quick Poses Tool
For my first session, I let the Quick Poses Tool select and time the poses for me. For my second session, three months later, I timed the same poses that I had saved with my timer.
To repeat poses from a previous session, you can locate your images from the Quick Pose Library or save screenshots for future sessions. Just be mindful to use the images for exercises only as they are copyrighted.
If like me, you’re guilty of drawing what most interests you and avoid practicing what is difficult, then these powerful exercises will help round out your art skills, quickly.
If you found this article useful, be sure to share it with other pen and ink enthusiasts.
Resources
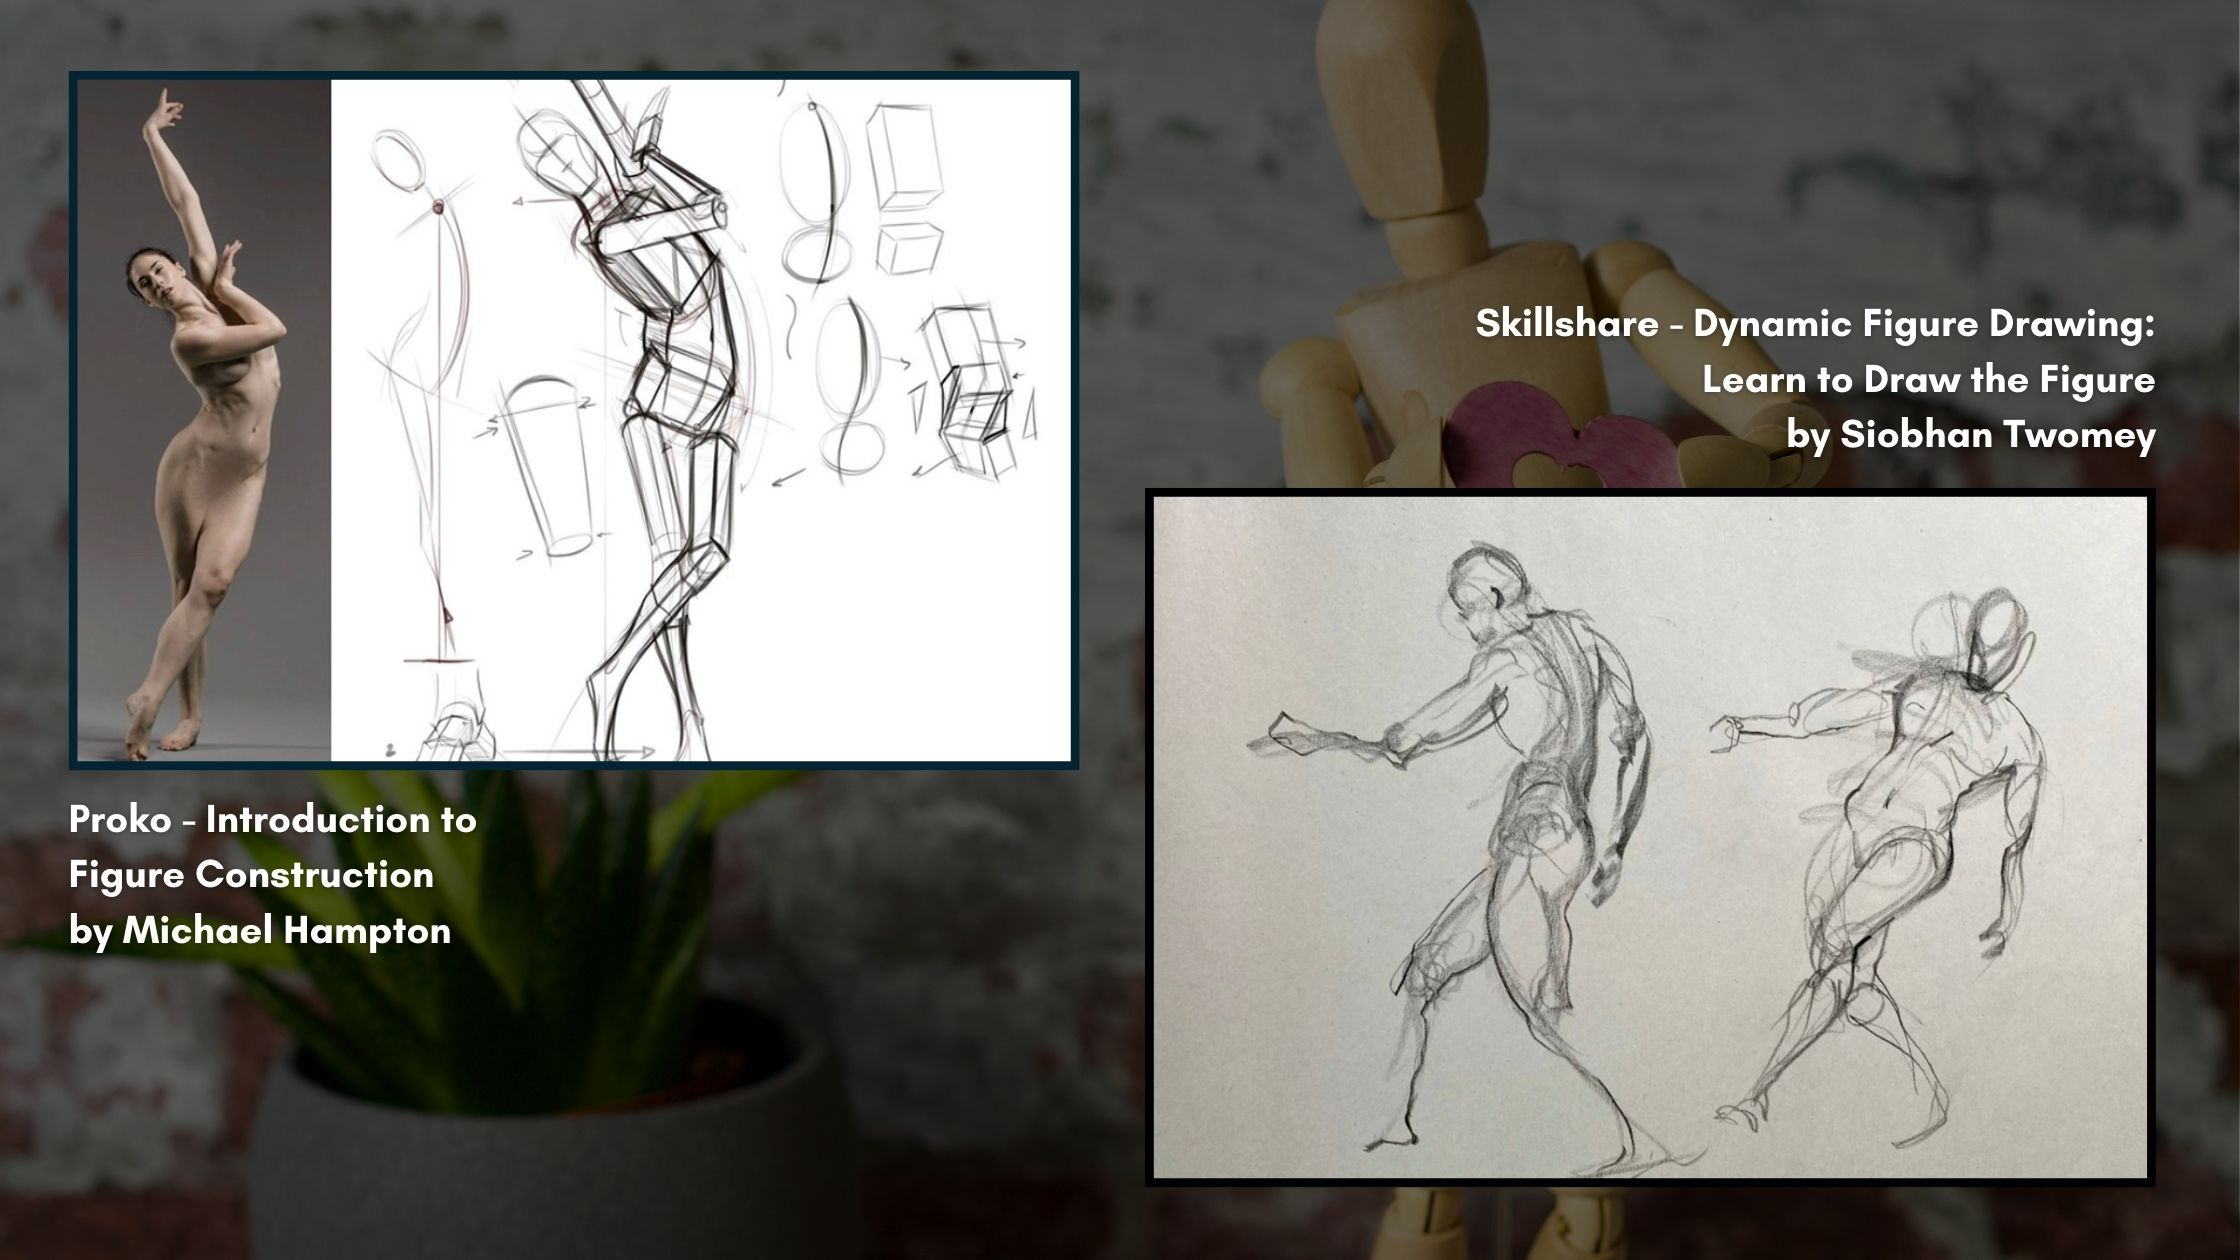
🎓 Recommended classes to improve ‘correctness of proportions and realistic anatomy’
Take these classes for free with a one-month free trial of Skillshare:
- Dynamic Figure Drawing: Learn to Draw the Figure by Siobhan Twomey
- Measuring and Proportion for Figure Drawing by Brent Eviston
- Volume and Structure 3D Figure Drawing by Brent Eviston
Proko courses on anatomy:
- Figure Drawing Fundamentals by Stan Prokopenko
- Introduction to Figure Construction by Michael Hampton
- Anatomy of the Human Body by Stan Prokopenko
Other resources
- Draw with me (Longstride Video Playlist)
- Inking in sketchbook demo by Peter Deligdisch (Peter Draws Video)
- How to draw directly to ink by Teoh Yi Chie (Video)
- Quick Poses Practice (Web Tool)
- Line Of Action Practice (Web Tool)
- Understanding Bridgman Drawings with Jeff Watts (Paperback)
- Tombow Fudenosuke Soft Brush (Pen)
- All other supplies


I really liked the idea of the blog! It is an interesting. I appreciate the comment space because it allows users to contribute to the community. Keep up the good work in everything.
Thank you! Thanks for stopping by and leaving a note. Happy inking!