How to sell your art at Canadian Comic Cons
In this guide, we’ll cover:
- What is Comic-con?
- Is tabling at Artist Alley right for you?
- How to apply
- Logistical planning
- What will you sell?
- Packaging your art products
- Why should people buy from you?
- Recommended booth display gear
- How to Take Payments
- How long are the days?
- Ways to transport your stuff
- Know The Rules
- Is Artist Alley Worthwhile?
- Artist Alley Resources
//Disclosure: Some of the links on this page are affiliate links. I earn a small commission when you use those links to purchase something. Read more about the Affiliate Disclosure on the Terms page.

What is Comic-con?
Comic-Con is a multi-day event held in convention centers in major cities around the globe.
Although originally focused on comic books and science fiction/fantasy themes, it has expanded over the years to include broader entertainment-related genres.
If this is your first event, I recommend that you:
- apply to an event located in or near your city to reduce expenses (travel & lodging)
- opt for a smaller or a mini-convention, the fees are lower and the event is shorter (more manageable)
- be as prepared as possible

Is tabling at Artist Alley right for you?
In terms of the genre, as a traditional visual artist who creates black-and-white line drawings of mostly birds – from my perspective, Artist Alley is similar to an art fair with a pop-culture vibe.
Attendees are interested in seeing various creations including original artwork, prints, posters, stickers, buttons, cards, handmade crafts, toys, apparel, books, and much more.
People usually go to buy something even if just as a memento.
If you’re wondering about the caliber or level, the artist alley section is curated for amateur and semi-professional artists. From what I assessed in perusing the other booths, my very subjective opinion is that the organizers welcome a wide scale of skill levels.
Moreover, even though the pillar themes are comics and anime-related, the event attracts people who appreciate talent and creativity in general.
If you’re an illustrator in a similar niche to mine or consider yourself more on the fine arts spectrum – if you can make physical reproductions of your art, you can sell them at artist alley.
📚 For ideas on how to get to the “exhibit-ready” stage, read this article to help you customize a learning plan and meet your art goals.
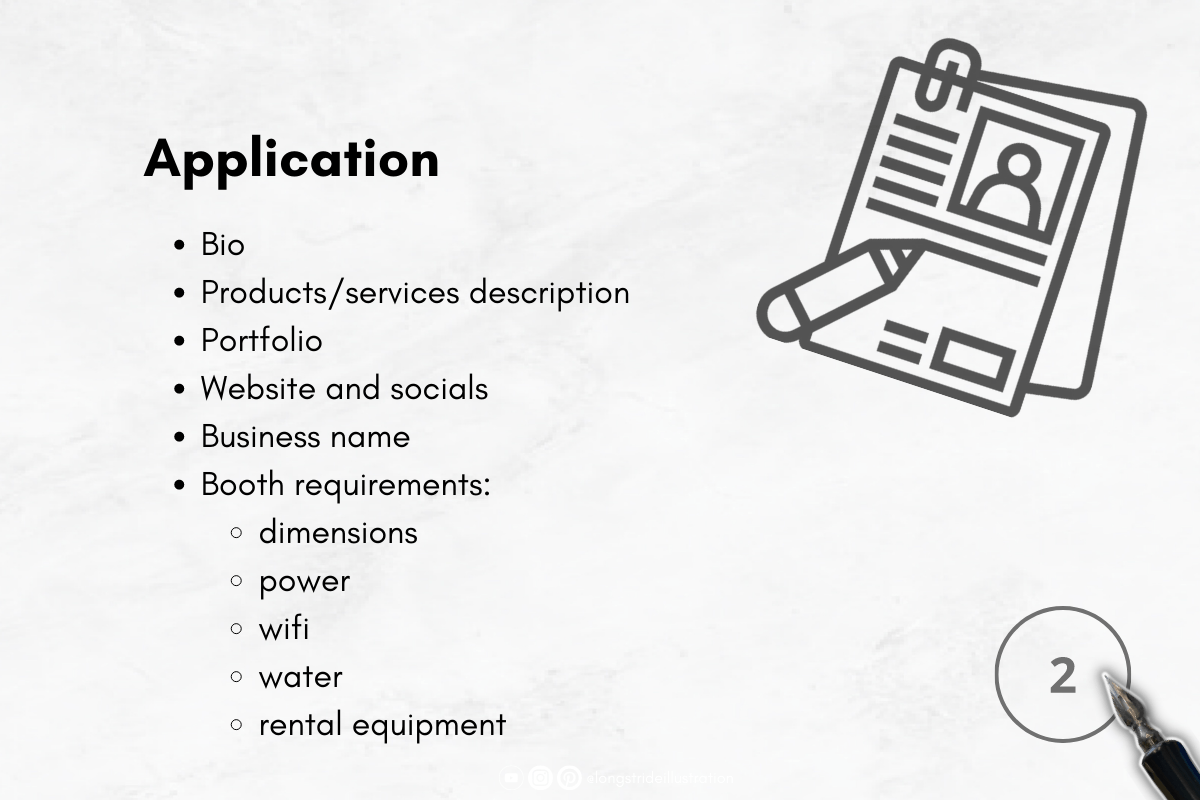
How to apply
Nonetheless, getting in is not a guarantee. To improve your chances, apply early as some events sell out immediately.
Provide a short bio describing your products or service offerings. This helps organizers determine which category to slot you in, whether in the Comic Creator section selling on-site commissions and related products or more of a Vendor of “paper” or “crafty things”.
Be sure to read the event website thoroughly beforehand as there may be restrictions on what types of products you can sell.
Not all events will allow merchandise or plush toys at an artist alley table. If in doubt, stick to paper things (originals, prints, cards, stickers, books).
You’ll need an online portfolio which can easily be set up on a free website platform or even as a PDF/Google doc for the smaller events.
Bigger events, like a Fan Expo, will in addition to a portfolio require that you have a website, web store, and/or social media accounts.
You may also be asked to list past events where you’ve exhibited, however, this is not a requirement to be accepted.
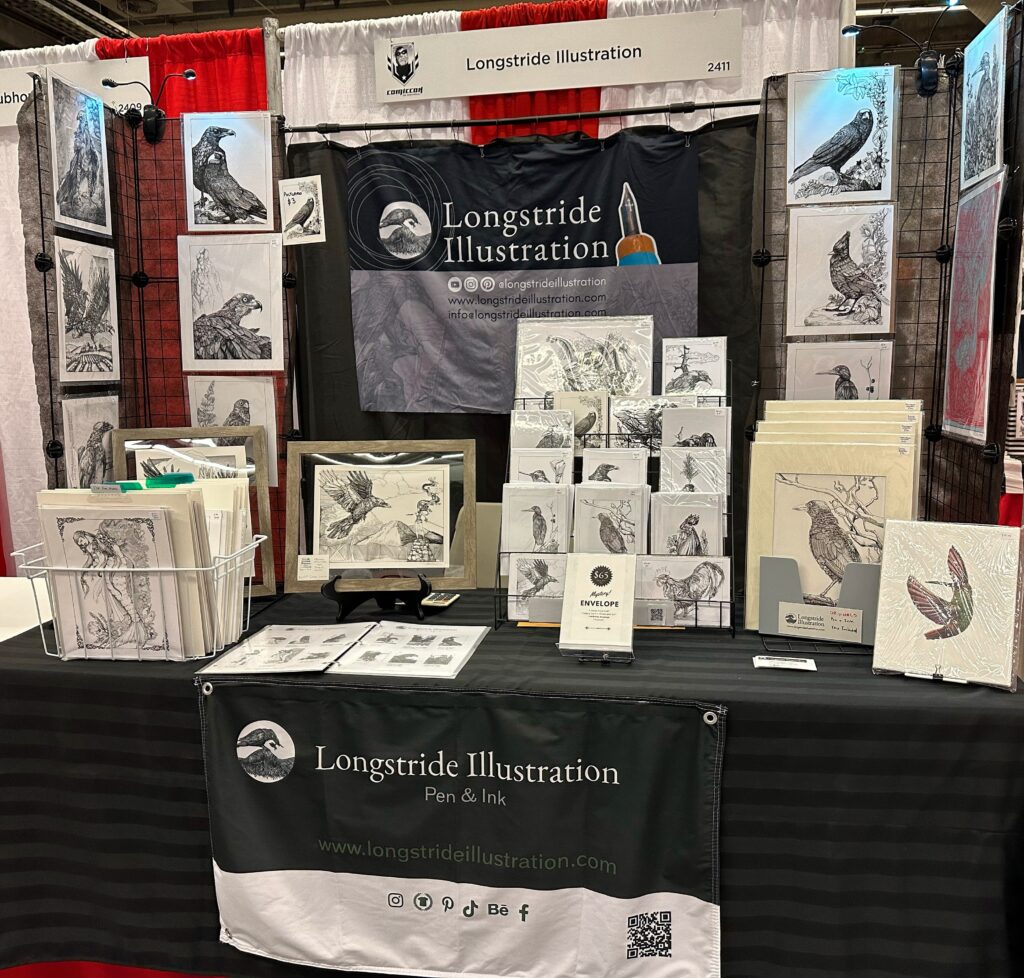
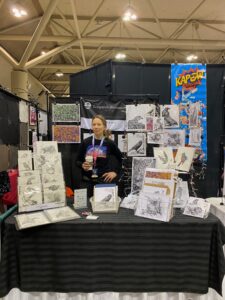
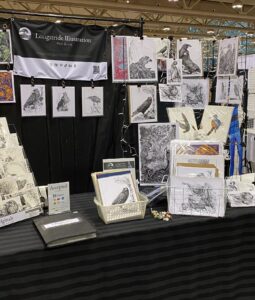
My updated booth in Montreal 2023.
Also, give some thought to the name under which you’d like your business to be listed on the event program. This will also help you promote your booth name and location for fans to find you.
If you’re wondering what type of table space to purchase for your booth, commonly available setups are 6 or 8-foot tables that come with two chairs and two exhibitor passes.
Everything else is generally extra, such as wifi, power, insurance, or a premium location.
Some events will offer display hardware rentals. This can be pricy, especially if tabling at conventions is something you’re considering as a recurring thing. You may consider sharing a table with another artist – and I’ll talk more about how to connect with artist alley communities further in the article.
Know that you may be required to pay upfront or a percentage of the total fee along with your application.
You can expect to hear back about your application at least 6 weeks before the event if not sooner.
Logistical planning
If your event is local and you’re familiar with the area, logistical planning is more straightforward. Otherwise, there’s planning for travel and accommodations.
Typically, convention centers are located in busy areas of large cities, so plan for where to park, related fees, along with load-in/load-out procedures.
You should also determine the best method and equipment to transport your exhibition gear to and from the venue.
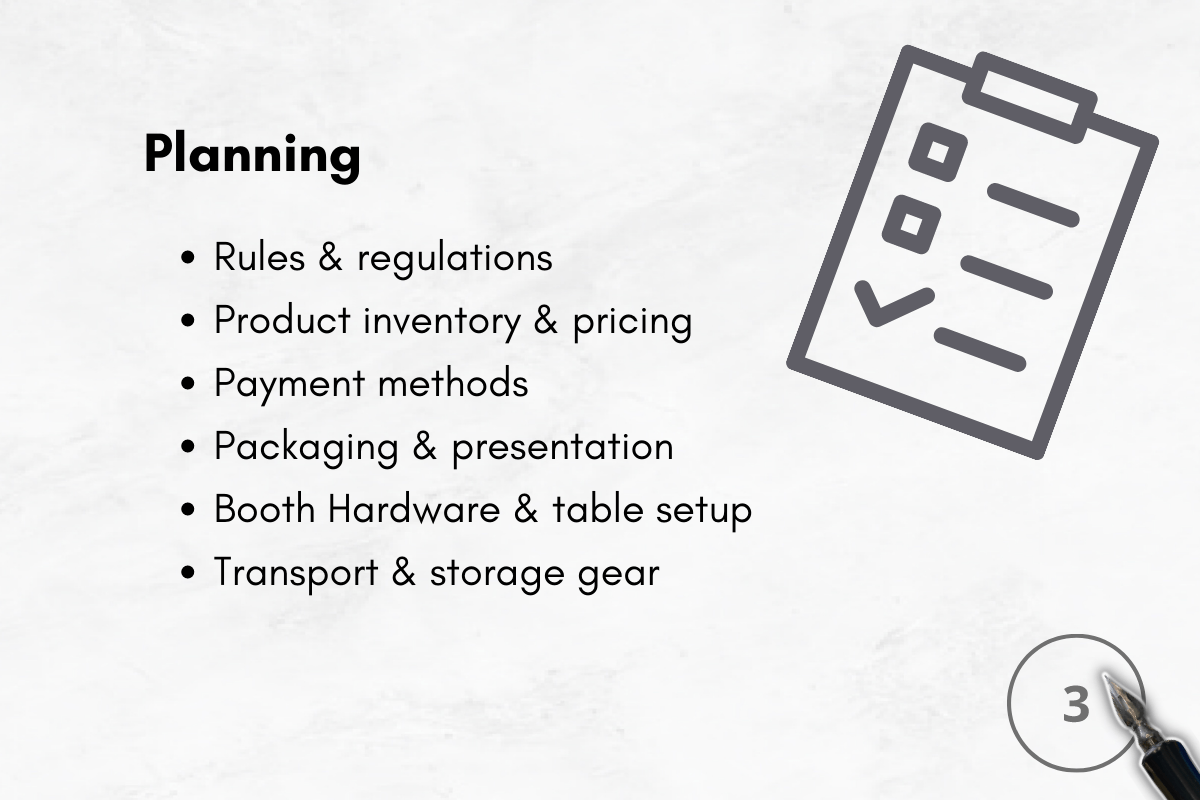
What will you sell?
Next is determining:
- what products to sell
- dimensions
- quantities
- pricing
- purchase incentives (special deals)
- how to package your products
I was advised that premium or higher price-point items are slower to sell at Artist Alley, such as gallery-quality screen prints or original art (unless you’re a celebrity comic artist).
Think of these conventions as a huge marketplace with a lot of competition (like Etsy). There is more of a trend toward purchasing a little from many tables rather than purchasing big from a few tables.
Having said that, people do love to see original art and I have successfully sold pieces (>$100) at my table. Ideally, your originals are displayed in a frame, canvas, or at least in a rigid framing mat and cello sleeve.
Having a portfolio of original art at your table for fans to flip can be an attraction.
However, be mindful that it runs the risk of getting damaged. I used to have my originals in a portfolio and have since switched to displaying only a select few originals in picture frames, with the remainder tucked away.
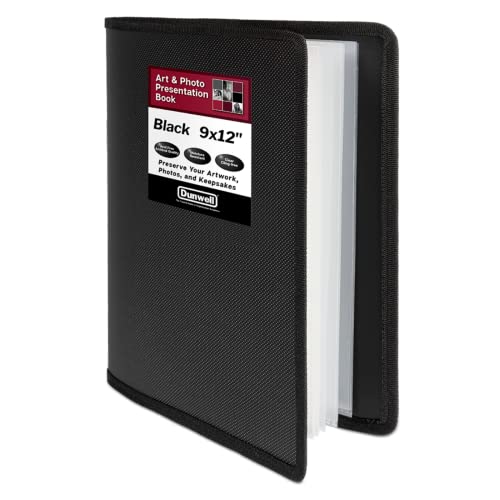
Instead, I use the portfolio presentation book to display a catalog of what’s available listing the names of each artwork piece, dimensions, formats, and pricing.
I typically have between 25-30 different subjects (designs) in my catalog at the time.
For prints, the general guideline for most vendors is these dimensions and price points:
- 4×6 print $5-10
- 5×7” print – $10-15
- 8.5×11” print – $15-20
- 11×17” print – $20-25
- incentive ‘deals with purchase’ of more than one item
As for print quantities, it depends. The rule of thumb for a three-day event is approximately:
- 20-25 each of your most popular subjects (top sellers) in the various available dimensions
- 8-10 each of the other subjects (testing the market)

The gamble is getting stuck with overstock or selling out and missing out on sales.
If you have the means to produce inventory affordably with ease and without concerns about overstock, then I would bring a surplus.
Another option, if you sell out, is to produce inventory during the event for the following day at a quick-print service provider.
As for formats, in addition to prints, other popular items include stickers, postcards, folding cards, buttons, bookmarks, and posters (18×26”).
Packaging your art products
At a minimum, use a transparent resealable cello sleeve or something to protect the prints.

Because my prints stand vertically in a bin on the table, I also insert a rigid chipboard sheet along with the cello sleeve.
In the beginning, I slipped a business card inside the packaging but later had a branded stamp made.
Now I stamp the back of the chipboard instead. It’s economical and looks nicer too.

I ran out of business cards on both my first and second conventions.
Five hundred cards per event! They were fanned on the front of the table and everyone stopping by would grab some. So, no need to include a card in the packaging.
I hand-write on Avery labels for my price stickers and bring along spare labels and extra pens.

It’s a nice touch to provide bags with purchase.
I had two types. Large clear bags to show off the art and small paper bags stamped with my branding.
Some tables did not provide bags and customers did voice appreciation for that extra care when I offered them a bag.
🎨 Visit my FAQ page for the full list of tools, materials, and supplies I use in my art studio.
Why should people buy from you?
Booth display attractiveness and ease of quick perusing are key.
Attendees tend to do a few laps to assess the entire floor before making purchase decisions.
Upon a great first impression, people immediately stop to browse or tell you that they plan to return for a purchase.
The most basic and effective way to impress is to be welcoming.
Are you uncomfortable in crowds or with public speaking? If so, that unease will evaporate as soon as you start talking about your art.
You’ll be more confident talking about what is unique and memorable about your products if you’ve thought about what to say ahead of time.
Some people are great at thinking on the spot, but for an introvert like me – I’m a smoother talker when prepared.
Beyond saying “hi” or “I like your costume” you can easily launch into providing information about what you’re offering from your display.

If you’re nervous about sounding like a sales pitch, jot down a few key points. For example, my value proposition and key points are to:
- emphasize that my art is hand-drawn traditionally with dip pens
- show the dip pens (on display)
- point to the framed originals
- invite them to browse the catalog
- explain the print dimensions, formats, pricing – and special incentives
- mention how long each piece took to draw
- tell the story behind each subject drawn
- tell them about my YouTube channel for tips & tutorials
- invite them to visit my socials, and website, subscribe to a newsletter
Remember to have fun.
For me, the main motivation for tabling at conventions is to interact and connect with fans in person.
As well, as a chance to learn from and exchange tips with other artist vendors.
Year-to-year you’ll likely see the same people at these events and make like-minded friends.
Recommended booth display gear
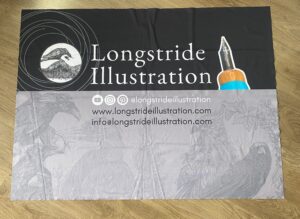
A branded display, such as distinct colours, logo, and/or brand name is good for retention.
My booth and table display are black with a branded banner and table runner. People said that they easily recalled my black booth with the ink birds.
Some events supply a tablecloth and skirt, some don’t. Regardless, best to have your own. Choose a tablecloth that will cover the table to the floor.
Also, bring a large binder or bulldog clips to secure the skirt or cloth in a raised position for easy access to your containers and snacks under the table.
Expect to be constantly restocking and reaching down for items, so it’s wise to organize your setup functionally.
For the display structure, a popular choice is the plastic or wire storage units that can be assembled in any formation.
I used the wire panels to create a tabletop wall as a backdrop for hanging samples on and secured it to the table with bulldog clips.

Height matters.
Aim to hang your best items at eye level or higher so that people can see even when your booth is crowded.
Initially, I used binder clips with key rings for hanging items on the wire unit. However, this method was time-consuming to assemble, heavier to transport, and sort of messy-looking. I could never get the artwork to stay straight using the binder clips. Not to mention – if not super-careful the clips made dents on the prints.
A better option if using binder clips with key rings is to produce laminated hole-punched prints that you re-use as your display samples at every event.
Since my print selection changed from show to show, I switched to using self-adhesive sticker hanging tabs on the back of the sample prints.
The tabs can be re-used without damaging items and this method looked significantly better.
I sold out of the most popular prints on the first day after switching from clips to invisible tabs.
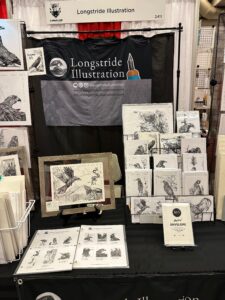


I have two tabletop wire baskets — one with 8.5×11” original drawings and one with 8×10” prints.
Originals are packaged with a beveled-cut picture mat with a rigid backing, into a transparent cello sleeve.
The second basket has rigid-mat dividers for ease of flipping through prints.
I keep five prints of each subject in the basket and restock them from the storage bins under my table as each sells.
At my first two events, I arranged folding cards and mini prints into several small baskets. But they were overshadowed by taller items and awkward to access.
I eventually invested in a tabletop literature wire rack to display those smaller format items.

As well, I added three foldable wire tabletop easels for displaying framed originals. The uptake in sales was immediate as a result of these minor investments in my display hardware.

An art vendor booth is lucky to be set against a wall or a curtained backdrop. This is typically reserved for the comic artist’s section of Artist Alley.
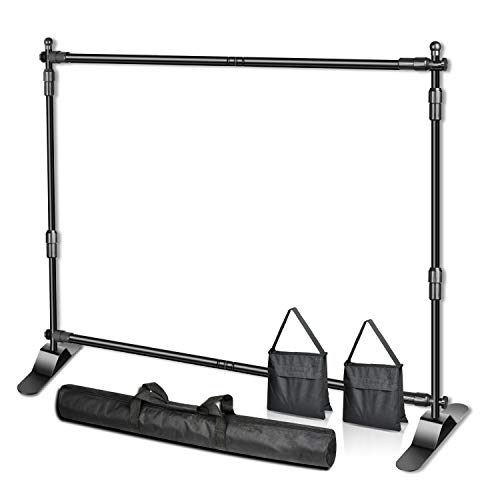
Therefore, I recommend investing in an 8×8’ adjustable photo stand backdrop. Be sure to order the flatfoot bottom over a tripod bottom.
The flatfoot legs are less of a trip hazard and not as prone to tip over. It’s easy to assemble with the telescopic tubing, it packs small, and being adjustable is quite versatile.
A bonus to having this hardware handy is that I became more motivated to exhibit at additional events, like at local art fairs.
I bought an inexpensive black cloth shower curtain at Walmart as the backdrop, hung it with shower rings, and secured it on each side with large binder clips.
I used double-sided Velcro tape to attach my branded banner over the shower curtain and a few small binder clips.
I used to hang sample prints off of the overhead banner but it lacked visual appeal and distracted from the impact of the banner.
Business cards and a visible QR code are at the front of the table. Some vendors display their business cards in attractive containers.

It’s sensible to cover your booth overnight. I used an opaque bed sheet secured with bulldog clamps from the dollar store. The cash and card reader I take with me, along with a list of items that need to be restocked if I’m running out.
How to Take Payments
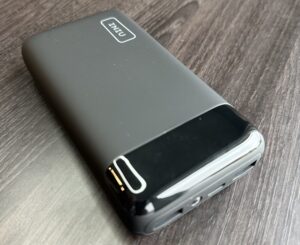
For my first event, I ordered the free mini-Square Reader. I soon discovered its limitations and unreliability. It accepts only a few types of payments and works inconsistently.
Thereafter, I upgraded to the ~$ 60 CAD (price subject to change) device which is a chip and PIN contactless card reader.
I highly recommend having a proper point of sales reader or you’ll miss out on sales.
It’s possible to find a used one or borrow one if you’re hesitating about the investment. You can pair your Square account with the App on your mobile device with any reader, granted that it’s one at a time.
I don’t normally purchase power or WIFI at events. I use my data though I’ve heard others turn their mobile device into a hotspot.
The hotspot option tends to drain batteries, so it’s advisable to bring a portable charger or a USB power bank.

For me, a charger for my devices was sufficient, and extra AA batteries for my decorative string lights.
For my Cash float, I brought $810 in cash, divided as such:
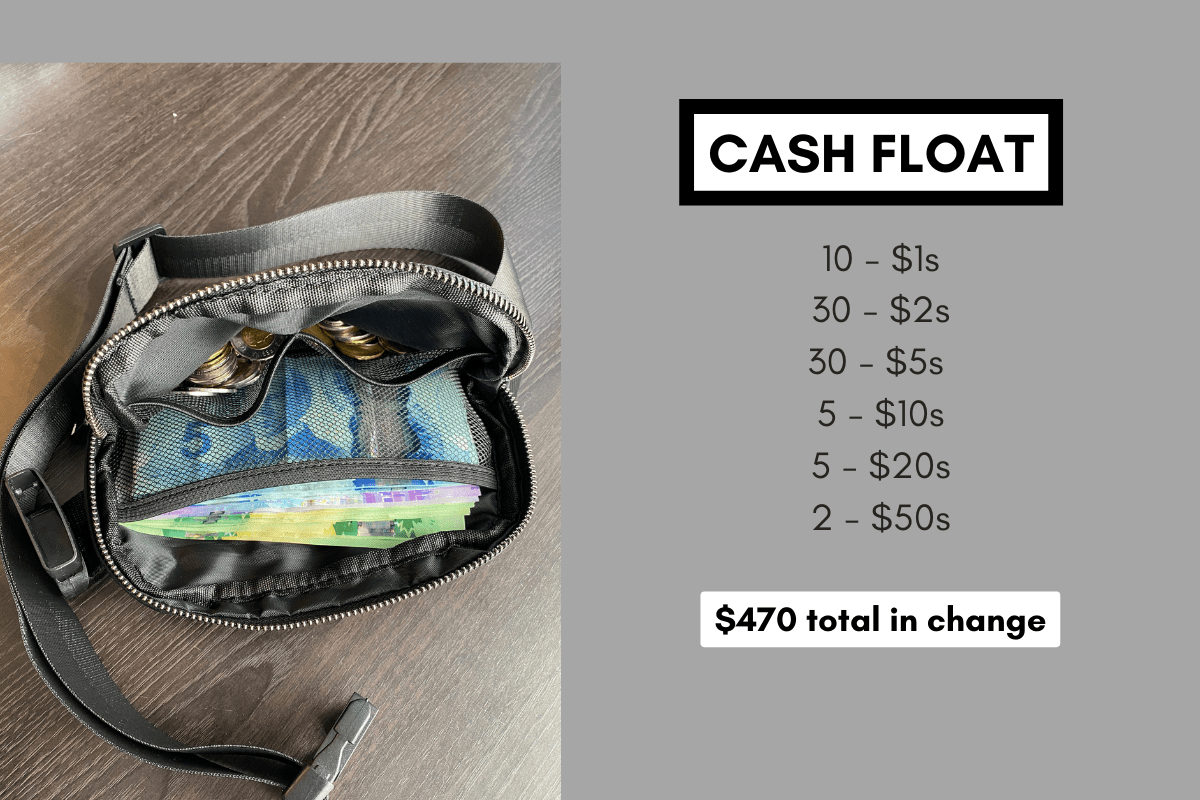
I wear a money belt. Some vendors use a lock box instead.
If you’re wondering about charging a sales tax or an additional % to cover your card reader processing fees, that’s up to you.
My preference is to charge customers the price as marked so there are no hidden fees or surprises. Most small vendors seem to do it that way as well.
Since I’m self-employed, I do my bookkeeping but my accountant handles everything that’s required at year-end for filing tax reports.
How long are the days?
It’s not unusual for Conventions to have 10-12 hour long days.
It goes without saying to pack water and healthy snacks. And to layer your clothing so that you can be comfortable as temperatures fluctuate throughout the event.
You’ll likely be standing most of the time, so I highly recommend wearing comfy shoes and bringing an anti-fatigue mat. The most popular and easy to transport are pieces of foam puzzle play mats.
Ways to transport your stuff
Test your table display beforehand.
If you’re still tweaking your setup, it’s best to practice at home and take photos as a reference guide to facilitate quick assembly at the venue.
I prefer to set up at the venue the night before when feasible.
Below is a list of the extra items to bring.

For transporting your gear to and from the venue, if you have large quantities or oversized items you can book access to the loading docks for setup and teardown. Ask about flatbed dollies to borrow.
For most small vendors, we can roll in the front door.
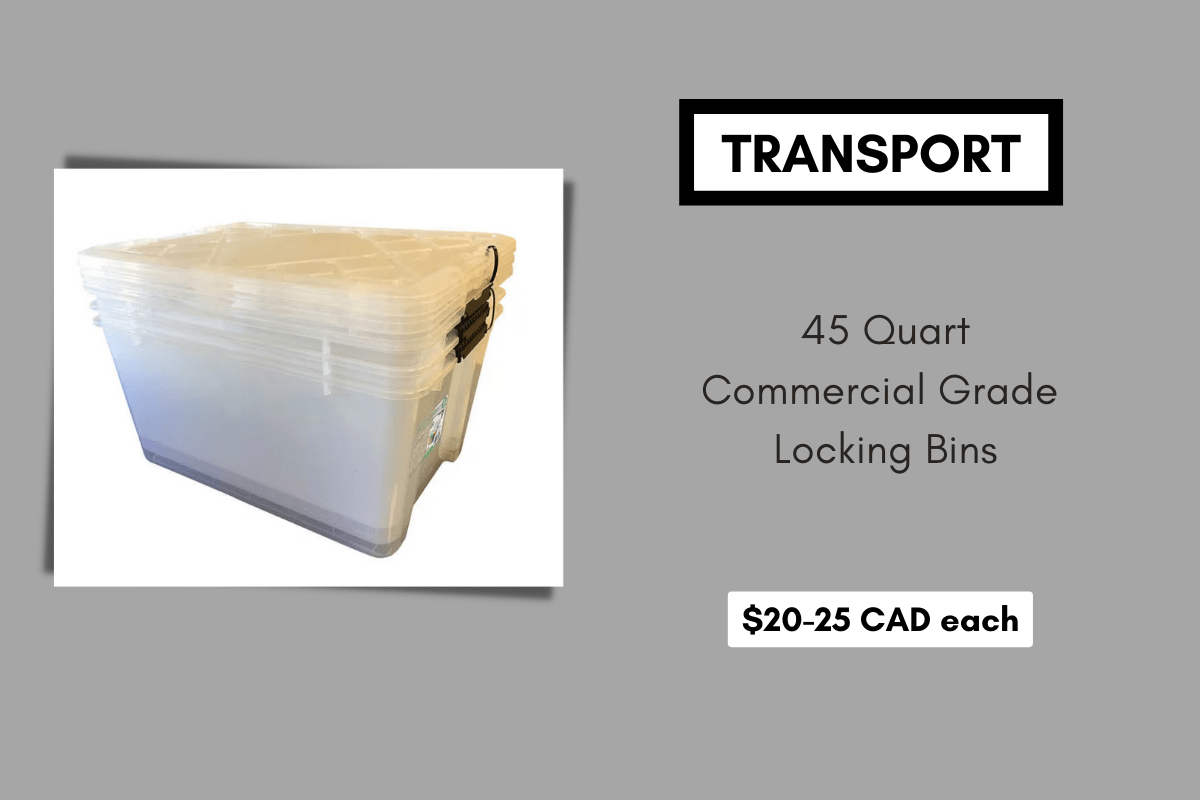
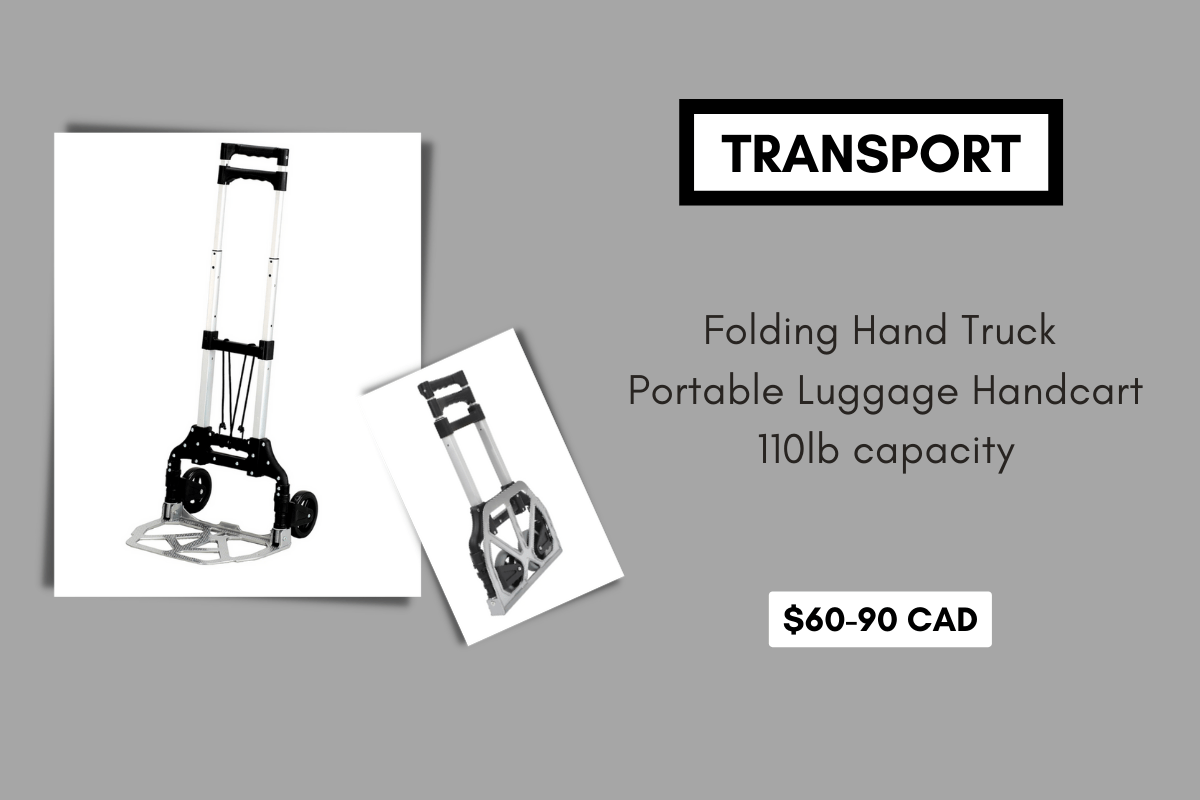
I managed to fit everything into a 45-quart locking bin and a large gym bag stacked on an adjustable luggage cart.
I have seen hard-case roller luggage as well as collapsible utility wagons for carting gear around.
The decision of what travel gear to choose will be influenced by how much stuff you have and your transportation mode to each venue, whether you plan to:
- fly
- drive
- public transit
- walk
Keep in mind that most conventions are in densely busy downtown areas which adds challenge to logistical maneuvering, therefore plan for extra time (and higher parking rates, if driving).
Know The Rules
The information shared in this guide pertains to major conventions in Canada.
If you’re looking to table in a country where you do not reside as a citizen or permanent resident, best to double-check regulations. Ask event organizers directly if you’re unsure.
Either way, read your event guide and double-check all policies, rules, and regulations.
Some restrictions vary by event or year to year.
Study the floor plan, familiarize yourself with load access, setup/teardown, and show hours.
Is Artist Alley Worthwhile?
At my first event, there was no profit because of the upfront investments: display hardware, card reader, branding collateral, packaging materials, product inventory, transport equipment, storage bins, etc.
As well, I made poor choices with my travel plans and paid higher fees as a result. I did somehow break even though.
In my second event, profit after expenses was in the $1,000 CAD range.
I implemented improvements from experience at each event, and consequently, there has been a rising graph of earnings to match my efforts.
As for measures of success, I gain rewards from:
- Experience in running my own art business
- Networking in the industry
- Sharing info with other fellow artists
- Exposure for my art
- Meeting fans in person
- All the fun!

Artist Alley Resources
The most up to date information is usually on the Convention’s website plus check their Facebook and/or Twitter for announcements and updates.
I joined the Canada Artist Alley Facebook Group for:
- finding buddies to share tables, travel & accommodations
- insider info about events
- lists of suppliers, vendors, and other Con events
- advice on basically everything!
If you’re going solo, look for helpers through these groups.
Once your on-site at the venue, the volunteer crew members are there to lend a hand if you need assistance or a brief stand-in at your booth.
For more ideas on table setups, a web search of “artist alley display” will bring up photos, blogs, and videos to inspire you.
In conclusion, Artist Alley is a great opportunity for amateur and semi-professional artists to showcase their work to fans.
By keeping in mind the tips I’ve shared, you can increase your chances of success in your application and make the most of the experience.
Be sure to set your notifications on for my YouTube channel updates.


Wow!! What awesome tips. I didn’t think of half of this stuff.
Thank you for unlocking that chest that was being gatekept.
Thanks for visiting my blog, I’m really happy to hear that this information is helpful. Wishing you success at your next event!
Pingback: Guidelines to legally sell fan art | Longstride Illustration