Do you like the engraving-style illustration?
In this article, I’ll walk you through what I learned from studying the works of master Walter Crane, and how you can apply his hatching style to your own pen and ink projects.
//DISCLOSURE: I earn a small commission when you use my affiliate links to make a purchase. Learn more about my affiliate partnerships on the Terms page.
How to Render Like Walter Crane in Pen and Ink
One of the best ways to learn how to hatch in that woodblock illustration style is to study the masters from that era.
I’ll demonstrate the master study process, looking at the works of Walter Crane (1845-1915).
Walter Crane was considered one of the most influential children’s book illustrators of his generation.
Master Crane was classically trained, with influences from the Pre-Raphaelite movement and Japanese woodblock prints.
How to ‘Master Study’ – First Steps
The first step of the ‘master study’ process is to decide on an approach.
You can study the artworks to meet your learning objectives or approach the process with an exploratory mindset.
For this Walter Crane study, I was interested in the woodblock style of hatching in pen and ink.
In particular, I focused on finding answers to the question “What techniques were used to build values?” Such as:
- Line quality effects
- Stroke direction (parallel or crossing)
- Textures and patterns (hatching types)
- The spacing in between the marks used to build values
- Edging (transitions or boundaries between elements or values – hard, soft, implied)
📖 For more ideas on how to do a master study, read this blog article here.
The second step is to research source materials. Gather images and spend an hour or more looking at the art.
I found tons of illustrations in the book titled The Art & Illustration of Walter Crane.
Review the art to find answers to your learning objectives. Also, make note of anything else that jumps out as interesting for further exploration.
Narrow down your selection to a handful of images. The next step is to copy the illustrations from your selection.

Bunched Hatch Technique
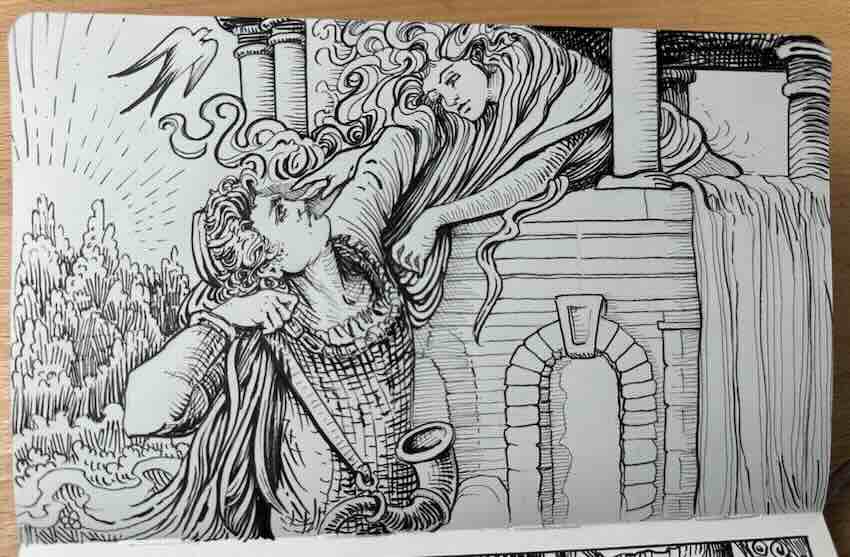
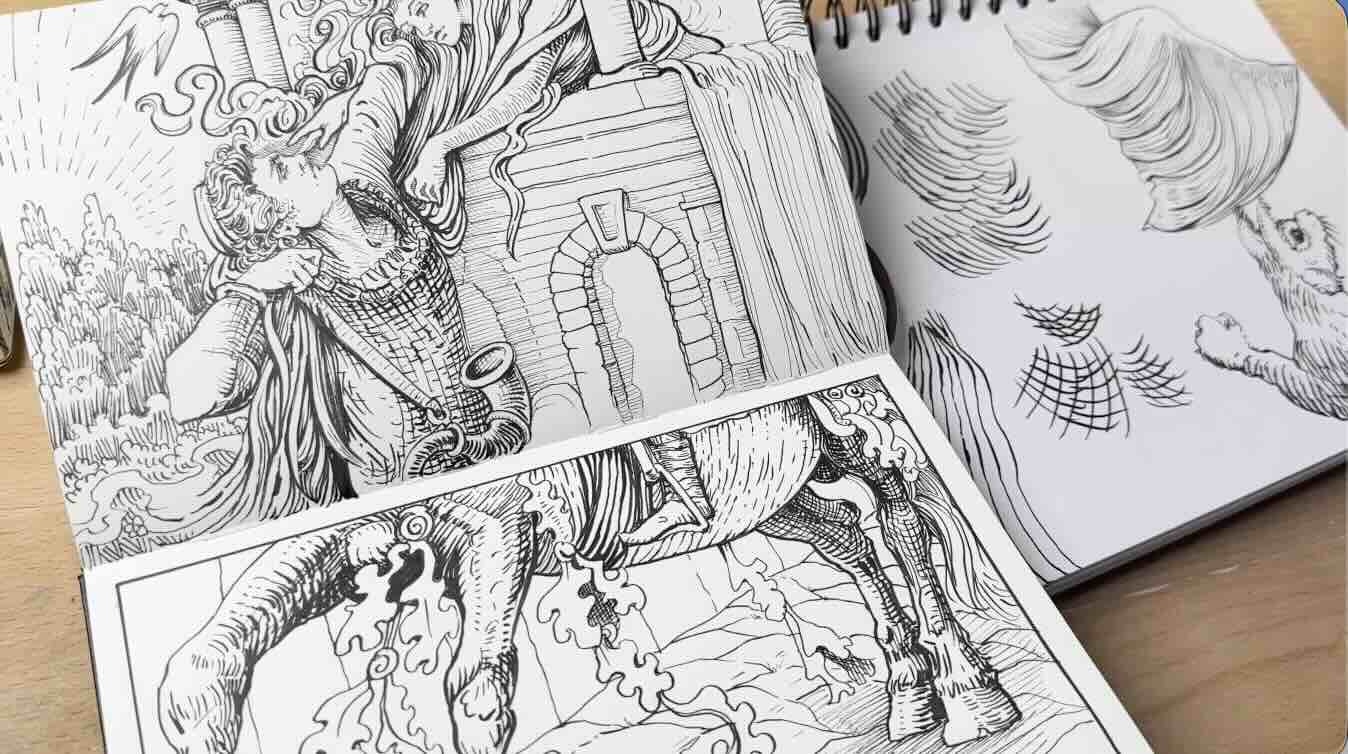
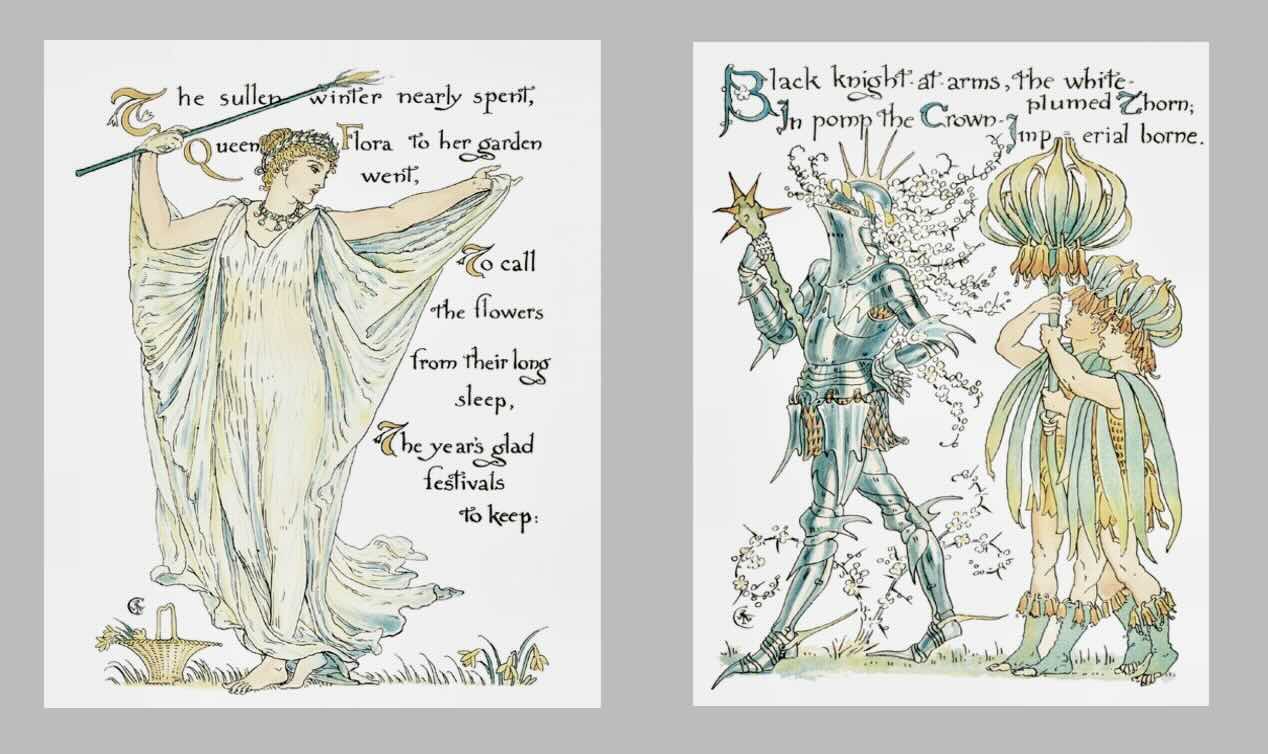
After narrowing images from master Crane’s collected works, I began my studies with a section from the Rapunzel piece (below). I chose to study this piece because the pose is so dynamic.
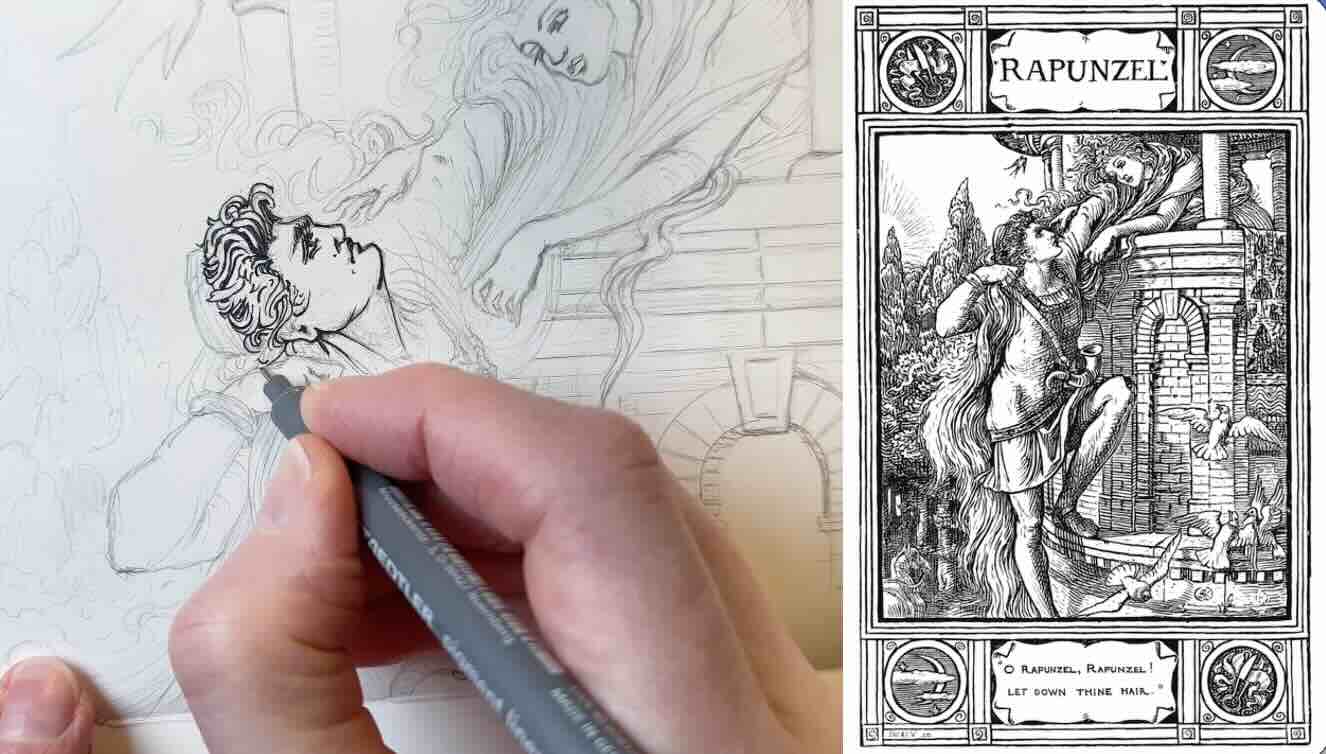
After the initial sketch in pencil, the challenge begins. It’s really at the inking stage that I started to notice what stands out about his hatching style.
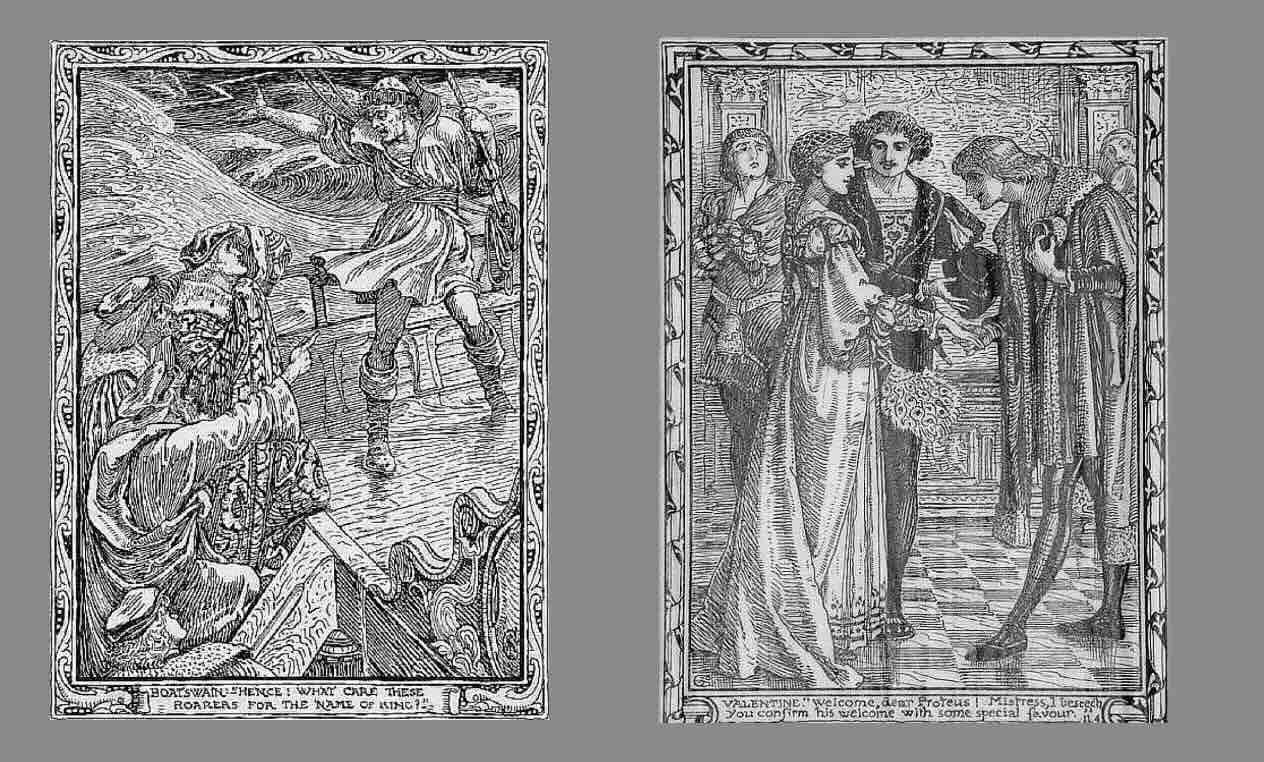
As mentioned, his earlier published works were created using woodblock printing.
That means the master inked his illustrations with dip pens and brushes, then skilled artisans would carve that image in reverse on wood. They’d then roll on a thick ink on the raised surface of the wood, which then got transferred onto paper for printing.
That’s why the illustrations are generally high in contrast.
You see very thick outlines, mixed with very thin lines, framed with either solid white or solid black.
There is a narrow range of mid-tones in between the solids for transition. Like with the fellow’s hair (above). That section is very black and white, not a lot of grey rendering.
If you’re going for a realistic style, as master Crane did, then high contrast has limitations.
Because of this, he relied on cross-hatching to build half-tones. Also, line quality, lines that fade from thick to thin (or thin to thick).

The thick-to-thin lines are a distinct characteristic of using a flexible, elastic inking tool, such as a brush and dip pen. Plus, factoring in the effects of the carving tools for the woodblock printing.
Therefore, for these sketches, I’m using a soft, sponge-tip calligraphy pen, Tombow’s Fudenosuke pen. It’s great for quick sketching and to mimic such strokes effortlessly.
The other trick he used to create the illusion of volume while restricted by a limited range of values is what I call ‘bunching’.
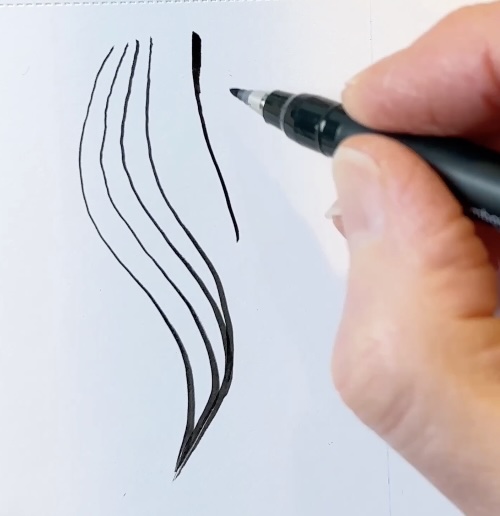
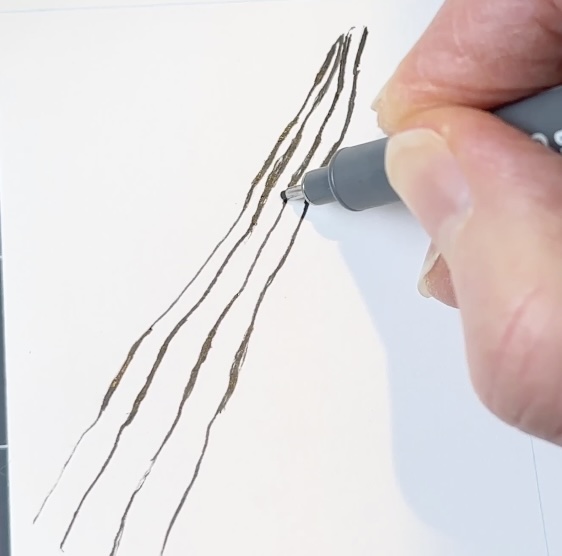
Bunching is when the lines have weight variety, thick or thin, plus they gather towards a single point. The strokes gradually bunch in a linear trajectory.
Like with Rapunzel’s hair and her tunic. Crane does this bunching trick a lot for hair and fabric textures.
✍🏻 Not sure about your learning goals or who else to study? Check out my Master Study Guide.
Let’s look at more of the master’s hatching textures.

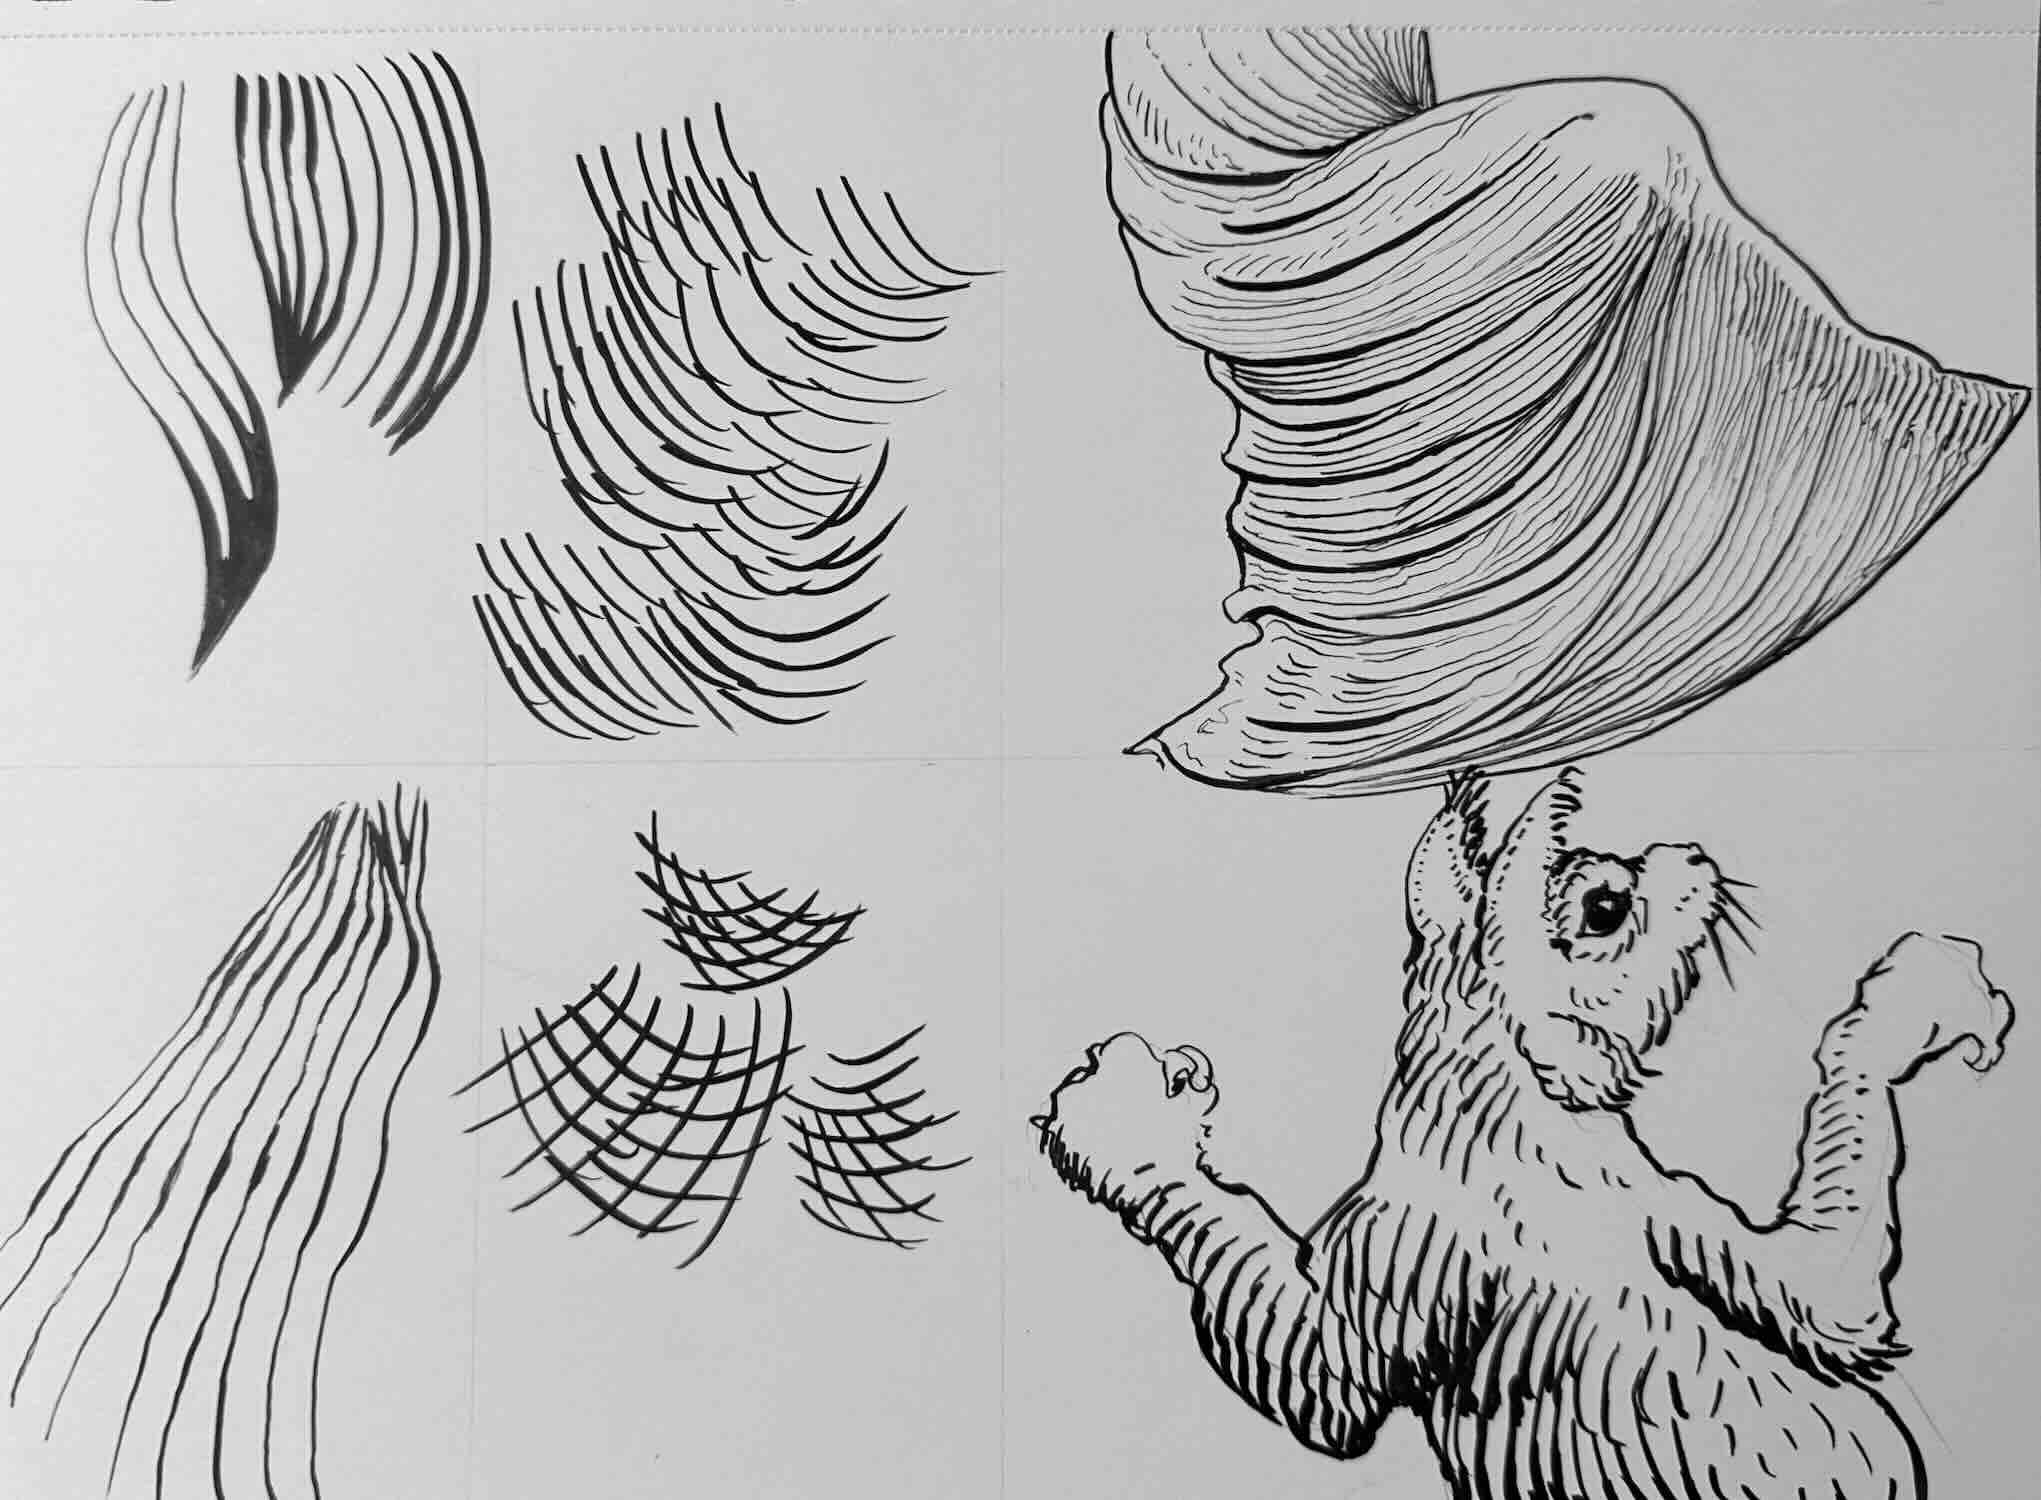
Curved Cross-Hatch
For the second mini study, I chose a section of this piece with horse legs (below) because of the beautiful curved hatch marks.
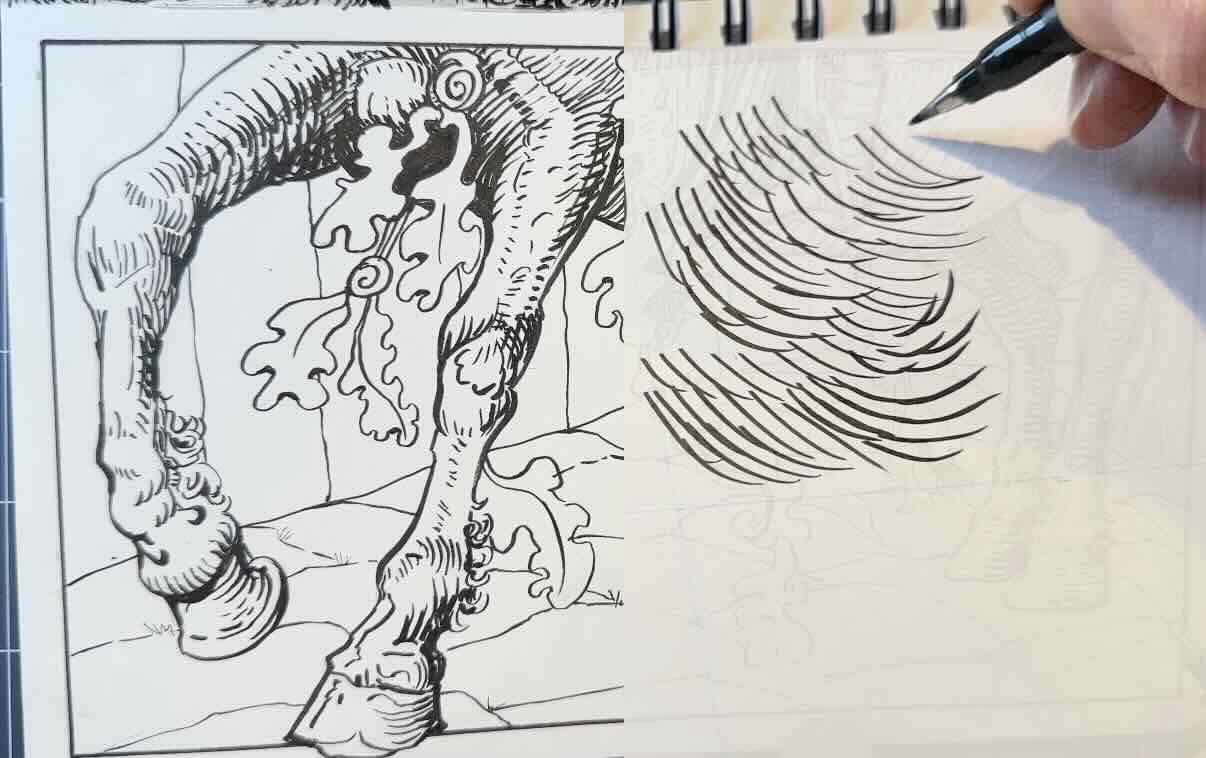
Master Crane used curved hatches combined with line quality to build tone. The hatches go thick to thin, but instead of long strokes that travel towards a single point, they’re shorter and layered in a staggered fashion.
To deepen the density of the tone, he brings the curved hatches closer together and crosses the marks.
The curvy cross-hatch pattern results in an effective gradation.
Line Quality Combo
Let’s have another look at the bunched hatch technique. This time, instead of a flexible tip pen, using a fine liner pen to see how much influence the tool has over the effect.
The benefit of using fine liner pens is that they ensure consistent, uniform marks. But when aiming for line quality, using technical pens means you need to either go over the lines to thicken them or switch to the tip size of the appropriate weight.
The stroke transition from thin to thick is not as smooth when using fine liners. It requires more skill. For this woodblock style, using fine liners takes more effort, and the edges come out rough.
But you can combine tools depending on the desired effect.
Like for this lady’s robe (below).
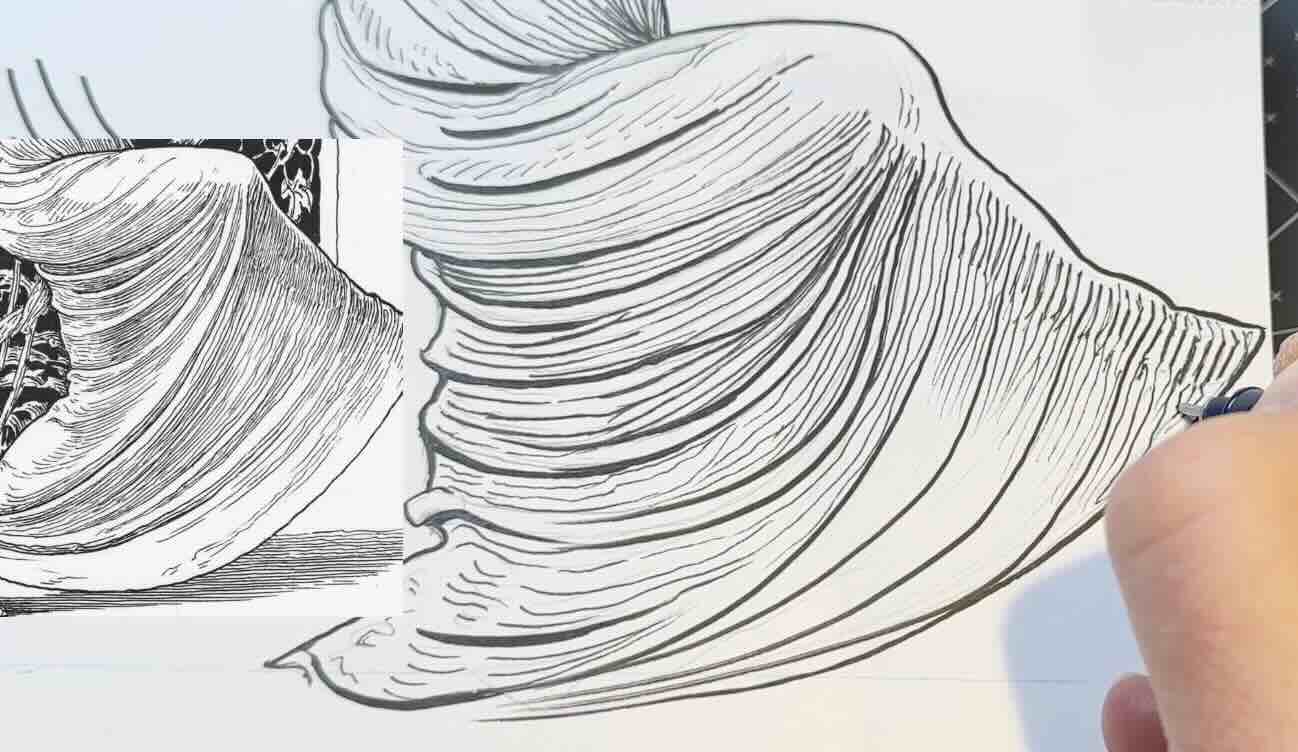
Observe how master Crane used line quality for the main contour lines of the drapery, ideal for a flexible tip tool. Then the hatches in between have a more uniform weight, ideal for a technical pen.
He built the tone by doubling the lines, roughly going over the strokes. Resulting in little gaps in the overlaps, creating edges that give the illusion of a texture.
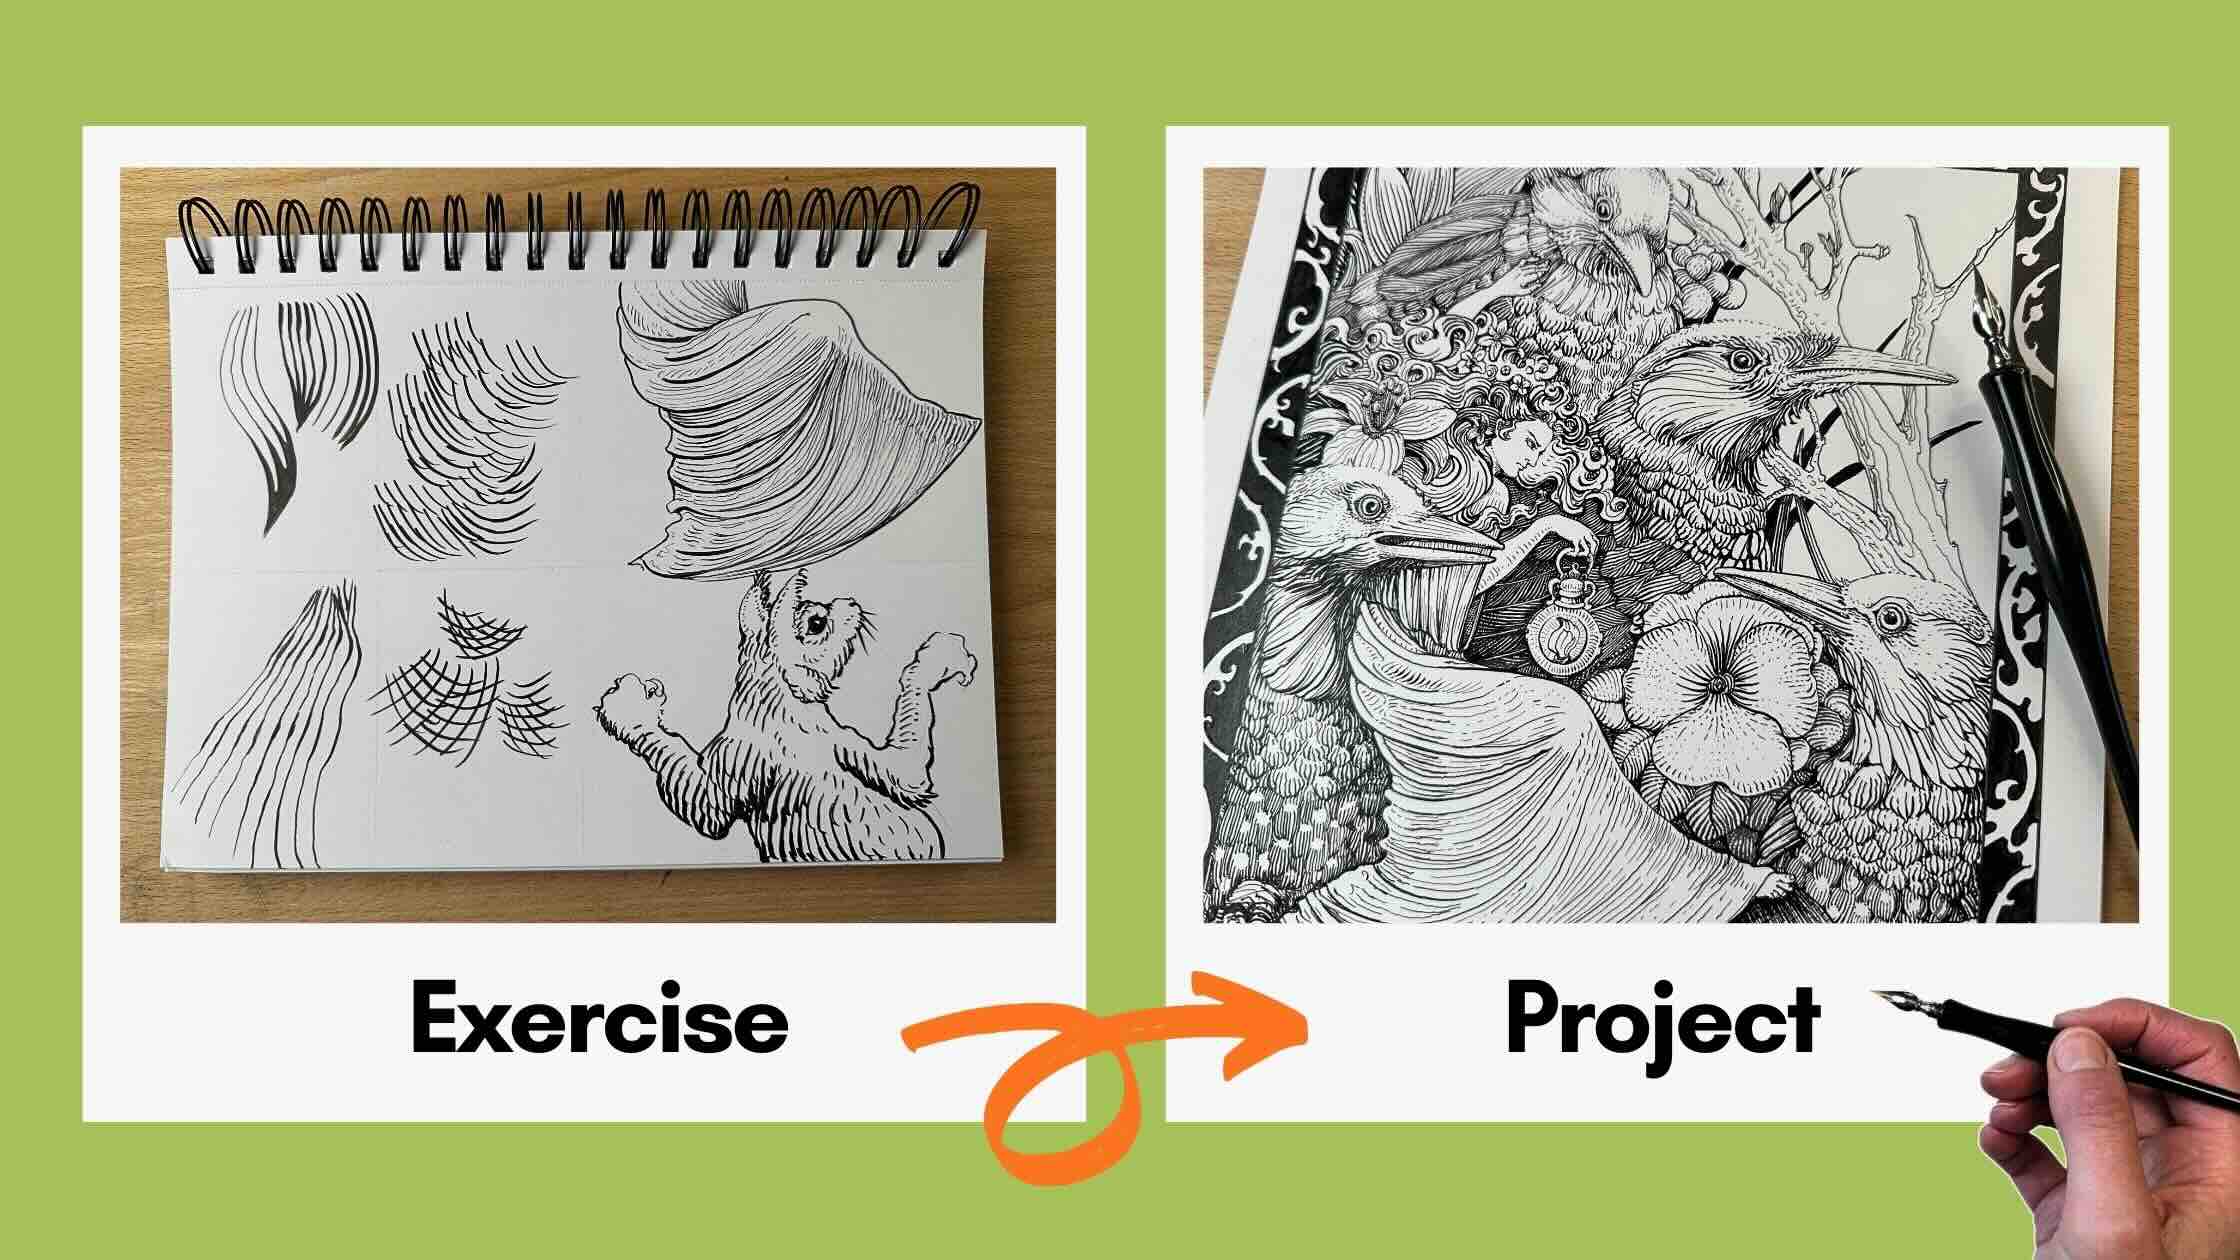
Let’s revisit this curved cross-hatch technique with this squirrel study.
Stroke Variety
In the squirrel study, I noticed that master Crane managed to create a few more value levels.
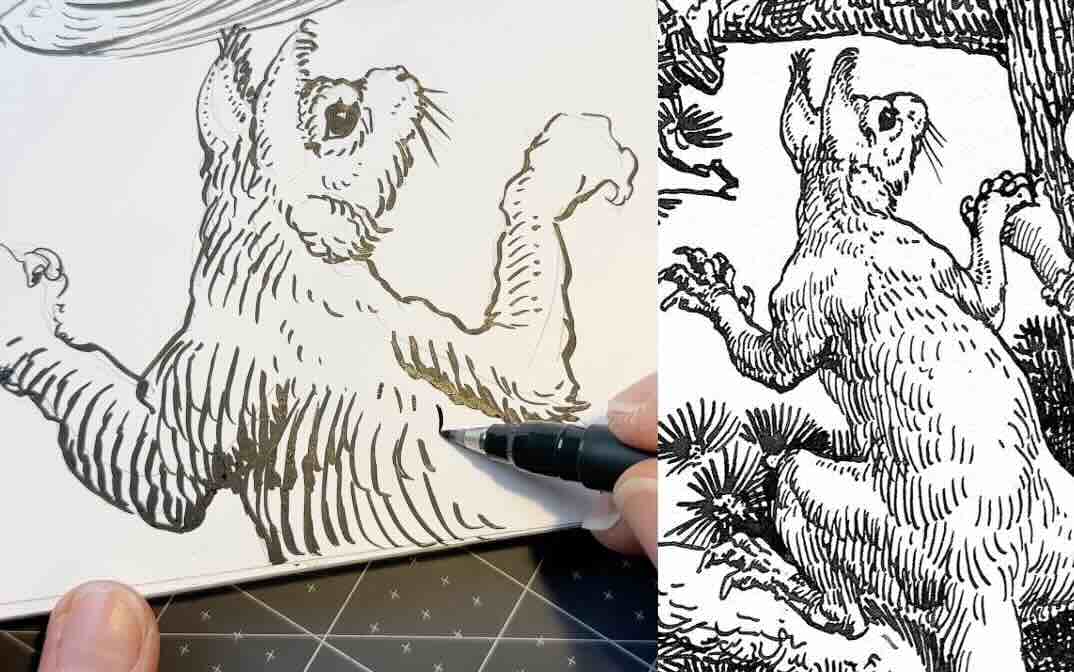
He achieved this by varying the length of the marks. Some short, some long. Some overlap, and some spread further apart.
After copying the masterworks with these mini-studies, the next step is to take note of what you’ve learned.
Apply Your Learnings to a Project
In the research phase, looking over Crane’s collection of woodblock prints, I observed the high contrast outcomes.
By copying a selection of his works, I learned that he developed mark-making techniques that would produce a wider range of grey values to push the medium to greater results.
From doing these four sketches, I picked up two hatching styles:
- the bunched directional strokes and
- the curved hatches
Both rendering methods were used to create a range of values. Using:
- Line quality (weight variety, thick and thin)
- Spacing of the strokes: close, far, short, long
It’s recorded in history that most of the legendary masters of all time studied the artists before them.
This is why I highly value studying a variety of masters with an open mind. Looking at a broad range of styles from different eras to see what resonates with your own natural style for further exploration.
🎓 For a step-by-step process to learn techniques from the great inkers, check out my master study course below.
At the end, you’ll have created a custom study blueprint. You’ll know exactly what technique to work on so you can confidently progress to more advanced projects.
Featured masters include: Bernie Wrightson, Franklin Booth, James Montgomery Flagg, Kentaro Miura, Moebius, and Takehiko Inoue.

Walter Crane Inspired Illustration
I created my own illustration to incorporate the elements I had already practiced in the studies.
For line quality, the drapery of the robe became the main point of interest of the composition.
For the curved cross-hatching pattern, I traded squirrels for birds.
I also kept Rapunzel’s awesome hairstyle as part of my design.
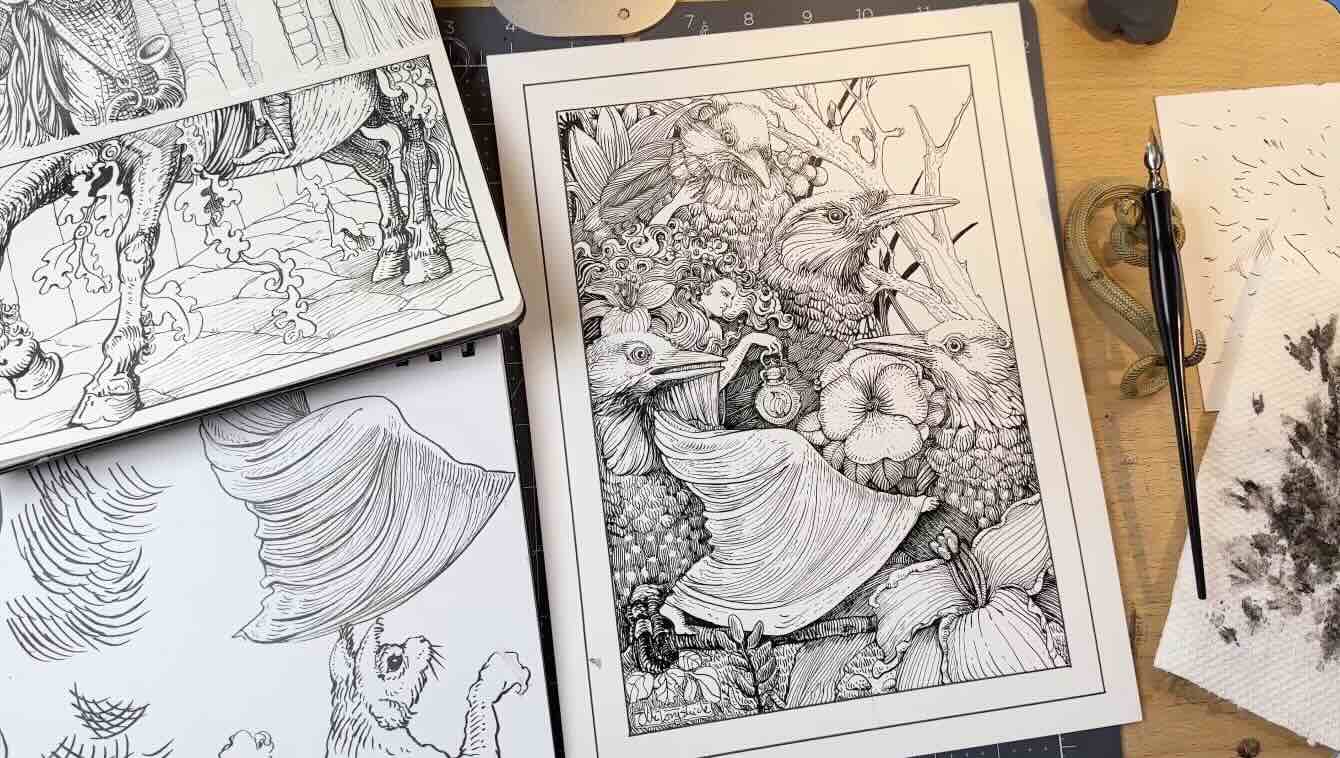
Otherwise, my composition hints at some of Walter Crane’s later works when woodblock printing was replaced with chromolithography.
His litho-printed ink and watercolour illustrations feel more whimsical and a little less formal than his woodblock prints.
The Supplies I Used for My Project
With my project, for the ink application, I definitely went with dip pens and brushes.
As mentioned, a flexible tool allows for line weight variety, thin to thick, in a single stroke.
I used a set of small and large illustration nibs from Speedball:
- Hunt 102 Crowquill
- Hunt 512 Bowl Nib
- Hunt 513EF Spoon Nib
- no.2 watercolour brush
- Speedball Super Black India Ink
- Strathmore Bristol Smooth Paper
Overall, I aimed to use the hatching techniques I picked up from the studies, as well as adhere to the high contrast look of the woodblock printing style.

I kept referring to master Crane’s illustrations for guidance, and that’s when I realized something important was missing:
A vignette!
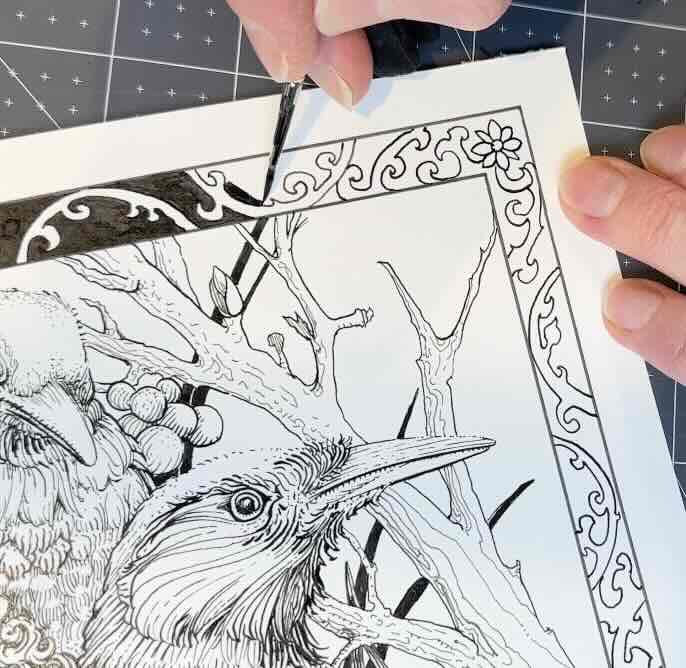
Vignettes are those ornate decorative borders. His vignettes were such a delight and not to be overlooked.
Final Tips
So, if you like the woodblock/engraving-style illustration, this is how you can study the works of masters to incorporate similar techniques in your own projects.
The key to success with these types of studies is to keep your samples small and techniques few.
Rather than copy a piece in its entirety, crop a section or several sections as samples.
The variety of mark-making techniques used in a single piece can be overwhelming. Pick one or two hatching strokes that stand out to you and practice only those per study session.
This method keeps your studies manageable and ensures you can transfer the learning comfortably to your illustration projects.